| View previous topic :: View next topic |
| Author |
Message |
groundhog
Member

Joined: Oct 01, 2009
Posts: 23
Location: Michigan
|
 Posted: Thu Apr 02, 2015 5:14 pm Post subject: M38 tub installation steps Posted: Thu Apr 02, 2015 5:14 pm Post subject: M38 tub installation steps |
 |
|
I have been looking on-line for any good instructions on the best way to install a new repli-tub onto an M38. Another words, does the tub need to be level with the floor or with the frame, and does that tell me what size rubber mounts to put in, etc. I was surprised that I was not able to find very much. Even pics would be helpful. Thanks again, in advance.
Lakeview, Michigan
_________________
Ron K
M38/CJ2A |
|
| Back to top |
|
 |
4x4M38
Member
Joined: May 30, 2014
Posts: 3447
Location: Texas Hill Country
|
|
| Back to top |
|
|
4x4M38
Member
Joined: May 30, 2014
Posts: 3447
Location: Texas Hill Country
|
|
| Back to top |
|
|
wesk
Site Administrator


Joined: Apr 04, 2005
Posts: 16265
Location: Wisconsin
|
| Posted: Thu Apr 02, 2015 10:16 pm Post subject: |
|
|
You should not mount the new tub until you have the drivetrain installed along with the pedal stubs and steering shaft. Leave the tranny area covers and pedal/steering covers off until you are ready to make final tub adjustments.
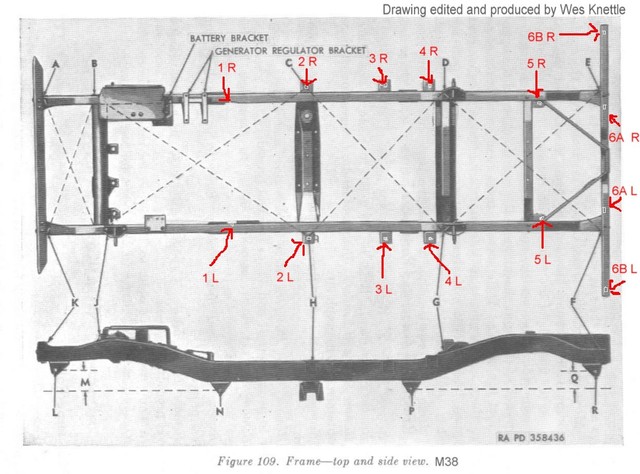
The parts manual tells you the thickness of each rubber pad. ORD 9 SNL G-740
As mentioned above the TM 9-1804B tells you how to install it.
As a rule of thumb you start by aligning the rear edge of the tub with with the rear cross member. Then after inserting all the listed pads in the parts manual install the 4 rear bolts finger tight. You can start shimming as needed to center the pedals, steering and shift levers as close as possible.
Once you are satisfied with the tub position and before you do any final drilling and bolting be sure to assembled the fenders and grill and make sure their degree of adjustment capability will get them where they need to be. If they can't then you may need to give up on some tub adjustment accuracy to make sure the front sheet metal will fit nicely.
Now before you call it quits trial fit the hood.
_________________
Wes K
45 MB, 51 M38, 54 M37, 66 M101A1, 60 CJ5, 76 DJ5D, 47Bantam T3-C & 5? M100
Mjeeps photo album: http://www.willysmjeeps.com/v2/modules.php?set_albumName=Wes-Knettle&op=modload&name=gallery&file=index&include=view_album.php |
|
| Back to top |
|
|
groundhog
Member
Joined: Oct 01, 2009
Posts: 23
Location: Michigan
|
| Posted: Fri Apr 03, 2015 5:10 am Post subject: M38 tub installation steps |
|
|
Thanks so much for all of the help. I figured that this was one item that I needed to take my time on, and get it right. I will check these items out.
Lakeview, Michigan
_________________
Ron K
M38/CJ2A |
|
| Back to top |
|
|
oilleaker1
Member
Joined: May 14, 2009
Posts: 972
Location: South Dakota
|
| Posted: Fri Apr 03, 2015 5:55 am Post subject: |
|
|
| As others have mentioned, don't drill until you fit all the components. The height of the tub changes how the gaps look between the hood and fender tops. The grill on a M38 is a bit adjustable on the hinges. Then your pedals and steering column need to be checked for centering. I make my own rubber pads out of belting or truck mud flaps. They are usually 1/4 inch thick. You can add or subtract rubber to level and fit things on the mount locations. Take your time. Stand behind the Jeep and sight over the tailgate to the cowl and see if it has a twist, look at the gaps on the fenders and hood. The biggie is the fact that the fenders have two bolts through the center brace into the frame. Those don't move much. So, start there and work out. Some of the new bodies do not fit worth a darn and require modification to get them to fit. I have personally seen horror with MD Juan CJ2A bodies. The older production was just terrible. Folks like Midwest military make top notch repair floors and hat channels. I now avoid new bodies. John |
|
| Back to top |
|
|
wesk
Site Administrator
Joined: Apr 04, 2005
Posts: 16265
Location: Wisconsin
|
| Posted: Fri Apr 03, 2015 8:21 am Post subject: |
|
|
I prefer metal shim stock for increasing the height of the tub at the mounting points. Keeping the original thickness rubber pads in their is better then increasing the thickness of the rubber at those point. The thicker rubber will age in a few years and as it ages it shrinks and that mounting point will become loose. The thicker the pile of rubber the greater the amount of shrinkage. The original rubber thickness was deemed adequate for it's designed purpose, to insulate the tub from the harmonics/vibration transmitted to it from the frame. If you use a machine shop to make the shims from 1/8" steel plate and have a dozen or so made in a small size that will mate with all the rubbers and predrill the bolt holes you will come away with enough shims at a fair price.
I have several illustrations on tub mounting in my photo album:
http://www.willysmjeeps.com/v2/modules.php?set_albumName=album97&op=modload&name=gallery&file=index&include=view_album.php

_________________
Wes K
45 MB, 51 M38, 54 M37, 66 M101A1, 60 CJ5, 76 DJ5D, 47Bantam T3-C & 5? M100
Mjeeps photo album: http://www.willysmjeeps.com/v2/modules.php?set_albumName=Wes-Knettle&op=modload&name=gallery&file=index&include=view_album.php |
|
| Back to top |
|
|
oilleaker1
Member
Joined: May 14, 2009
Posts: 972
Location: South Dakota
|
| Posted: Fri Apr 03, 2015 11:59 am Post subject: |
|
|
But Wes!---------------my teeth don't rattle as much!  Your idea sounds pretty good. John Your idea sounds pretty good. John |
|
| Back to top |
|
|
Boze
Member
Joined: Aug 13, 2008
Posts: 93
Location: Bloomfield Twp., Michigan
|
| Posted: Fri Apr 03, 2015 12:53 pm Post subject: |
|
|
| I installed an MD Juan tub on my '50 in 2004 and the fit for the starter pedal is off in two directions. This has caused me problems along with the lousy floor pan bolts, missing holes, lousy factory paint and no reinforcement on the rear corners. I should have patched my original tub. I know better now. |
|
| Back to top |
|
|
RickC
Member
Joined: Apr 11, 2005
Posts: 174
Location: Coventry, RI
|
| Posted: Fri Apr 03, 2015 2:33 pm Post subject: |
|
|
I did the MD Juan tub. It takes a LOT of juggling shims and adjusting holes. I ended up using an original panel where the starter pedal mounts because
it was so far off. Unless the tubs have improved you'll need to trade off some stuff to get everything to eventually line up. I recall the hat channels weren't even close and the dashboard must have been made by someone that hadn't seen an M38. The gauge panel is bolted in place, no provision for the twist screws. Have pics in my album |
|
| Back to top |
|
|
WillysMotors
Contributor

Joined: Jan 19, 2006
Posts: 111
|
| Posted: Fri Apr 03, 2015 4:16 pm Post subject: |
|
|
I'll be honest Ron, I wouldn't do this without having the old tub and the new one side by side to transfer holes, and if necessary, transfer 'patch' panels.
Trying to weld in a starter hole patch with the tub installed is not practical... |
|
| Back to top |
|
|
groundhog
Member
Joined: Oct 01, 2009
Posts: 23
Location: Michigan
|
| Posted: Sun Apr 05, 2015 7:40 am Post subject: |
|
|
Unfortunately I don't have the original tub, and it was a pieced tub, one half being an M38 and one half being a CJ2-A. It was so far gone, and I decided that it wasn't practical to continue with a pieced tub mostly. I have temporarily installed the front fenders, grill and hood. The channels in the fenders that mount to the frame aren't lining up. It looks like my pto shifter opening is holding me up. Maybe enlarge front of hole. The grill may come into place with the fenders if I can get the tub moved right. I really appreciate all of the experienced tips and hints. It has been very helpful. And like you all have said, I am taking my time. Thanks
_________________
Ron K
M38/CJ2A |
|
| Back to top |
|
|
oilleaker1
Member
Joined: May 14, 2009
Posts: 972
Location: South Dakota
|
| Posted: Sun Apr 05, 2015 7:59 am Post subject: |
|
|
| I've read quite a few posts that bad mouth the passenger side front fender. They say the brace is spot welded 1.5 inches off, or the length of the tubs right side panel is off. Some have to move the brace from it's current position in order to get things to work. This means drilling out MD Juans spotwelds. All this on a brand new improved body? Keep your chin up. John |
|
| Back to top |
|
|
groundhog
Member
Joined: Oct 01, 2009
Posts: 23
Location: Michigan
|
| Posted: Mon Apr 06, 2015 6:06 am Post subject: |
|
|
Thats about the size of it. Another words, keep smiling. 
_________________
Ron K
M38/CJ2A |
|
| Back to top |
|
|
RickC
Member
Joined: Apr 11, 2005
Posts: 174
Location: Coventry, RI
|
| Posted: Mon Apr 06, 2015 6:15 am Post subject: |
|
|
| I used my original fenders. They actually fit pretty well..... |
|
| Back to top |
|
|
|

