Joined: Mar 13, 2006 Posts: 1079 Location: Richburg, SC
Posted: Sat Mar 18, 2017 9:49 am Post subject:
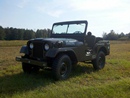
I have made a little progress since the last update, but don't know if it will be fast enough to finish before the rally in a few weeks.
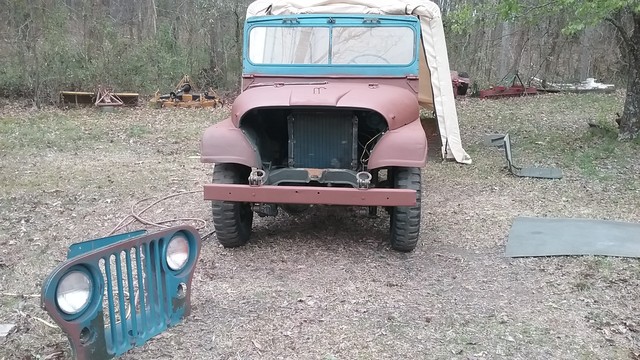
I finished stripping and priming the body and I pulled the grill off and disassembled it the last time I was off.
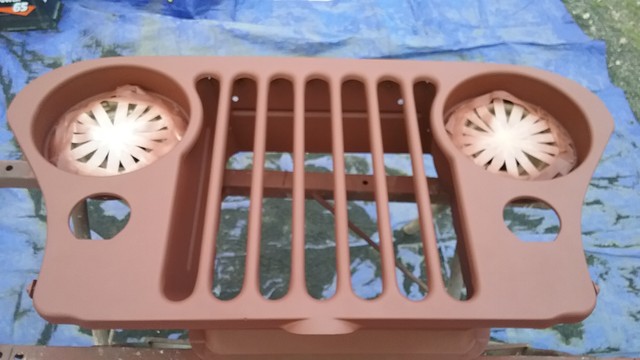
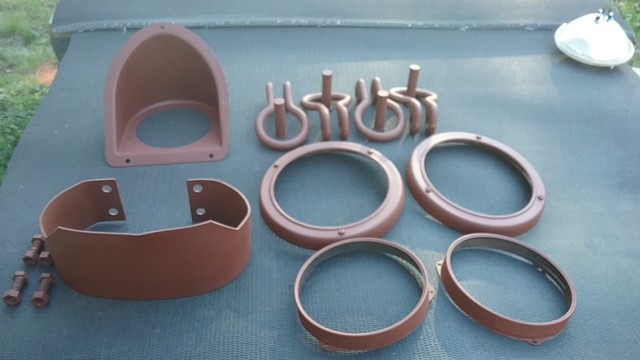
Yesterday I blasted and primed the grill outside and a bunch of small parts in the blasting cabinet.
I think it is supposed to rain off and on today, so I'm going to switch gears and work in the tent today - on the engine/radiator/shroud/fan. I also bought new top leafs to replace my broken front ones, so I need to replace them.[/img] _________________ Matt
1953 M38a1
1964 USMC M38a1
'51 USMC M100 trailer, '54 M100 trailer, '90 M101a1 trailer
Http://wilfreeman.wordpress.com (M38a1 build blog)
http://m38a1usmc.wordpress.com (USMC M38a1 rebuild blog)
Joined: Mar 13, 2006 Posts: 1079 Location: Richburg, SC
Posted: Sun Mar 19, 2017 7:07 pm Post subject:
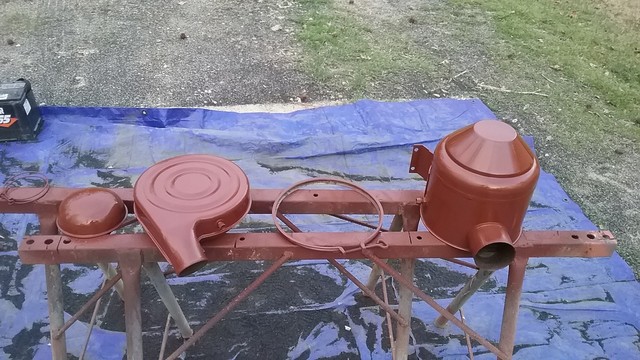
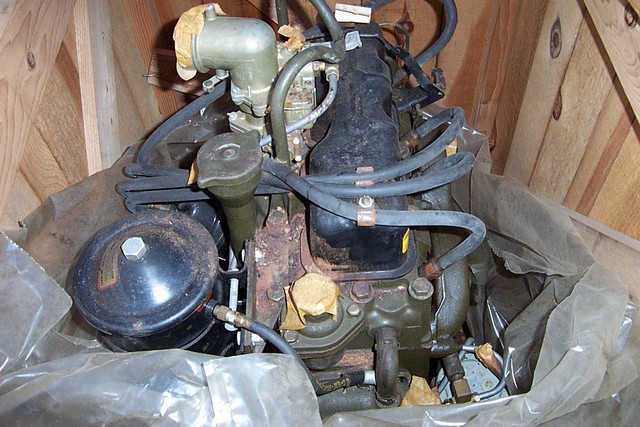
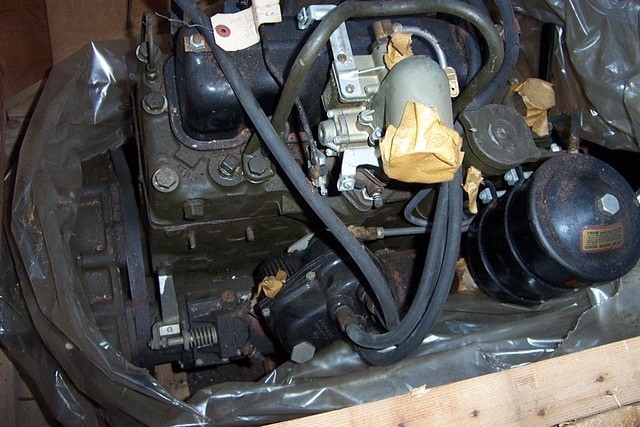
Question that has been covered before: What colors for the valve cover, air cleaner, fan and radiator shroud? EVERYTHING under the hood was painted green including the accessory data plates. I am almost ready to paint these parts and I want it as close to original as possible. I hand painted the block and head green and sprayed the radiator black today. I also read on another post that the horn was painted green?
Hoping to get the passenger and rear seats and w/s frame blasted and primed tomorrow along with either replacing the front fuel line or getting back to stripping the rest of the interior.
I ordered the seat cushions on Friday - will be here this week. I am ordering paint, hoses, fan belts and a water pump tomorrow. So hopefully the next time I'm off I can get all of this primed stuff painted and put back together! _________________ Matt
1953 M38a1
1964 USMC M38a1
'51 USMC M100 trailer, '54 M100 trailer, '90 M101a1 trailer
Http://wilfreeman.wordpress.com (M38a1 build blog)
http://m38a1usmc.wordpress.com (USMC M38a1 rebuild blog)
valve- black
air clean- black, but side cap is green
radiator shroud - unknown, no paperwork, i did green
As a side note i have the same mc as you and whole air cleaner was painted green as well.
Joined: Mar 13, 2006 Posts: 1079 Location: Richburg, SC
Posted: Mon Mar 20, 2017 5:40 am Post subject:
When I was blasting, the valve cover was black first coat, covered in green. All I saw was green on the air cleaner. The shroud only had green over primer. I like the look of my other (Army) Jeep with the black valve cover and black air cleaner, but I'll prob paint the air cleaner green. What about the fan - black? Mine was rust colored, so I have nothing to go on with it other than the Army version was black. _________________ Matt
1953 M38a1
1964 USMC M38a1
'51 USMC M100 trailer, '54 M100 trailer, '90 M101a1 trailer
Http://wilfreeman.wordpress.com (M38a1 build blog)
http://m38a1usmc.wordpress.com (USMC M38a1 rebuild blog)
Joined: Mar 13, 2006 Posts: 1079 Location: Richburg, SC
Posted: Mon Mar 20, 2017 1:27 pm Post subject:
Got it - I like the black valve cover and oil filter housing. I think I'll do the air filter housing and radiator shroud in green. Already painted the valve cover today - getting ready to paint the oil filter housing top now.
Joined: Mar 13, 2006 Posts: 1079 Location: Richburg, SC
Posted: Fri Mar 31, 2017 6:45 am Post subject:
No photos to post this time - no time to download from the phone and upload here. I looked back to see the last thing I posted. Even though I didn't think so, I guess I HAVE made some progress in the past 10 days!
I ordered and received (from QTM parts) my radiator hoses, bypass hose, water pump, belts, flex brake lines and paint (gallon and 2 spray cans). I blasted/primed and painted the passenger and rear seat frames, grill, windshield frame, air cleaner and a bunch of small parts. I also painted the block, valve cover, radiator, shroud and fan. I put the cleaned gas tank back in and cleaned the front fuel line and hooked the fuel system back up. I put my spare carb on after I bead blasted and clear coated/painted the base of it. I fired it up and found no exhaust manifold gaskets/ leaks and 2 stripped out studs that I didn't have time to fix.
So I went ahead and changed the brake flex hoses, reinstalled the radiator, grill and fenders. I also received my seat cushions from WeeBee Webbing and took my windshield frame to the glass place to get the glass installed with the new rubber. Then I had to call it a week - have to go back to work tonight.
I thought I would have time to get it ready for the Denton rally, but with the exhaust problems, I just simply ran out of time! Sooo - my 3 days off next week will be used to get my other Jeep ready for the rally. I need to adjust the intake valves and finish up my fuel pump install. I also have to get the trailer ready and work on the rear brakes on the truck - in addition to cutting grass and weedeating (3 acres).
I hope to get back on it soon after the rally and get the interior stripped/primed and painted and get it back on the road. Then I can get to work on the body. _________________ Matt
1953 M38a1
1964 USMC M38a1
'51 USMC M100 trailer, '54 M100 trailer, '90 M101a1 trailer
Http://wilfreeman.wordpress.com (M38a1 build blog)
http://m38a1usmc.wordpress.com (USMC M38a1 rebuild blog)
Joined: Mar 13, 2006 Posts: 1079 Location: Richburg, SC
Posted: Fri Apr 07, 2017 12:40 pm Post subject:
Yep, I switched back to Gillespie enamel. Although the latex sprayed well and dried enough to handle fairly quickly, it still isn't dry enough to sand. I don't know exactly what I had expected as far as sanding was concerned, or maybe I didn't think they far ahead. Anyhow, other than being able to get the paint the day I needed it and a SMALL savings, I would say that it is not worth using. I am thinking about blasting my inner fender wells and repainting with the Gillespie since it is not an exact match and they have brush marks on them. The frame can wait. _________________ Matt
1953 M38a1
1964 USMC M38a1
'51 USMC M100 trailer, '54 M100 trailer, '90 M101a1 trailer
Http://wilfreeman.wordpress.com (M38a1 build blog)
http://m38a1usmc.wordpress.com (USMC M38a1 rebuild blog)
Joined: May 30, 2014 Posts: 3447 Location: Texas Hill Country
Posted: Tue Apr 18, 2017 9:54 am Post subject:
I painted an 1/8" scale wood railroad car with some satin exterior latex I bought at a big box store few years ago. It was a big brand, not the cheapie.
Joined: Mar 13, 2006 Posts: 1079 Location: Richburg, SC
Posted: Mon Jul 31, 2017 2:11 pm Post subject:
Been awhile since I worked on the a1. I didn't make my deadline for the April rally, so the Jeep took the back burner to life while the wife and daughter were out of school for the summer. I have been collecting some parts that I need in the meantime. I stopped by QTM Parts on the way to Nashville earlier this month and picked up a new driver seat back and some small parts. I cut the old metal off the seat and welded the new one back on - then painted it. Cost me $43 to keep the original seat in service!
Today I had the afternoon to myself and decided to tackle replacing the three stripped exhaust manifold studs. Once I started removing the nuts I discovered something major - the rearmost stud was not there! I was hoping that it had been replaced with a bolt and it fell out. Once I got the manifold off, my day went to $&% in a handbasket! It was broken off flush with the block!
I changed gears and went ahead and removed the other four studs using the double nut method to give me a little boost in spirit before tackling the rear stud. I quickly found out that it is too close in there to drill a straight hole for an easy out and that a crooked hole doesn't work with an easy out! I also learned that the front, top middle and rear holes go into the water jacket.
So, is there a way to do this without removing the engine? Maybe remove the grill, unbolt the motor mounts and bellhousing (along with other small stuff) to slide it forward a couple of inches. Cut a hole in the firewall! _________________ Matt
1953 M38a1
1964 USMC M38a1
'51 USMC M100 trailer, '54 M100 trailer, '90 M101a1 trailer
Http://wilfreeman.wordpress.com (M38a1 build blog)
http://m38a1usmc.wordpress.com (USMC M38a1 rebuild blog)
Joined: Mar 13, 2006 Posts: 1079 Location: Richburg, SC
Posted: Sun Nov 12, 2017 6:55 pm Post subject:
I have been working on the Jeep off and on for the last few months. So this is an update on my progress. I had a little downtime at work, so I thought I would share what I have accomplished since August. I don't have the time to upload pics right now, but they are on my blog if you want to check that out. Hopefully I can get them uploaded here the next time I'm off.
I got the exhaust studs (all of them) replaced, the manifold machined (it had a pretty bad warp and I wanted to use the factory one instead of my spare) and engine put back together.
Last month I pulled the front brakes apart to find a mess of dried mud, brake fluid soaked mud, corroded up, stuck wheel cylinders, worn out shoes and drums that couldn't be turned. I pulled the hubs and found the outer bearings on both sides pretty much trashed. So, I cleaned, replaced and repacked the bearings and replaced the hub seal. Then I cleaned the backing plate and installed new shoes, wheel cylinders and drums.
While working on the front end, I went ahead and pulled the front springs off, disassembled, cleaned and repainted them. I replaced the top leaf that was broken on both sides with the replacements that I bought earlier this year. Then I reinstalled them on the Jeep.
I ordered a repair panel for the rear panel (the lower part below the floor level) from Classic Enterprises, then cut out the bent up part on my reap panel and welded in a piece from the repair panel. It doesn't look perfect, but a LOT better than it was! I also cut out the rusted out part under the passenger side door opening, the small section that was rusted in the floor there as well as the bottom of the cowl support. I bent and formed a new support piece and welded it in and used some of the left over rear patch panel to make a patch for the floor. This turned out pretty good considering I am a total amateur at metal work! I still need to buy some 18ga metal to patch the outside skin.
I bought new batteries a few weeks back and tried to get the motor running again. It was a no go. Last week, I was determined to get her going. After a few days of trying everything, she still wouldn't hit a lick, so I started over with the basics. I checked for voltage drop to the distributor - I had over .6v drop! I ended up cleaning all of the terminals and grounds and replacing the #12 wire to the distributor (part of it) because the insulation was gone and it was arcing on the connector. After this, I re indexed the oil pump/distributor to get the #1 tower to about the 7 o'clock position with room to adjust the timing. Still wouldn't spark. Last thing I could think of was the pointless ignition module. So I pulled the distributor out and replaced it with my spare distributor (with points). Turned her over with choke for about 5 seconds and BAM! - she fired up! Ran pretty smooth too! After a little tinkering and adjusting timing and carb, she was running like a sewing machine - about as quiet as one too. Here's a link to my blog video (if it will work):
https://m38a1usmc.files.wordpress.com/2017/11/20171108_153403.mp4
I buttoned the engine back up and added water to the radiator and let her idle for a while to check for leaks. Good to go!
I will be off work again in a couple of days, so I hope to get the brakes finished up, bled and working so that I can moved her (safely) into the shop. Right now, she is being worked on in a temporary "tent" portable carport in the yard beside the shop. If I can get her into the shop I can roll around on a creeper on concrete in the heat and things will go a little more quickly. The countdown timer is on for the Denton rally in April - 6 months! _________________ Matt
1953 M38a1
1964 USMC M38a1
'51 USMC M100 trailer, '54 M100 trailer, '90 M101a1 trailer
Http://wilfreeman.wordpress.com (M38a1 build blog)
http://m38a1usmc.wordpress.com (USMC M38a1 rebuild blog)
Joined: Mar 13, 2006 Posts: 1079 Location: Richburg, SC
Posted: Tue Nov 14, 2017 8:39 pm Post subject:
Got the brakes working good enough for a test drive today and I'm impressed! It runs and drives real smooth for being out of service for so long. I also installed the new rear brake flex line and painted/installed a new temp gauge.
Here's the writeup on my blog: https://m38a1usmc.wordpress.com/2017/11/15/brakes-and-test-drive/
Now, a question. Once I figured out that my temp gauge wasn't working and I installed the new (NOS) one, I took another test drive. It took FOREVER for the temp needle to move and then it only went up to 140deg and stayed there. When I got back to the shop I used my temp gun to measure at the filler neck water = 134deg. Lower radiator hose = about 90deg. Head temp = 205deg. This was after driving around the field for around 10 min. There didn't seem to be much (if any) water movement at the filler neck. _________________ Matt
1953 M38a1
1964 USMC M38a1
'51 USMC M100 trailer, '54 M100 trailer, '90 M101a1 trailer
Http://wilfreeman.wordpress.com (M38a1 build blog)
http://m38a1usmc.wordpress.com (USMC M38a1 rebuild blog)
You cannot post new topics in this forum You cannot reply to topics in this forum You cannot edit your posts in this forum You cannot delete your posts in this forum You cannot vote in polls in this forum