Joined: Apr 03, 2005 Posts: 271 Location: Chester County, PA
Posted: Mon Dec 26, 2005 8:17 pm Post subject: M38A1 Progress Report - and a question or two.
I can finally say Im making good progress on my M38A1.
Yesterday, Christmas Day
Got a fair amount done. Fixed both body-frame mounting points and some other stuff.
Some before pictures:
All Driver Side
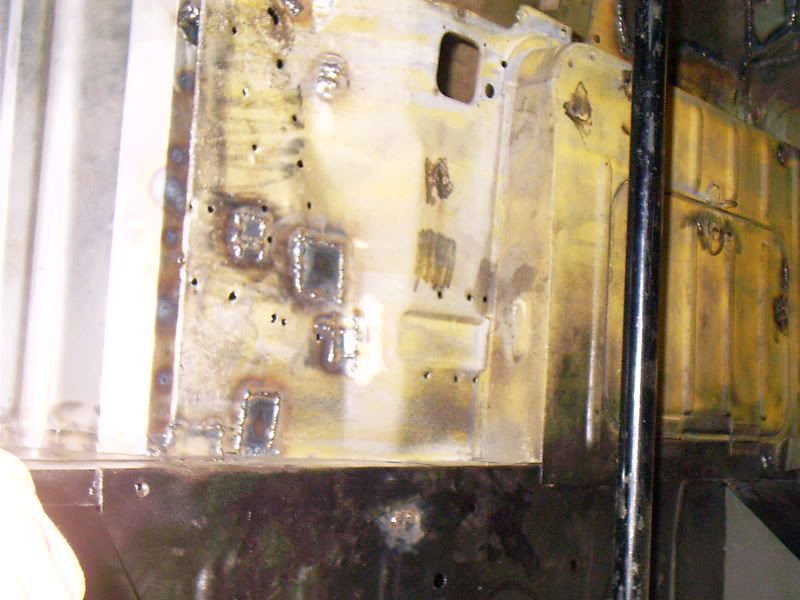
Now, Afterwards:
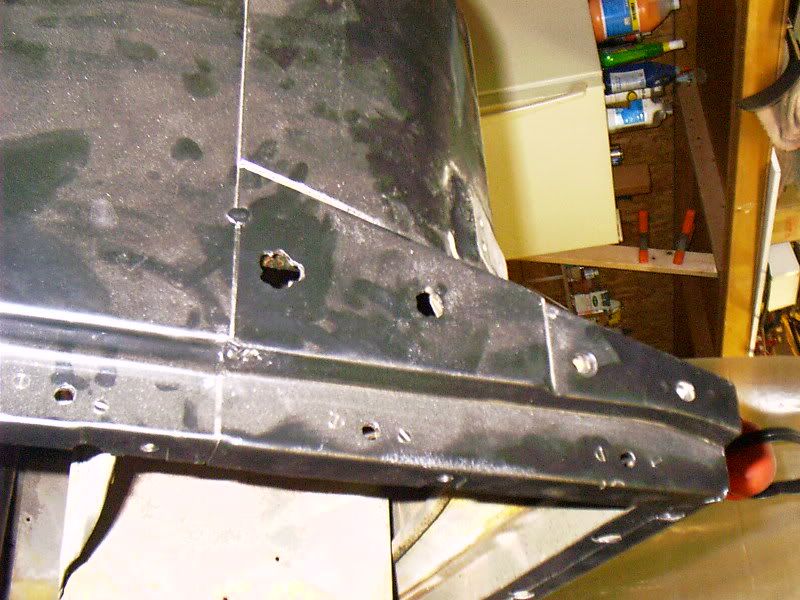
Passanger Side. Sorry, no before pict! But it did look pretty hideous.
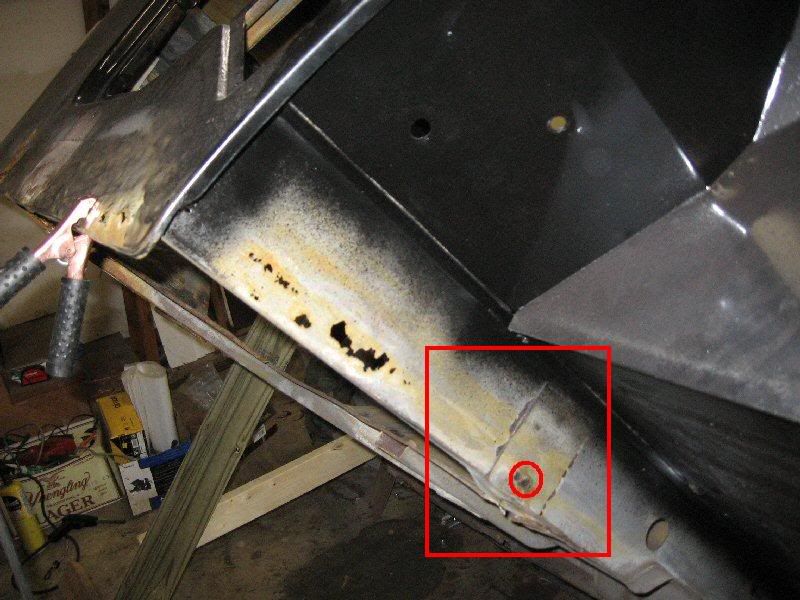
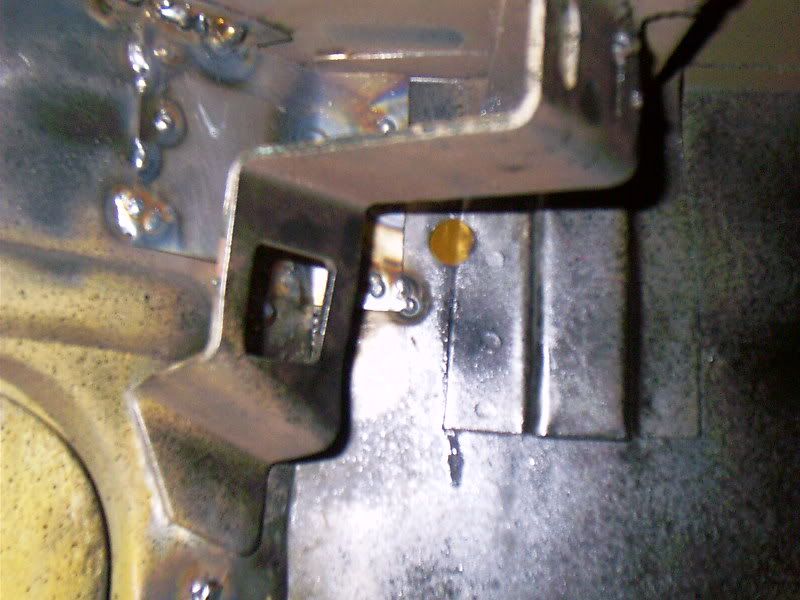
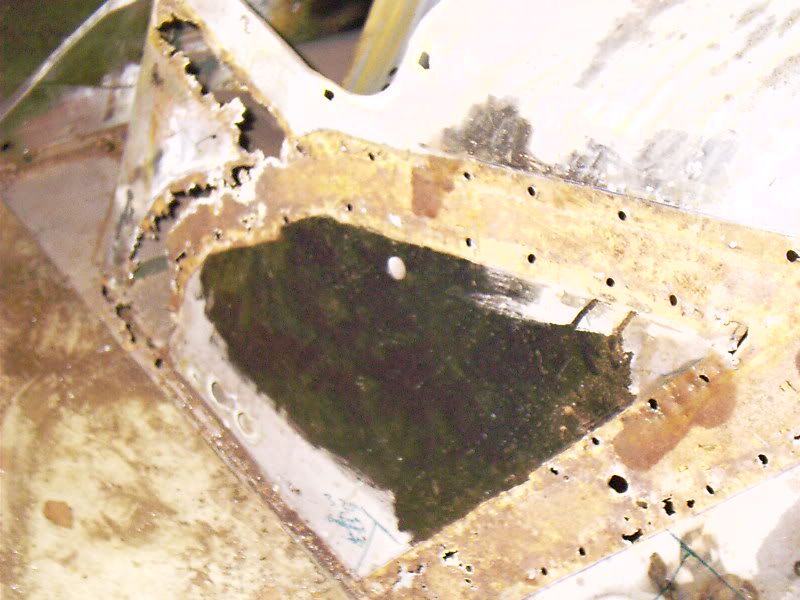
This is what I call "character corner." This is where my jeep has unique character. There were some rust holes here, corrosion through metal. The orientation of the holes and the location they were in would have required me to tear apart essentially that whole entire corner to integrate the metal. So rather then spending a day cutting and fitting, and another day welding and grinding, I decided to just plug weld and seem weld in some locations a few patches. Worked out quite well, and Im sure they'll last for as long as the body is around.
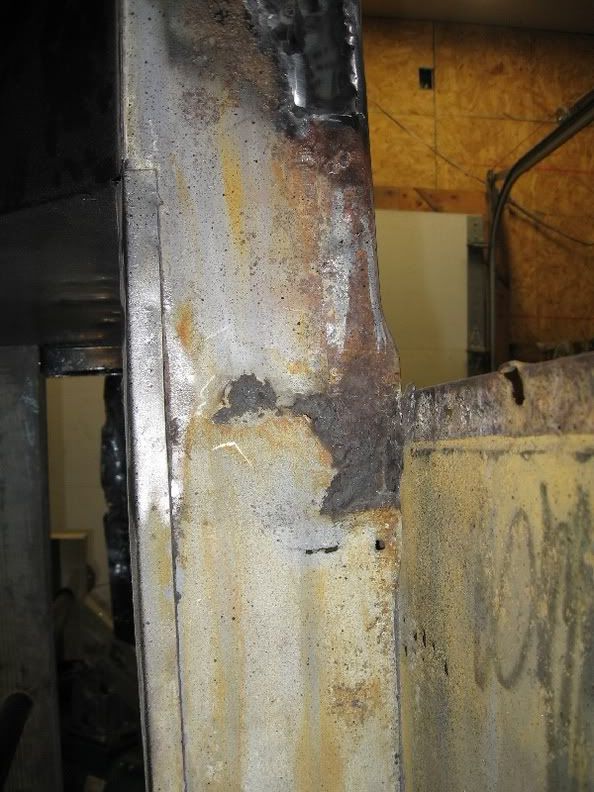
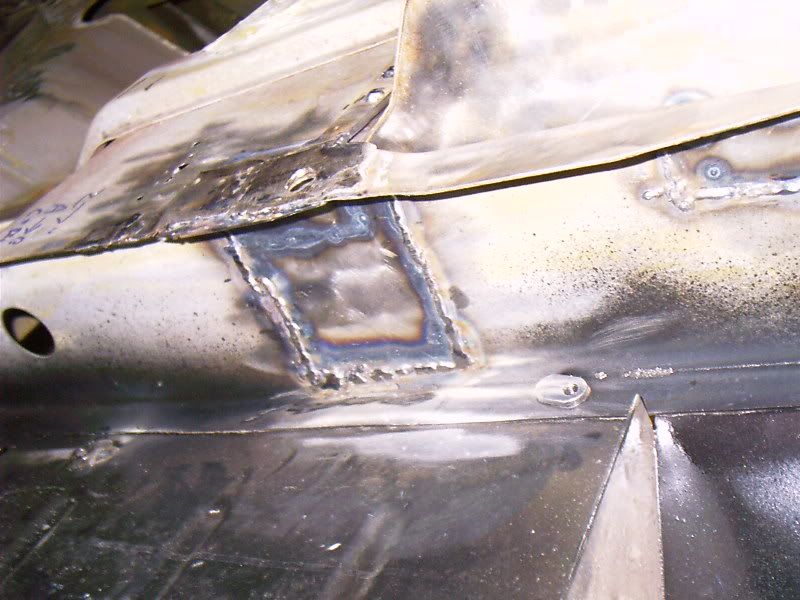
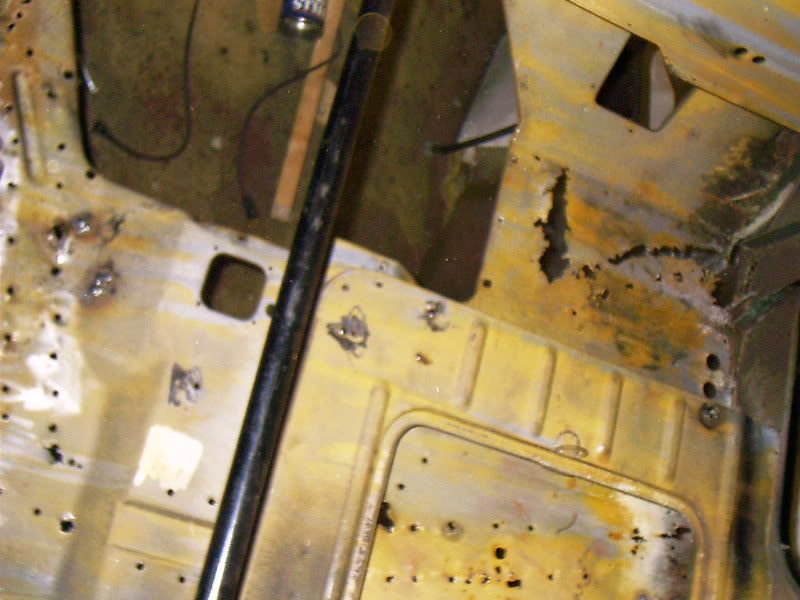
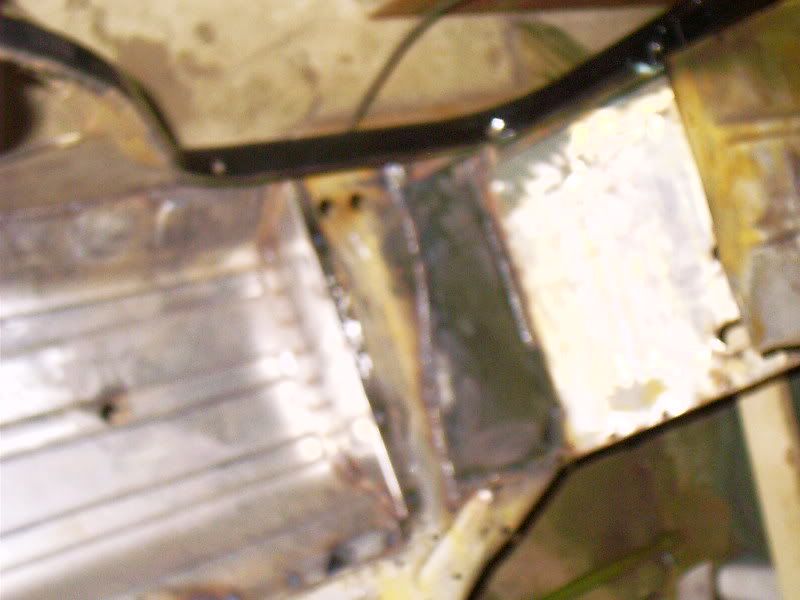
Here too is another place where my jeep has character. Again, small little corrosion holes. Not worth it to tear apart that hat channel and fit it exactly as originally. Plug welded a patch, and its as good as new!
Now today...
Driver Side
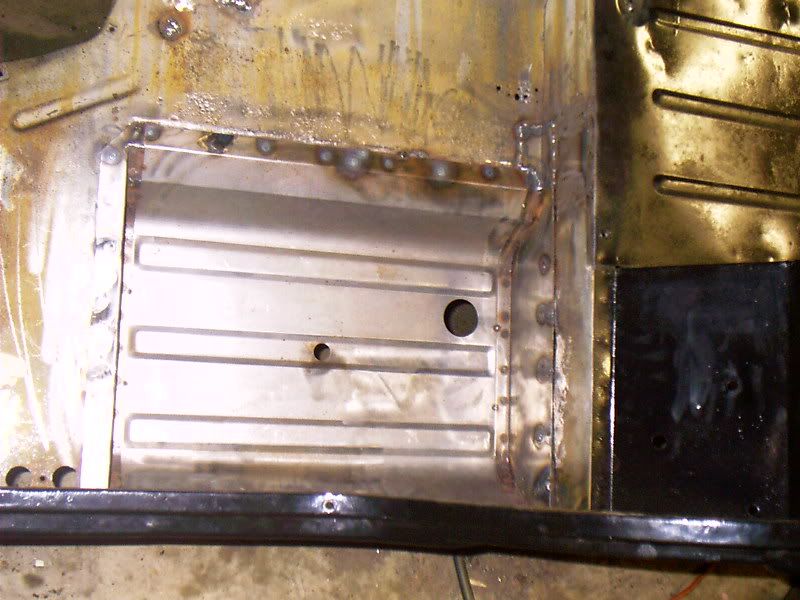
And I got my gas tank sump installed!!!
Test fitted the tank, fits great.
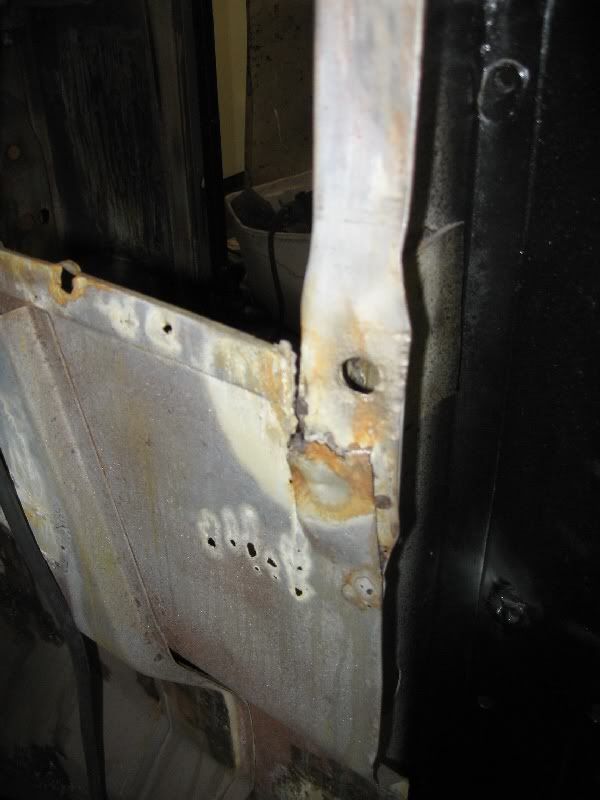
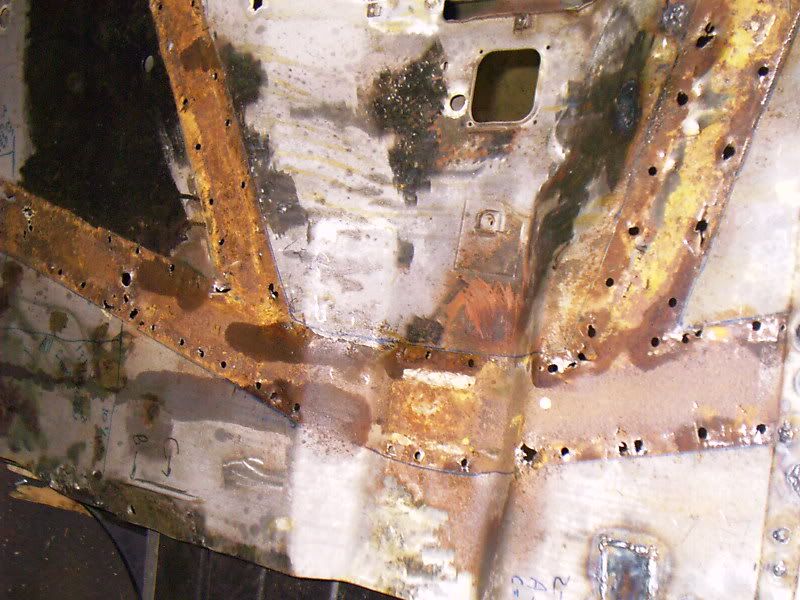
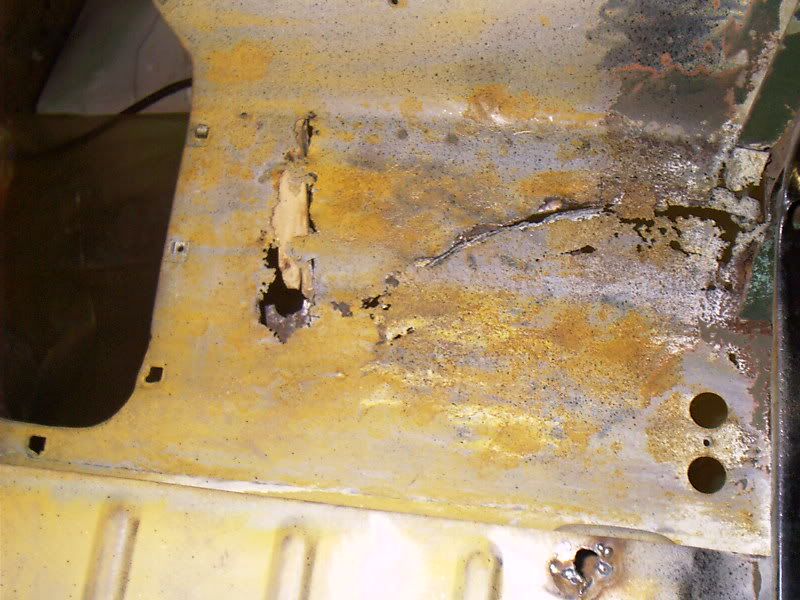
Dont know if any of you guys remember, but mine used to look like:
Down at the bottom corner of the body, you can see it. Trust me, there wasnt much left of it. It was totally trashed. Needless to say, when I paint it, Im going to pour some POR-15 on this thing. There is no way itll rust ever again.
Now for some questions
I hope to pull the hatchannels tommorrow, and possibly begin repair of the floorboards. Does anyone have any good methods for making sure my repro ones go back in the original spots? These body mounting holes Im sure are critical.
Also...
The heck are those two lower holes for? Looks like someone drilled them out several times. Honestly, they look like crap. I cant imagine they were there originally. Can anyone confirm my thoughts? _________________ Bob Collins
1954 M38A1 MD79056
As for the extra holes, I cannot say. However, on the replacement of the hat channels, when taking the old ones off, make some reference measuring points and photos. When you put the new ones on, just spot weld a couple of places and then I would remount the tub onto the frame and take not of how well the holes line up.
I know that sounds like a lot of work, but the only way to know for sure that things will fit right before final welding is to tack everything in place and then fit them together.
Good luck! _________________ Ryan Miller
MVPA # 22010
Joined: May 09, 2005 Posts: 111 Location: Bentonville, AR
Posted: Wed Dec 28, 2005 8:42 am Post subject:
Bob, those holes are probably a Bubba modification, maybe for a side mirror from another vehicle? On my '53 M38A1, as well as the other 3 we have, that is a solid panel. Keep up the good work, you're getting me insipred to begin making progress on mine. My other project, the '47 CJ2A/M38/M38A1/CJ3A combo, is almost complete, we drove it last week for the first time in 3 years; I'll be posting pics soon.
Keep up the good work, you're doing a great job! _________________ Galen
1947 CJ2
1953 M38A1
Joined: Apr 03, 2005 Posts: 271 Location: Chester County, PA
Posted: Wed Dec 28, 2005 3:07 pm Post subject:
thanks Galen for the information. I'll patch over it later on today, after I finish ripping these darn hat channels off.
Found out a pretty easy way to match up the holes, incase anyone ever needs to do the same thing I did.
I took a sheet of plywood and put it in a corner and kept it flush with one of the sides. I then crawled under the body and everywhere there was a body mounting hole, I drilled through the plywood. I also took measurements from the vertical support and sides of the jeep, just incase any question arises. Should be pretty easy to put back together. I'll let everyone know after Im done this. _________________ Bob Collins
1954 M38A1 MD79056
Joined: Apr 03, 2005 Posts: 271 Location: Chester County, PA
Posted: Wed Dec 28, 2005 7:32 pm Post subject:
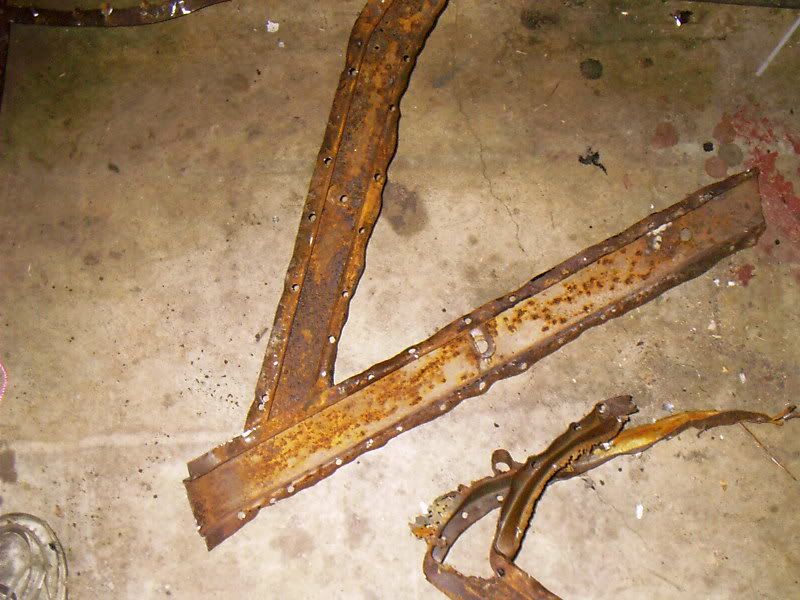
Well after about 3 hours of work today, I got the freakin things off. Surprisingly, finding and drilling spotwelds wasnt a problem. Instead, it was corrosion! Thats right, my floorboards and hat channels corroded to each other, making this job 10x harder than it needed to be. So after saying my fair share of curse words for the year, man handeling, and using my air hammer, I finally got them off. Ripped some good section of floor up, but I really had no other choice.
Man, you would also be surprised how much crap fell out of those things -- TONS of dirt and bits of rusted metal it looked like.
Joined: Apr 17, 2005 Posts: 891 Location: New Hampshire
Posted: Thu Dec 29, 2005 6:39 am Post subject:
How I did my hat channel was set the body on the frame, position it correctly then slide the new channel between the body and frame, mad sure it was still correct on the frame and then spot welded the hat channel on, then took the body off and finished the welding, seemed to work well for me.
Joined: Apr 03, 2005 Posts: 271 Location: Chester County, PA
Posted: Fri Dec 30, 2005 10:19 pm Post subject:
Not having school for a week is sure a blessing to my A1!
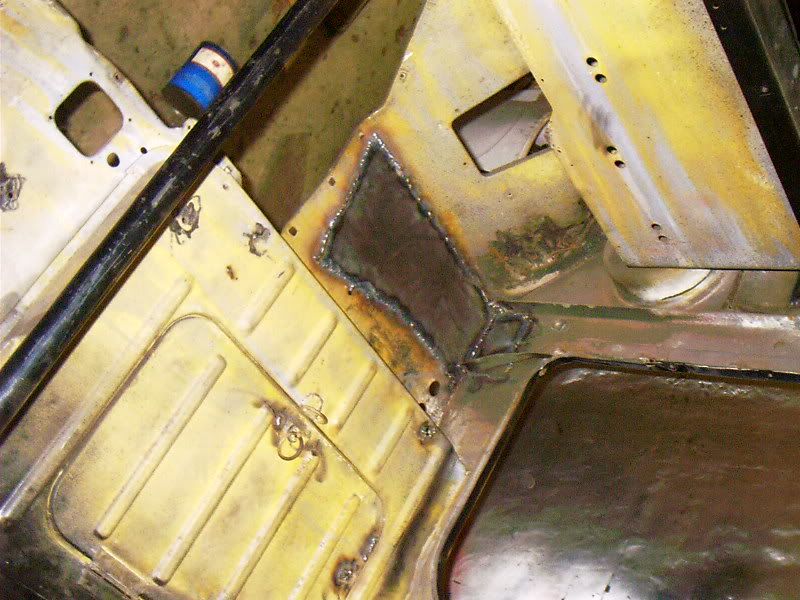
I'm *this close* to finishing all of the welding on the jeep. Tommorrow Im going to have a friend over to help me place and orient the hat channels, then plug weld those on. Then day after gonna cut up the remainder of the back panel and plug weld the new one on. It finally feels like I'm making progress -- and boy, its a SWEET feeling.
I should have school less often. Maybe I'll petition for an M38A1 work day...and somehow integrate it towards school -- so like I can get some credits for it. Hey, it could work! Im seeing chemistry in action when welding / applying phospheric acid to newly sandblasted metal...right...right? Okay...maybe it wont. But it would be cool!
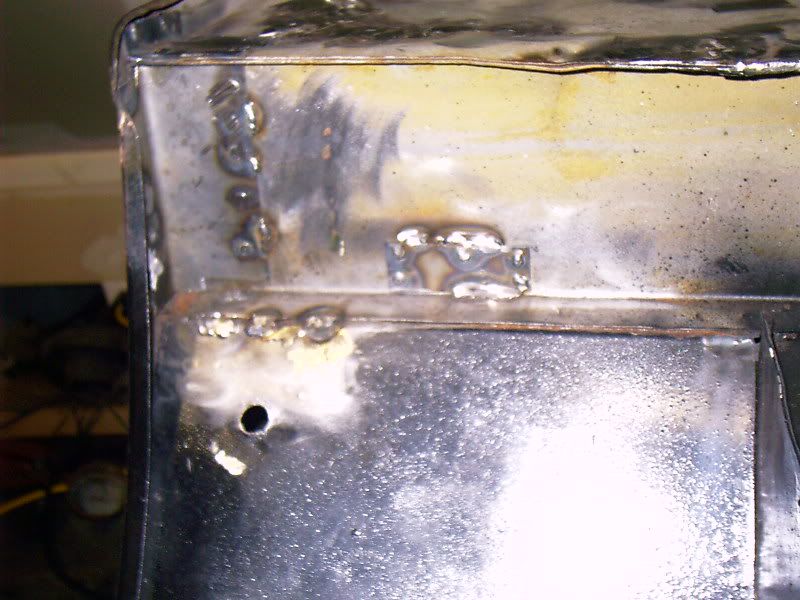
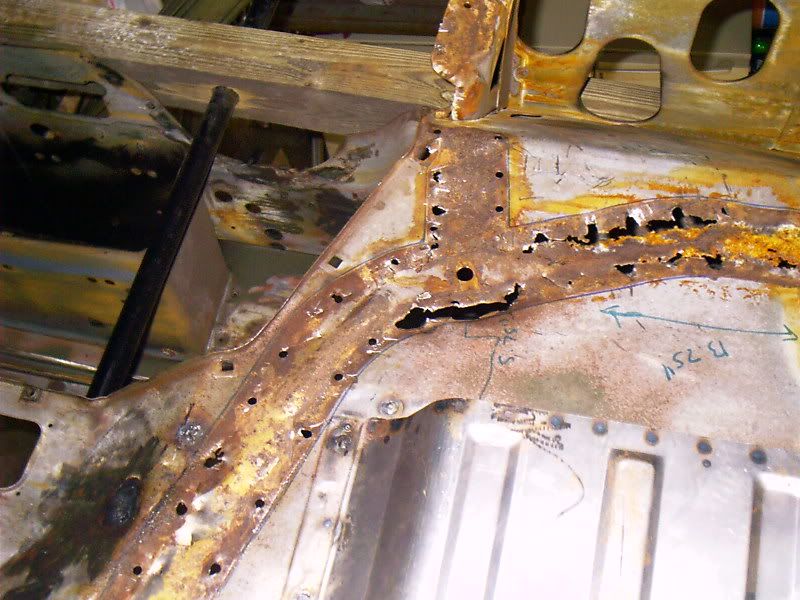
Take a look at these pictures.
Looks a lot more solid now, if I say so myself, considering they used to look like:
Okay, Question time
With the tub nearing completion, and the fenders / hood / windshield frame taken care of, I have began to look at the fuel tank. I actually have two of them. One that I know has to be sealed (fiberglass stuff has been applied looks like). I would prefer not to use this though, cause god only knows if it was prepped correctly / if the stuff stands a chance with a little bit of use. I have another tank that isn't fiberglassed....pure metal. It has some pin holes in it and looks a bit dirty. This is where my question comes in.
Whats the best way to clean it out? And would it be okay to braze these holes, or is mig welding them better?
Any hints to where common leaking places are too?
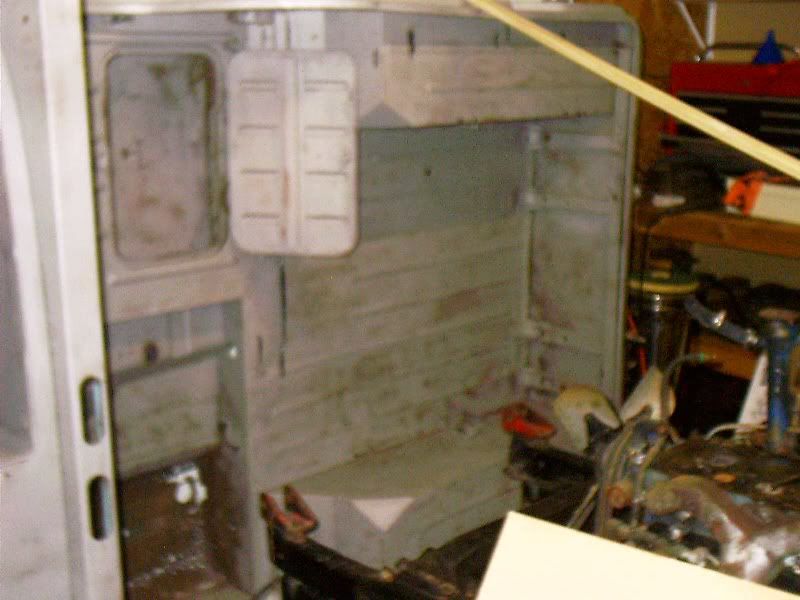
I stuck my camera down in the gas tank to see what it looked like:
Doesnt look TOO bad. This taken from where the sending unit is supposed to go I believe. Definitally a little bit of crud, but overall, not bad for sitting for 25 years.
What on gods green creation is this white stuff? I found a bunch of white stuff in my carb when I rebuilt it, wonder if its the same thing. Could it be lead deposits?
Much thanks! _________________ Bob Collins
1954 M38A1 MD79056
Joined: Apr 17, 2005 Posts: 891 Location: New Hampshire
Posted: Sat Dec 31, 2005 6:01 am Post subject:
the powder is dried gas. You can send your tank away and have it repaired and sealed. I did that with an M38 tank and it came out great, just ask Rick L.
Joined: Apr 03, 2005 Posts: 271 Location: Chester County, PA
Posted: Sat Dec 31, 2005 11:55 pm Post subject:
'nother question.
I got the passanger hat channel all welded up and ready to go, checked the measurements - all perfect.
The driver side...well...thats a different story. All of the holes in the old one were essentially corroded away. After making a couple jigs, I got the one hole that mounts to the body lined up perfectly -- but -- before I weld, what are these other holes for? I thought there was only 1 hole for mounting the body to the frame. Are the other holes in the hat channel for draining purposes -- and can I weld without worrying about their exact position?
Much thanks! _________________ Bob Collins
1954 M38A1 MD79056
You cannot post new topics in this forum You cannot reply to topics in this forum You cannot edit your posts in this forum You cannot delete your posts in this forum You cannot vote in polls in this forum