| View previous topic :: View next topic |
| Author |
Message |
Bretto
Member
Joined: Nov 24, 2010
Posts: 1390
Location: Orem, UT
|
 Posted: Sat Mar 26, 2011 9:34 am Post subject: Removing Cam gear! Posted: Sat Mar 26, 2011 9:34 am Post subject: Removing Cam gear! |
 |
|
| I'm at the end of my rope on trying to pull off the cam gear. I'm afraid with it being resin/fiber of it breaking. Is this thing built with a steel plate inside? How would one suggest pulling it off. I went to Autozoon and got a few pullers but none really fit. |
|
| Back to top |
|
 |
Bretto
Member
Joined: Nov 24, 2010
Posts: 1390
Location: Orem, UT
|
| Posted: Sat Mar 26, 2011 10:00 am Post subject: |
|
|
Per the manual:
Remove the crankshaft nut and crankshaft pulley. Remove the
eight nuts, lock washers and bolts that secure the engine front plate
to the cylinder block and remove the timing-gear cover. Remove
Woodruff key, oil slinger, and thrust washer. Remove cap screw
and lock washer that secures the camshaft gear and remove camshaft
gear washer. Using puller 41-P-29564 remove camshaft and
crankshaft gears (figs. 39 and 40).
Note. When removing the camshaft gear, remove one camshaft thrust plate
cap screw to allow proper seating of puller without disturbing timing marks on crankshaft and camshaft gears.
Sounds easy when reading |
|
| Back to top |
|
|
wesk
Site Administrator


Joined: Apr 04, 2005
Posts: 16256
Location: Wisconsin
|
|
| Back to top |
|
|
Bretto
Member
Joined: Nov 24, 2010
Posts: 1390
Location: Orem, UT
|
| Posted: Sat Mar 26, 2011 5:09 pm Post subject: |
|
|
Mr. J. Rigg showed up and we got it off!
 |
|
| Back to top |
|
|
wesk
Site Administrator
Joined: Apr 04, 2005
Posts: 16256
Location: Wisconsin
|
|
| Back to top |
|
|
Bretto
Member
Joined: Nov 24, 2010
Posts: 1390
Location: Orem, UT
|
| Posted: Sun Mar 27, 2011 7:40 am Post subject: |
|
|
OK then.
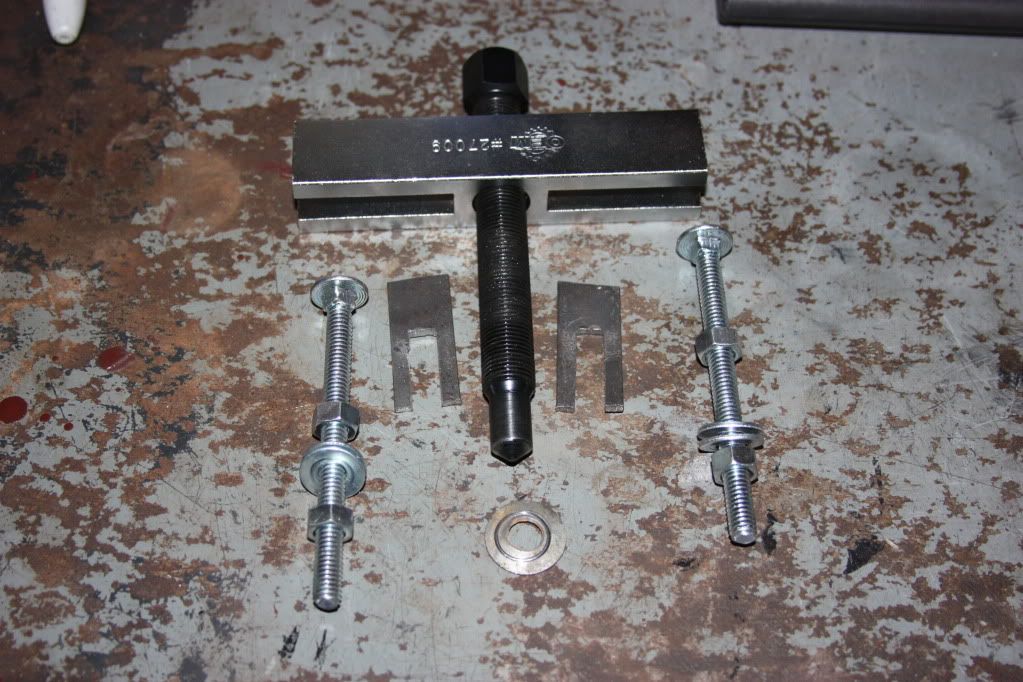
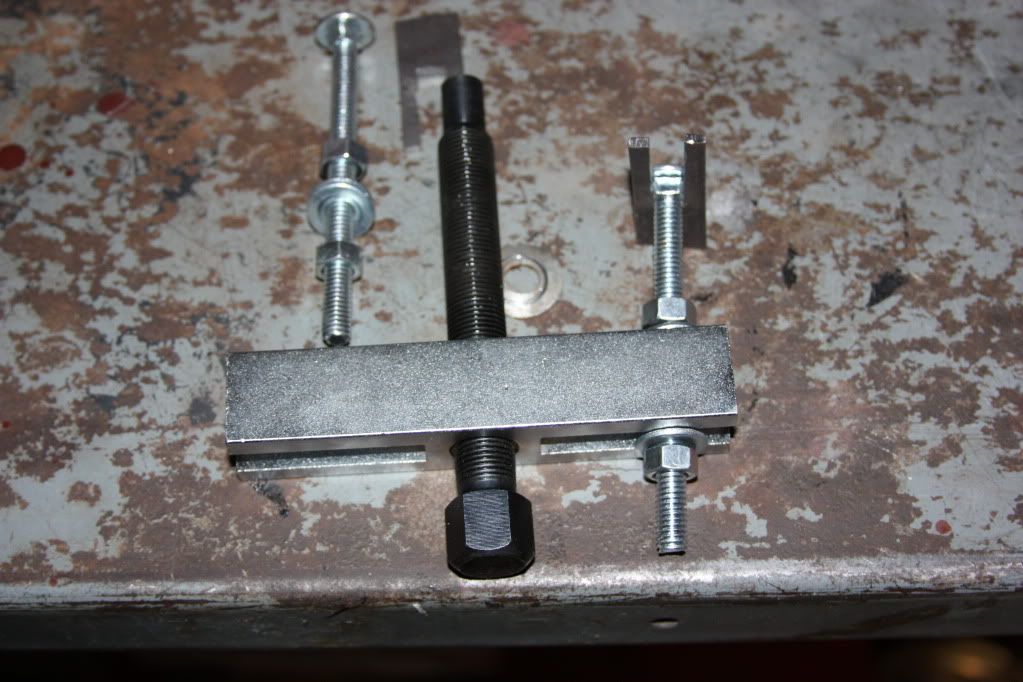
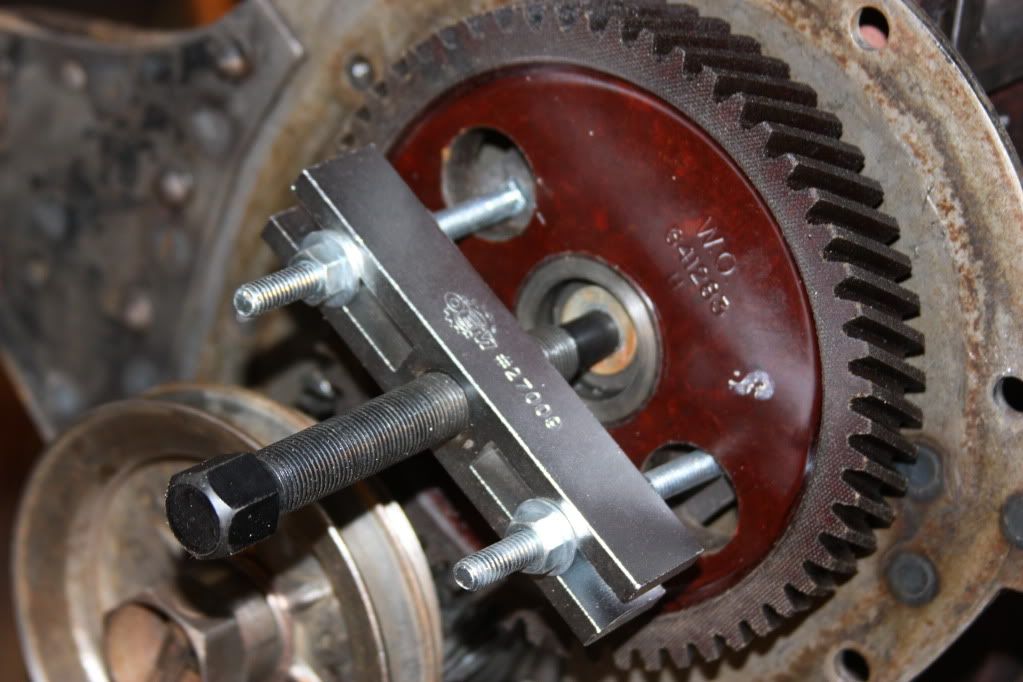
I took some flat bar steel and notched it to fit a carrier bolt. With the thin carrier bolt heads and the 1/8 steel the combo was still thin enough to be in the space behind the gear and the plate. I fished the steel behind the gear, and slide the carrier bolt into the slot from the front. By way of magic, with only 2 hands, was able to hold everything together and still add the puller in the mix. I had to try 2 attempts at this. The first time I had the steel pieces too centered on the holes and they were just wanting to bend up thru the holes. I readjusted by putting them snug up against the center best I could. Even then they flexed a little the POP!. It started to move! A few more turns and off with the gear. That thing is really on there.
 |
|
| Back to top |
|
|
wesk
Site Administrator
Joined: Apr 04, 2005
Posts: 16256
Location: Wisconsin
|
|
| Back to top |
|
|
Silverback2w2
Member

Joined: Apr 23, 2013
Posts: 37
|
| Posted: Sat Aug 24, 2013 4:23 pm Post subject: |
|
|
I just used this technique and it worked like a charm.
THANKS! |
|
| Back to top |
|
|
Bretto
Member
Joined: Nov 24, 2010
Posts: 1390
Location: Orem, UT
|
| Posted: Sun Aug 25, 2013 6:39 am Post subject: |
|
|
You're welcome. What brought you to have to pull it?
_________________
Brett
'51 M38
PHOTO DIARY OF MY BUILD |
|
| Back to top |
|
|
Silverback2w2
Member
Joined: Apr 23, 2013
Posts: 37
|
| Posted: Sun Aug 25, 2013 8:28 am Post subject: |
|
|
| Freshening all the gaskets and seals. I'm going through this "new to me" engine. |
|
| Back to top |
|
|
RICKG
Member
Joined: Aug 31, 2010
Posts: 1741
Location: SO IDAHO
|
| Posted: Sun Aug 25, 2013 9:42 am Post subject: |
|
|
Nice J. Rigg Brett..Glad others are taking advantage of it.
_________________
keep 'em rollin'
RICKG MC 51986 DOD 01-52, '50 CJ3a |
|
| Back to top |
|
|
|


