Douglass Waterproof Connectors
Date: Friday, February 03 @ 14:52:11 UTC
Topic:
DOUGLASS CONNECTORS
Chuck Watford MVPA #15175
www.willysmjeeps.com
Click on the "Read More" icon to read the rest of the article.
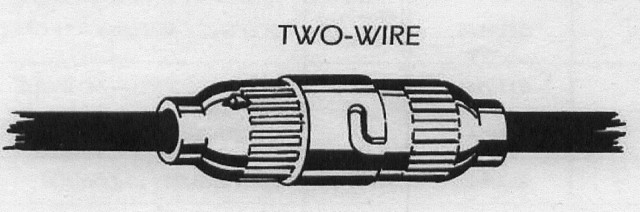
The early M-Series vehicles, including the M38, early M38A1, M211, and M135, used the Douglass style waterproof wiring connector. The Douglass connector is easy to identify by its metal twist-lock male and female shells. Later M-Series wiring used the all-rubber Packard connectors.
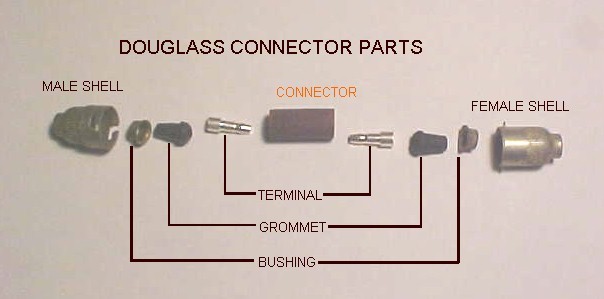 The Douglas connector consists of a metal male or female shell, a metal bushing, and a rubber grommet, all of which are free to slide on the wire, and a terminal end that is crimped onto the end of the wire. Male and female terminal ends are joined together by a plastic or bakelite covered metal connector. 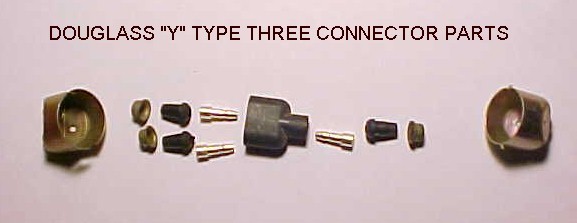
The same basic components are used to construct the 3-wire "Y" connectors, using different shells and connector.
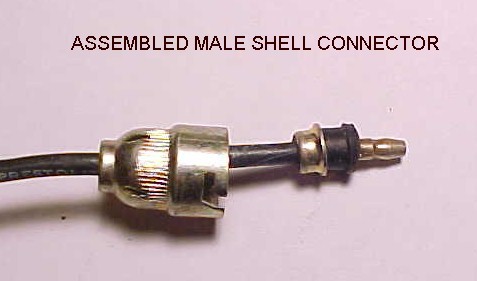
The photo above shows a completed Douglas style male terminal end. To assemble the terminal end, first slide the correct gender metal shell onto the wire, followed by the metal bushing. Place some dielectric grease on the wire before installing the rubber grommet. Slide all these parts several inches down the wire before you install the terminal. Strip the insulation back from the end of the wire until it just fits into the terminal.
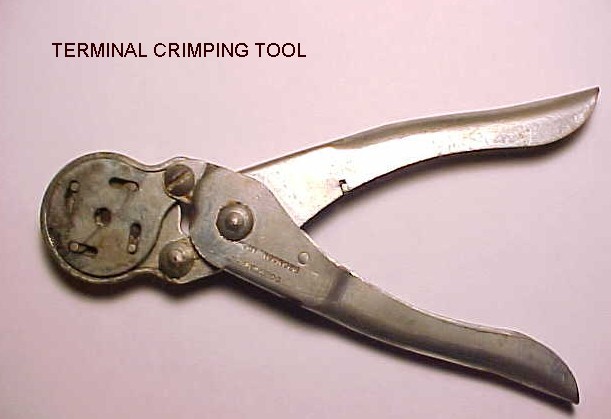
A special crimping tool is required that does not distort the end of the terminal. These tools can be found at MV flea markets, purchased from MV dealers, or purchased through some automotive electrical supply dealers.
Before I crimp the ends, I like to solder the joint. I do this by first placing a short piece of solder into the terminal. I then coat the end of the bare wire with non-acid flux, slip the wire into the terminal, and heat the end of the terminal with a very small pocket propane torch. A good way to tell when you have a good solder joint is to hold the wire end vertical with the terminal on the end of the wire. The piece of solder in the terminal will prevent the bare wire from going all the way into the terminal. As you heat the end of the terminal and the solder melts, the terminal will drop down into the correct position on the wire. Remove the heat and continue to hold in the vertical position until the solder joint cools. Once the joint has cooled to the touch, use the crimping tool to crimp the collar end of the terminal onto the wire.
Once the joint is cool, slide the rubber grommet up the wire and over the crimped collar end of the terminal. You may want to snap the terminal into a connector so you can position the rubber grommet correctly, the grommet should seal tight against the end of the connector. Next, slide the metal bushing over the grommet, followed by the metal shell.
Sometimes it can be difficult to lock the shell halves together to make the connection. This may be due to improper position of the grommet, the bushing not seating on the grommet or into the shell (is the bushing on backwards?) or the wrong length connector. If the joint is too loose, it won't seal, if it's too tight, it can damage the rubber grommet. It should take considerable pressure to make-up the joint, but you should be able to do it using only your hands. If you think you need to use a hammer and pliers, it's too tight!
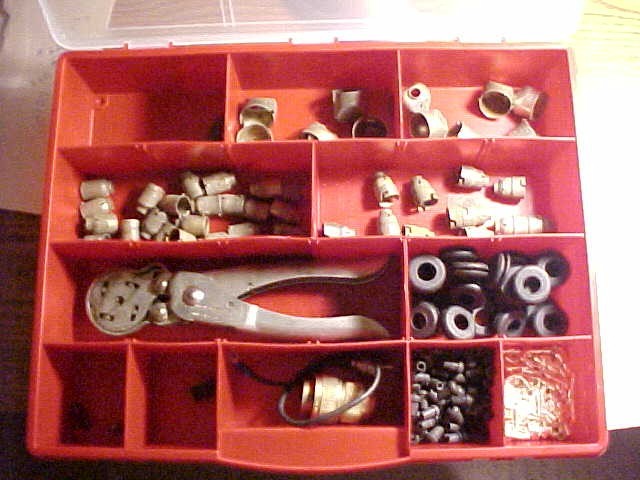
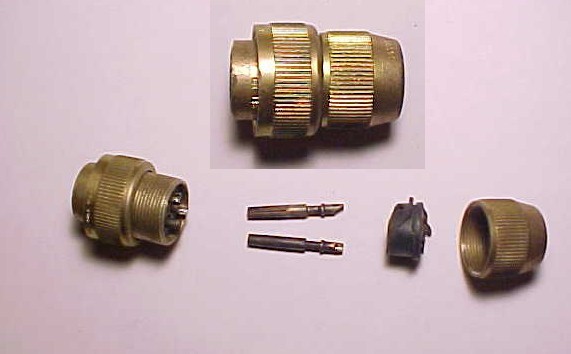
While grommets and terminals are available from dealers, you should make every effort to salvage shells, bushings and connectors from your old wiring harness. Sometimes you can find Douglass connector type wiring harnesses at MV flea markets. If the price is right, buy it and salvage the Douglass components. Shown above is my Douglass repair kit with salvaged shells, bushings and connectors.
In addition to repairing Douglass connectors, it is also possible to repair and/or reuse the screw-on connectors used at the light switch and other places.
Most of these connectors can be taken apart, the pins removed from the plug, new wires soldered to the pins, and reassembled. Use dielectric grease when reinstalling the pins into the rubber bushing in the connector body.
Making repairs to your Douglass connector style wiring harness is easy with the right parts and tools, but I would not recommend trying to build a complete harness. There are vendors who specialize in MV wiring and can provide you with a correct quality harness at a reasonable price. They can even provide an updated harness with provisions for turn signals, extra lights, etc.
|
|