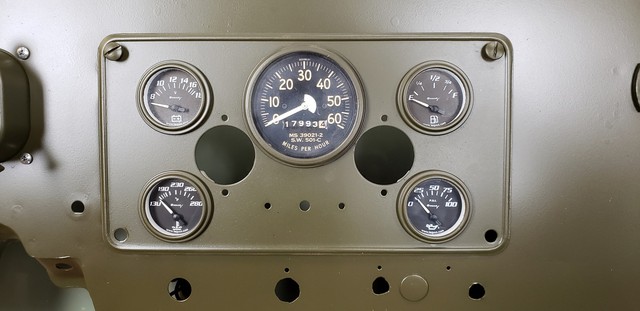
I'm cleaning up/repainting my dash cluster. Replacing two guages and removed paint from other two.
Anybody have a great idea of how to paint these? Not much to paint, so I thought either mask and spray rattle-can paint, or use a model/craft brush and do it by hand.
Thanks!
Gauges-Painting bezels
-
ColKilgore2860

- Member
- Posts: 34
- Joined: Thu Oct 31, 2019 6:00 pm
- Location: Story, Wyoming
- Contact:
Gauges-Painting bezels
Adam Jahiel
Photographer
Story, Wyoming
M38A1 & M38
Photographer
Story, Wyoming
M38A1 & M38
-
wesk

- Site Administrator

- Posts: 16458
- Joined: Sun Apr 03, 2005 6:00 pm
- Location: Wisconsin
- Contact:
Since these military gauges use a crimped lens circumference system for final assembly they are a very difficult unit to disassemble and then reassemble for painting. Masking & rattle can work fine as long as you use a masking tape with a finished facing that won't allow any paint to filter thru it.
One important note: Too much paint generates grounding issues between the gauges and the cluster panel and between the cluster panel and the dash. These gauges use two different 24V DC circuits to operate. One circuit runs from the gauge to the sender and then to the sender's ground. This circuit determines the amount of needle movement. The other circuit operates the needles movement and this circuit starts with +24V in then is grounded thru the gauge case and the retainer to the bare metal on the back side of the cluster panel. So you must make sure these grounding points are free of paint and corrosion. A very good idea also is to provide a separate gauge cluster to dash ground strap rather then relying on bare metal contact between the cluster panel, it's four quarter turn fasteners and the receptacles in the dash.
One important note: Too much paint generates grounding issues between the gauges and the cluster panel and between the cluster panel and the dash. These gauges use two different 24V DC circuits to operate. One circuit runs from the gauge to the sender and then to the sender's ground. This circuit determines the amount of needle movement. The other circuit operates the needles movement and this circuit starts with +24V in then is grounded thru the gauge case and the retainer to the bare metal on the back side of the cluster panel. So you must make sure these grounding points are free of paint and corrosion. A very good idea also is to provide a separate gauge cluster to dash ground strap rather then relying on bare metal contact between the cluster panel, it's four quarter turn fasteners and the receptacles in the dash.
Wes K
45 MB, 51 M38, 54 M37, 66 M101A1, 60 CJ5, 76 DJ5D, 47Bantam T3-C & 5? M100
Mjeeps photo album: http://www.willysmjeeps.com/v2/modules. ... _album.php
45 MB, 51 M38, 54 M37, 66 M101A1, 60 CJ5, 76 DJ5D, 47Bantam T3-C & 5? M100
Mjeeps photo album: http://www.willysmjeeps.com/v2/modules. ... _album.php
-
MarkR1951M38

- Contributor

- Posts: 117
- Joined: Sun Aug 21, 2016 6:00 pm
- Location: Huntsville, AL
I converted my M38 to 12 volt and a couple new gauges had chrome rims. I used painters tape, taped them off, and used an exacto knife to cut the tape around the glass/rim. Scratched it up with some fine sandpaper, and painted with rattle can paint. Looks good. Just get some good paint, none of that $1.99 stuff. Use primer too. Don't paint under the rims since they need to be grounded to the dash plate.
1951 M38 MC 22731
(Converted 12v, Carter WO carb, single action fuel pump, electric wipers)
http://www.willysmjeeps.com/v2/modules. ... _album.php
(Converted 12v, Carter WO carb, single action fuel pump, electric wipers)
http://www.willysmjeeps.com/v2/modules. ... _album.php
-
mdainsd
- Jeep Enthusiast

- Posts: 446
- Joined: Thu Oct 19, 2017 6:00 pm
I second Wes's recommendation about a separate ground system for the gauge panel. Most M series gauge problems seem to be able to be cleared up by doing it. Make a second "star" harness, with one lug for each of the gauges and a longer lead to route to the main body, generally up on the fire wall. Use internal tooth star washers and put one lug on each gauge and the long one to the firewall.
As an addition: Adding a double ended separate ground from the fuel tank sending unit mounting screw to the body makes the fuel gauge work oh so much better.
Your mileage may vary.
As an addition: Adding a double ended separate ground from the fuel tank sending unit mounting screw to the body makes the fuel gauge work oh so much better.
Your mileage may vary.
'52 Dodge M37, '42 GPW, '48 FrankenJeep CJ2A/M38, '50 CJV-35(U), '51 M38, '42 WC-57 Command Car, '44 WC-51 Weapons , (2) M1941 Sperry 60" Anti-Aircraft Searchlights, John Deere M-gator, '44 White M3A1 Scout Car
-
wesk
- Site Administrator
- Posts: 16458
- Joined: Sun Apr 03, 2005 6:00 pm
- Location: Wisconsin
- Contact:
I did neglect to mention the extra ground at the gas tank that I always install to insure the system works well. Also the senders on the engine will be more reliable if you insure you have the engine ground strap properly installed and each end is setting on bare metal as well.
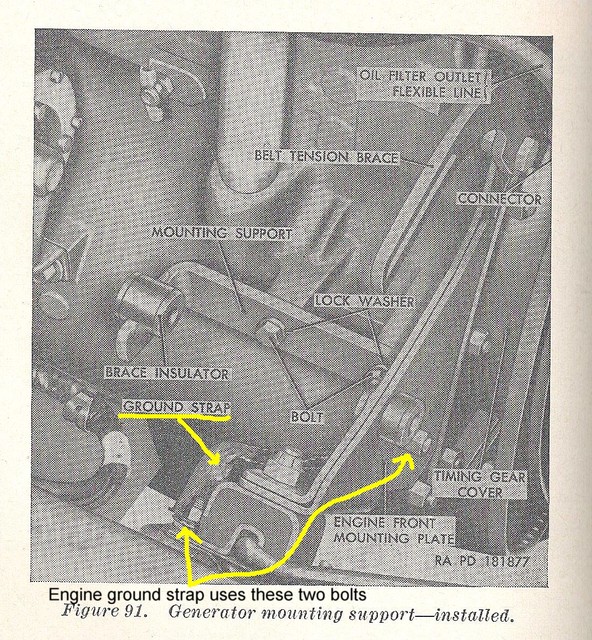
Make sure these two bolts are grounded to bare metal.
Make sure these two bolts are grounded to bare metal.
Wes K
45 MB, 51 M38, 54 M37, 66 M101A1, 60 CJ5, 76 DJ5D, 47Bantam T3-C & 5? M100
Mjeeps photo album: http://www.willysmjeeps.com/v2/modules. ... _album.php
45 MB, 51 M38, 54 M37, 66 M101A1, 60 CJ5, 76 DJ5D, 47Bantam T3-C & 5? M100
Mjeeps photo album: http://www.willysmjeeps.com/v2/modules. ... _album.php
-
Deetfreek
- Member
- Posts: 2
- Joined: Wed Apr 01, 2020 6:00 pm
- Location: Iowa
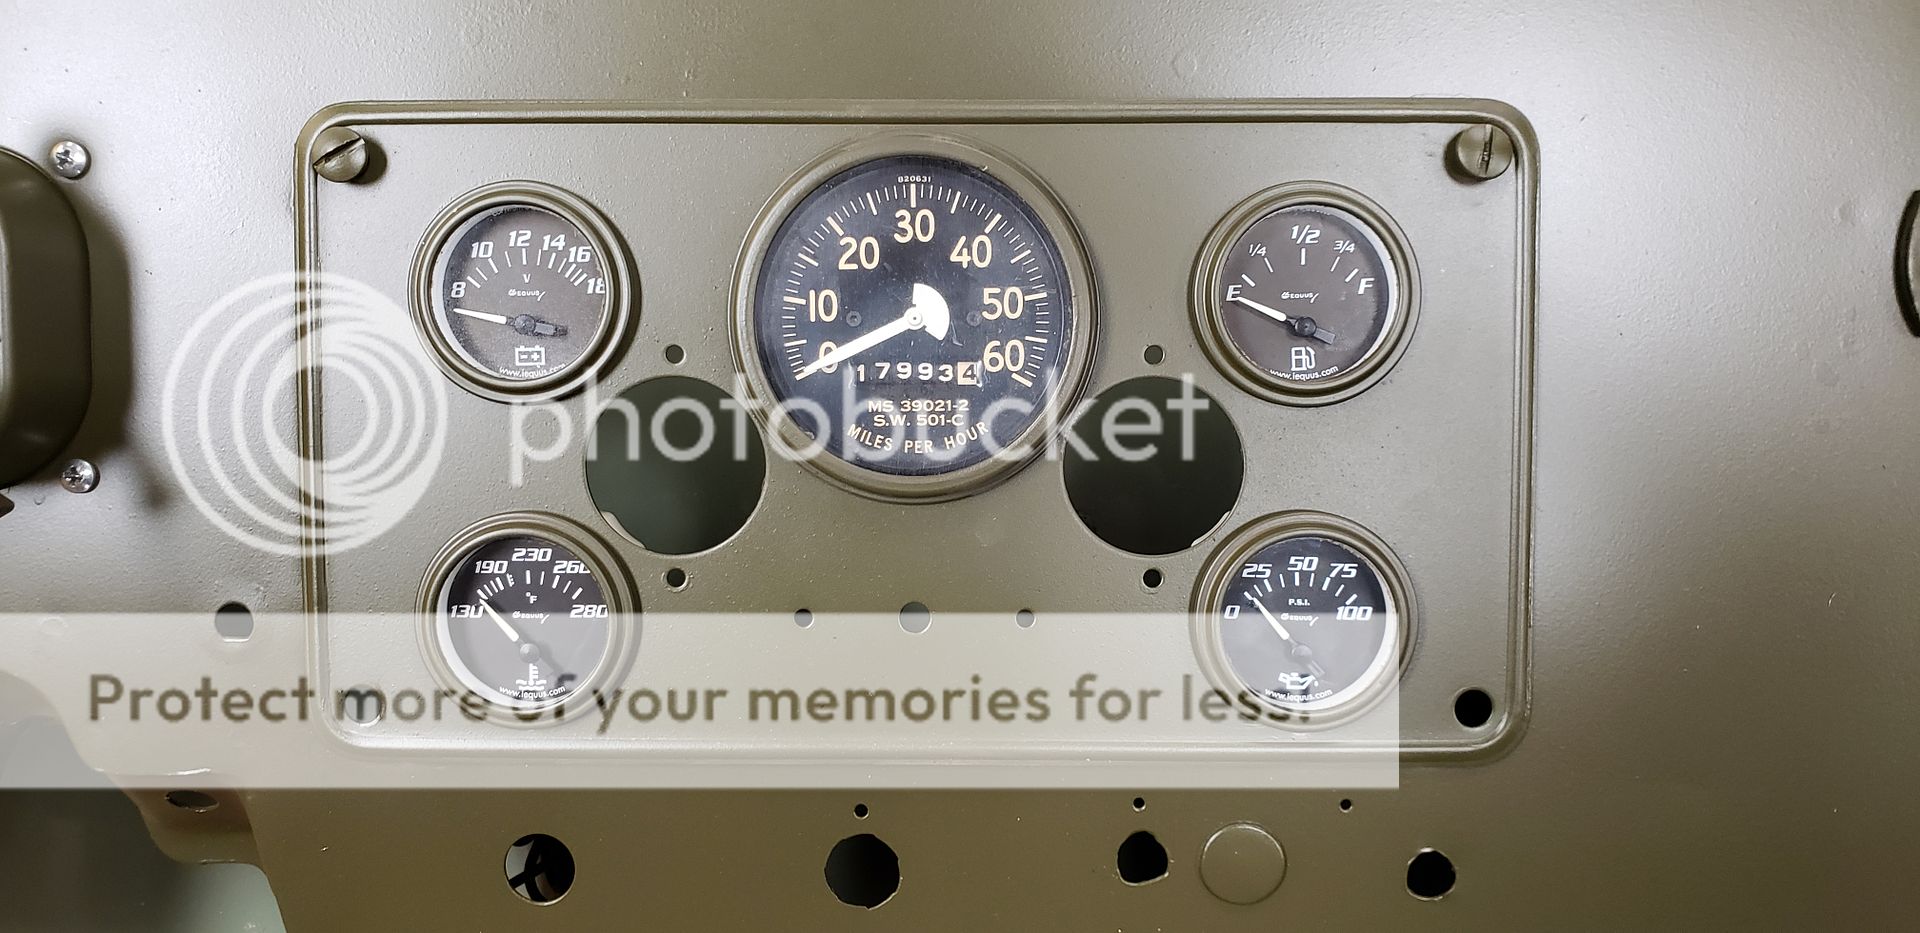
I did the same as Mark, mine was already converted to 12V and I needed functional gauges, so a new set was a necessity. I literally did the same thing, masked off the glass and sprayed the bezels.
https://s575.photobucket.com/user/walle ... w.jpg.html
https://i575.photobucket.com/albums/ss1 ... vuzcow.jpg
https://s575.photobucket.com/user/walle ... w.jpg.html
https://i575.photobucket.com/albums/ss1 ... vuzcow.jpg
-
wesk
- Site Administrator
- Posts: 16458
- Joined: Sun Apr 03, 2005 6:00 pm
- Location: Wisconsin
- Contact:
Vince, Nice work on the dash cluster.
I took the liberty of reducing your photos file size from 1.67 Meg to 296K which is much closer to allowed file size for photos in posts. What happens is you force the displayed screen to double in size which then requires scrolling vertical and horizontal to view your entire post. Really a pain for those with slow download rates.
Please review our photo posting rules at:
Here's the rules:
http://www.willysmjeeps.com/v2/modules. ... opic&t=498
Here's the tutorial for loading your album:
http://www.willysmjeeps.com/v2/modules. ... _album.php
Here's the tutorial for posting your photos:
http://www.willysmjeeps.com/v2/modules. ... pic&t=8670
Wes K
45 MB, 51 M38, 54 M37, 66 M101A1, 60 CJ5, 76 DJ5D, 47Bantam T3-C & 5? M100
Mjeeps photo album: http://www.willysmjeeps.com/v2/modules. ... _album.php
45 MB, 51 M38, 54 M37, 66 M101A1, 60 CJ5, 76 DJ5D, 47Bantam T3-C & 5? M100
Mjeeps photo album: http://www.willysmjeeps.com/v2/modules. ... _album.php
-
Deetfreek
- Member
- Posts: 2
- Joined: Wed Apr 01, 2020 6:00 pm
- Location: Iowa
First, thank you.
Second, checked and noted, sorry for the disruption. I will admit I was a little surprised it accepted it without asking for a smaller size. I will resize from now on before uploading.
Second, checked and noted, sorry for the disruption. I will admit I was a little surprised it accepted it without asking for a smaller size. I will resize from now on before uploading.
wesk wrote:Vince, Nice work on the dash cluster.
I took the liberty of reducing your photos file size from 1.67 Meg to 296K which is much closer to allowed file size for photos in posts. What happens is you force the displayed screen to double in size which then requires scrolling vertical and horizontal to view your entire post. Really a pain for those with slow download rates.
Please review our photo posting rules at:
Here's the rules:
http://www.willysmjeeps.com/v2/modules. ... opic&t=498
Here's the tutorial for loading your album:
http://www.willysmjeeps.com/v2/modules. ... _album.php
Here's the tutorial for posting your photos:
http://www.willysmjeeps.com/v2/modules. ... pic&t=8670