Hawkshadow's '52 M38CDN
-
ACRay
- Contributor

- Posts: 80
- Joined: Wed Jul 23, 2014 6:00 pm
- Location: Fort Bliss Texas
-
Hawkshadow

- Jeep Enthusiast

- Posts: 310
- Joined: Tue Oct 09, 2012 6:00 pm
- Location: Toronto, Ontario, Canada
Blackout Marker Refurb.
Here is how I refurbished my blackout markers. Ord 9 page 112 provides an excellent exploded diagram to assist in the process. My refurb kit came with my complete harness from Vintage Wiring of Maine. It is a very complete kit and I highly recommend it.
Disassemble and thoroughly clean all parts. Ensure to remove any remnants of the old rotted out spring that may have rusted away and fused itself to the bulb connector assembly. Here is everything disassembled, cleaned, and laid out beside the new kit.
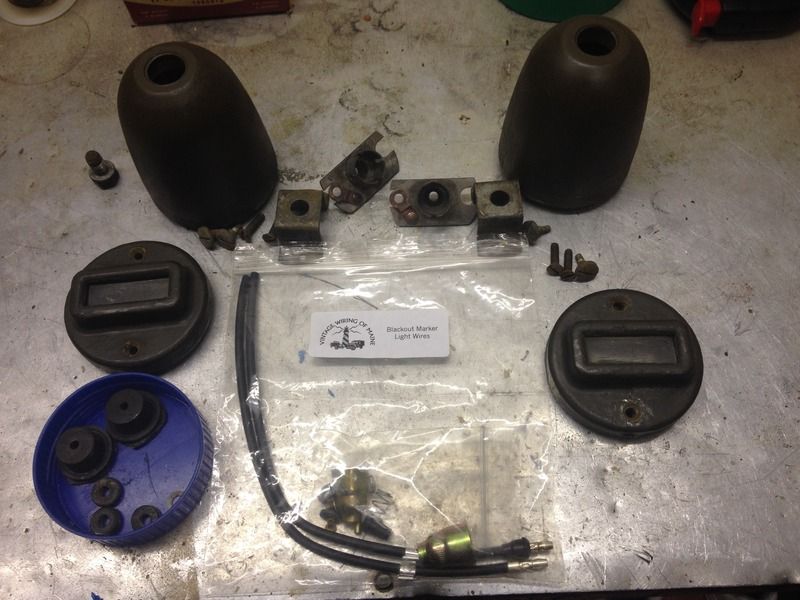
The new kit comes complete with the fibre disc replacement, as well as brass end caps which replaces the wire ends with hardened lead solder on the old setup.
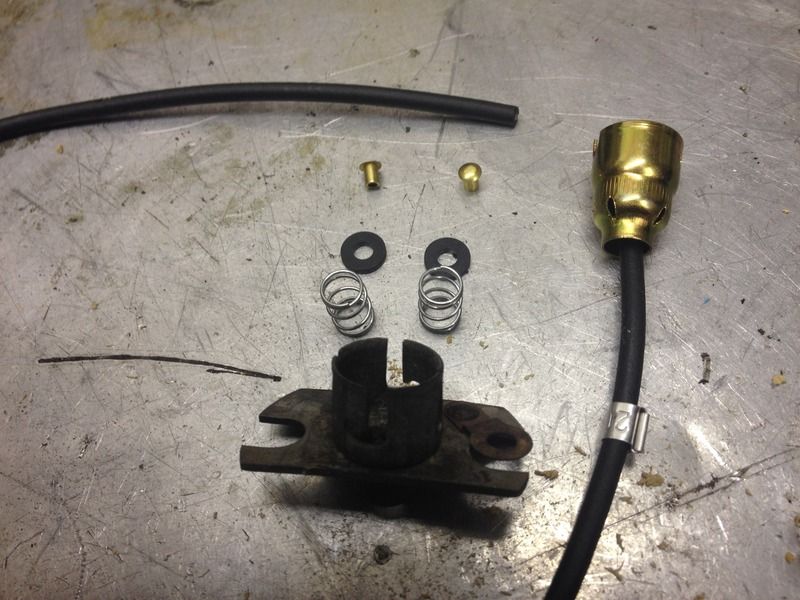
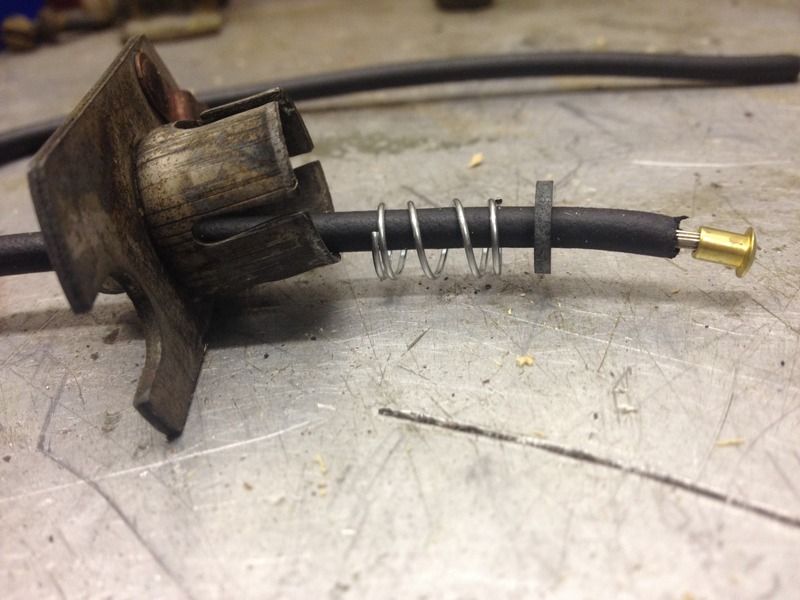
The wire is assembled like so. The new brass end will be soldered in to place.
The assembly goes together as laid out below. Although not included in the kit, I chose to replace the aged rubber grommets which go between the connector assembly and the support.
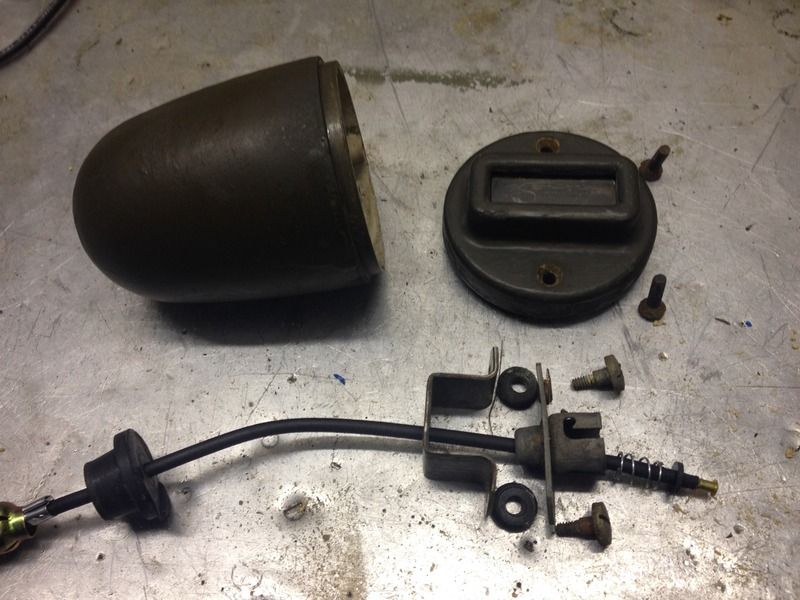
Assemble and slide in to the housing. Ensure that you have good ground continuity between the connector assembly and the housing or the bulb will not light.
Instal a bulb into the connector assembly, re-instal the door assy and you are good to go!
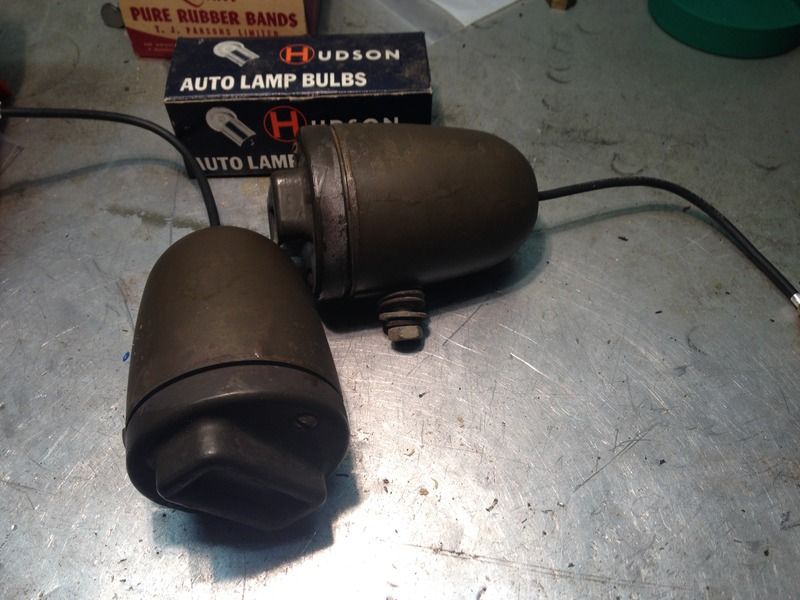
There you have it!
Disassemble and thoroughly clean all parts. Ensure to remove any remnants of the old rotted out spring that may have rusted away and fused itself to the bulb connector assembly. Here is everything disassembled, cleaned, and laid out beside the new kit.
The new kit comes complete with the fibre disc replacement, as well as brass end caps which replaces the wire ends with hardened lead solder on the old setup.
The wire is assembled like so. The new brass end will be soldered in to place.
The assembly goes together as laid out below. Although not included in the kit, I chose to replace the aged rubber grommets which go between the connector assembly and the support.
Assemble and slide in to the housing. Ensure that you have good ground continuity between the connector assembly and the housing or the bulb will not light.
Instal a bulb into the connector assembly, re-instal the door assy and you are good to go!
There you have it!
Jordan
M38 CDN
52-30718
M38 CDN
52-30718
-
Hawkshadow
- Jeep Enthusiast
- Posts: 310
- Joined: Tue Oct 09, 2012 6:00 pm
- Location: Toronto, Ontario, Canada
After running the engine up, I heard an un-mufflered noise coming from the manifold. It turned out that the weld holding the heat riser to the shaft failed.
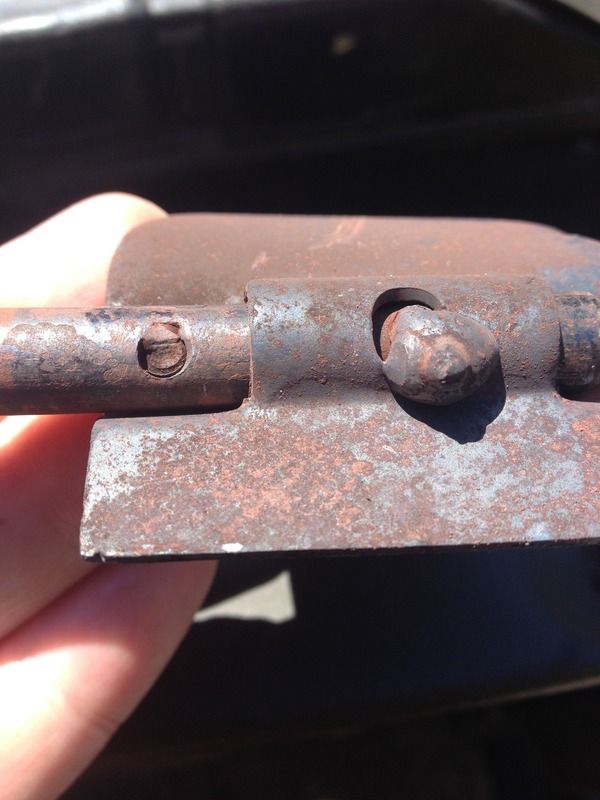
Disassemble and weld it back up.
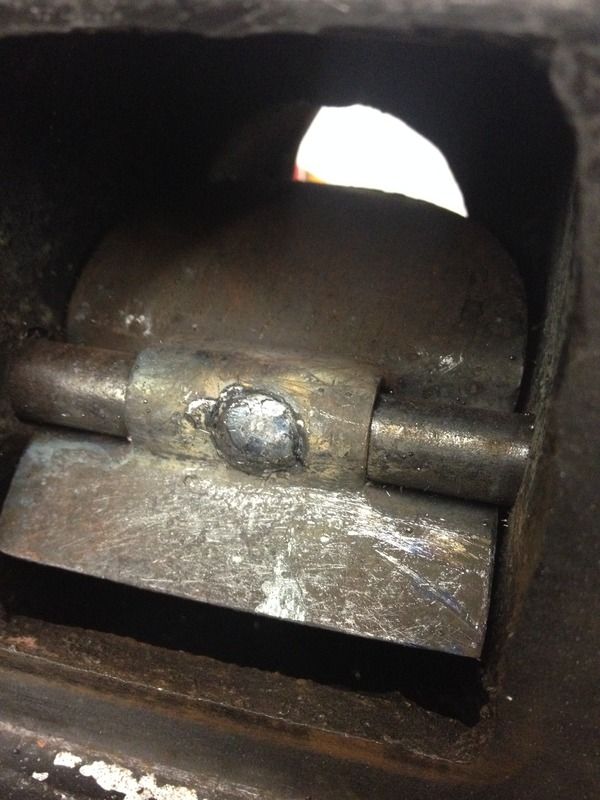
Fire up the engine and wonder why the riser appears stuck, and the manifold starts to glow... Disassemble once again to find...
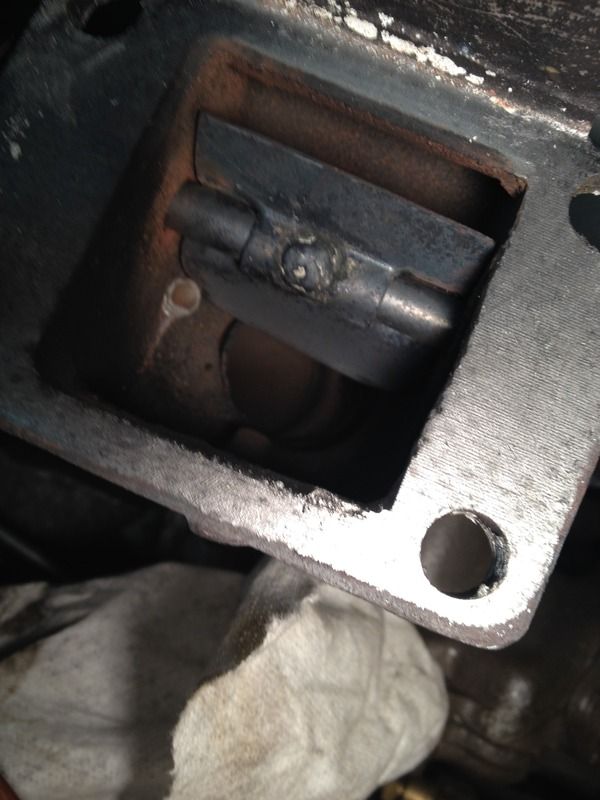
Oops, be mindful of the length of that bolt! Bolt replaced and all was well in the heat-riser world.
After dropping and re-indexing the oil pump to find its happy place for timing, it purrs like a kitten! Time for some driving.
For engine oil I'm currently running Amsoil SAE 30 break-in oil. Great oil pressure, and no oil consumption.
https://www.amsoil.com/shop/by-product/ ... sae-30%29/
Not sure what I'll transition to after the break-in... I had diesel oil, but am concerned with the high detergents. SAE 30 racing or classic vehicle oil is scarce around here.
Disassemble and weld it back up.
Fire up the engine and wonder why the riser appears stuck, and the manifold starts to glow... Disassemble once again to find...
Oops, be mindful of the length of that bolt! Bolt replaced and all was well in the heat-riser world.
After dropping and re-indexing the oil pump to find its happy place for timing, it purrs like a kitten! Time for some driving.
For engine oil I'm currently running Amsoil SAE 30 break-in oil. Great oil pressure, and no oil consumption.
https://www.amsoil.com/shop/by-product/ ... sae-30%29/
Not sure what I'll transition to after the break-in... I had diesel oil, but am concerned with the high detergents. SAE 30 racing or classic vehicle oil is scarce around here.
Jordan
M38 CDN
52-30718
M38 CDN
52-30718
-
Hawkshadow
- Jeep Enthusiast
- Posts: 310
- Joined: Tue Oct 09, 2012 6:00 pm
- Location: Toronto, Ontario, Canada
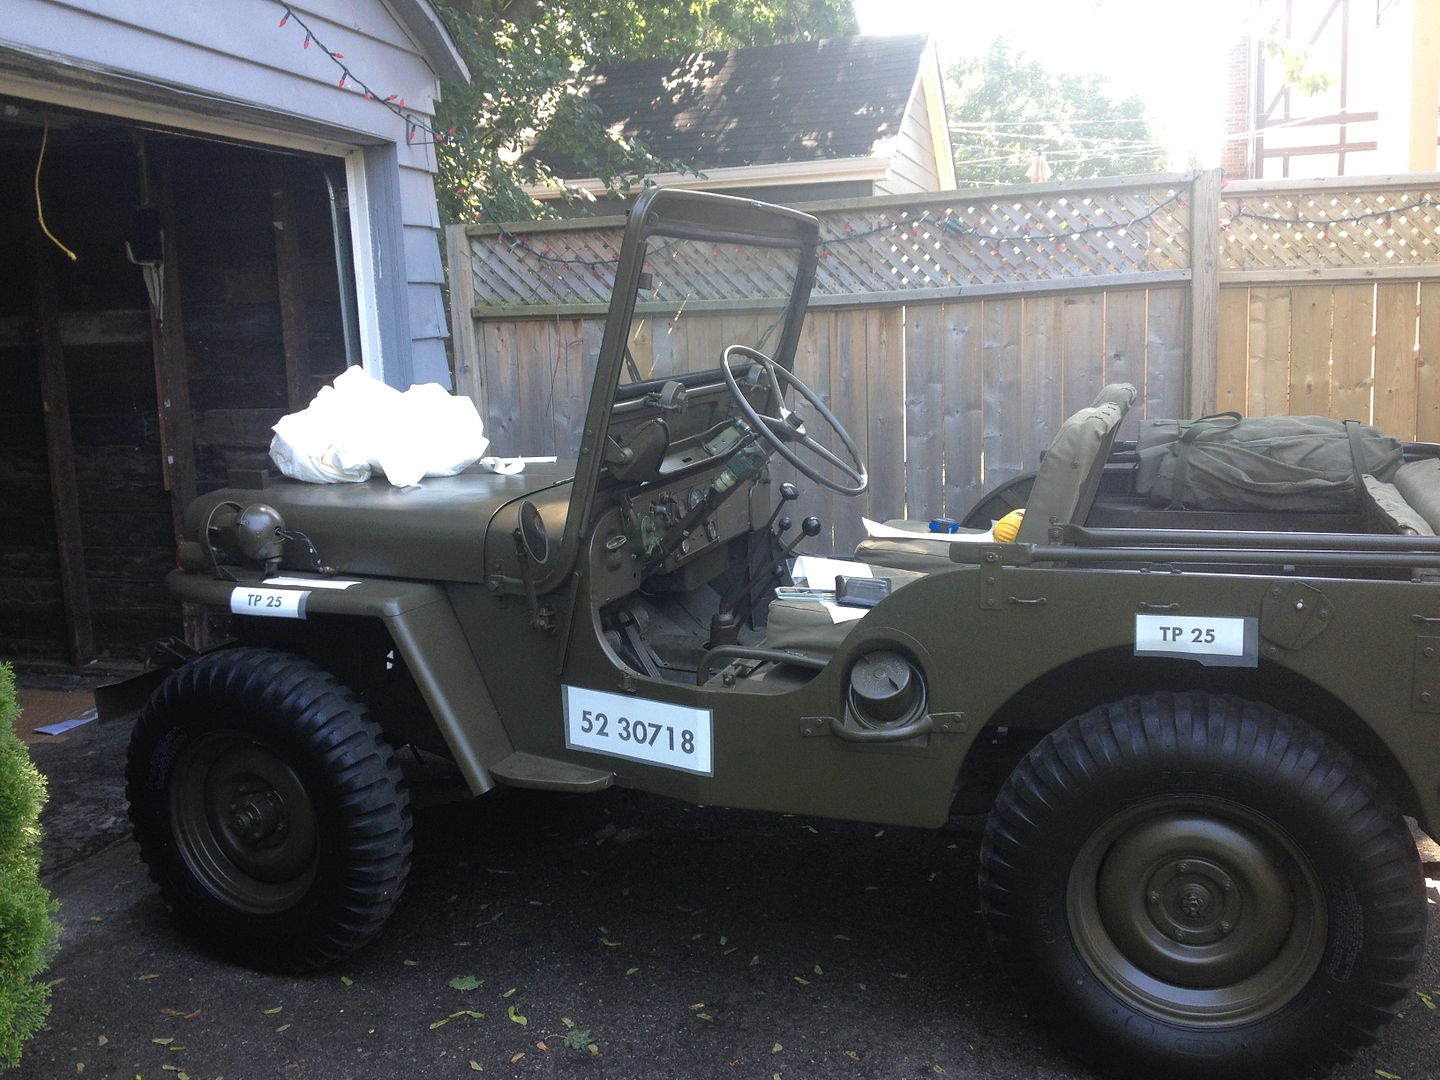
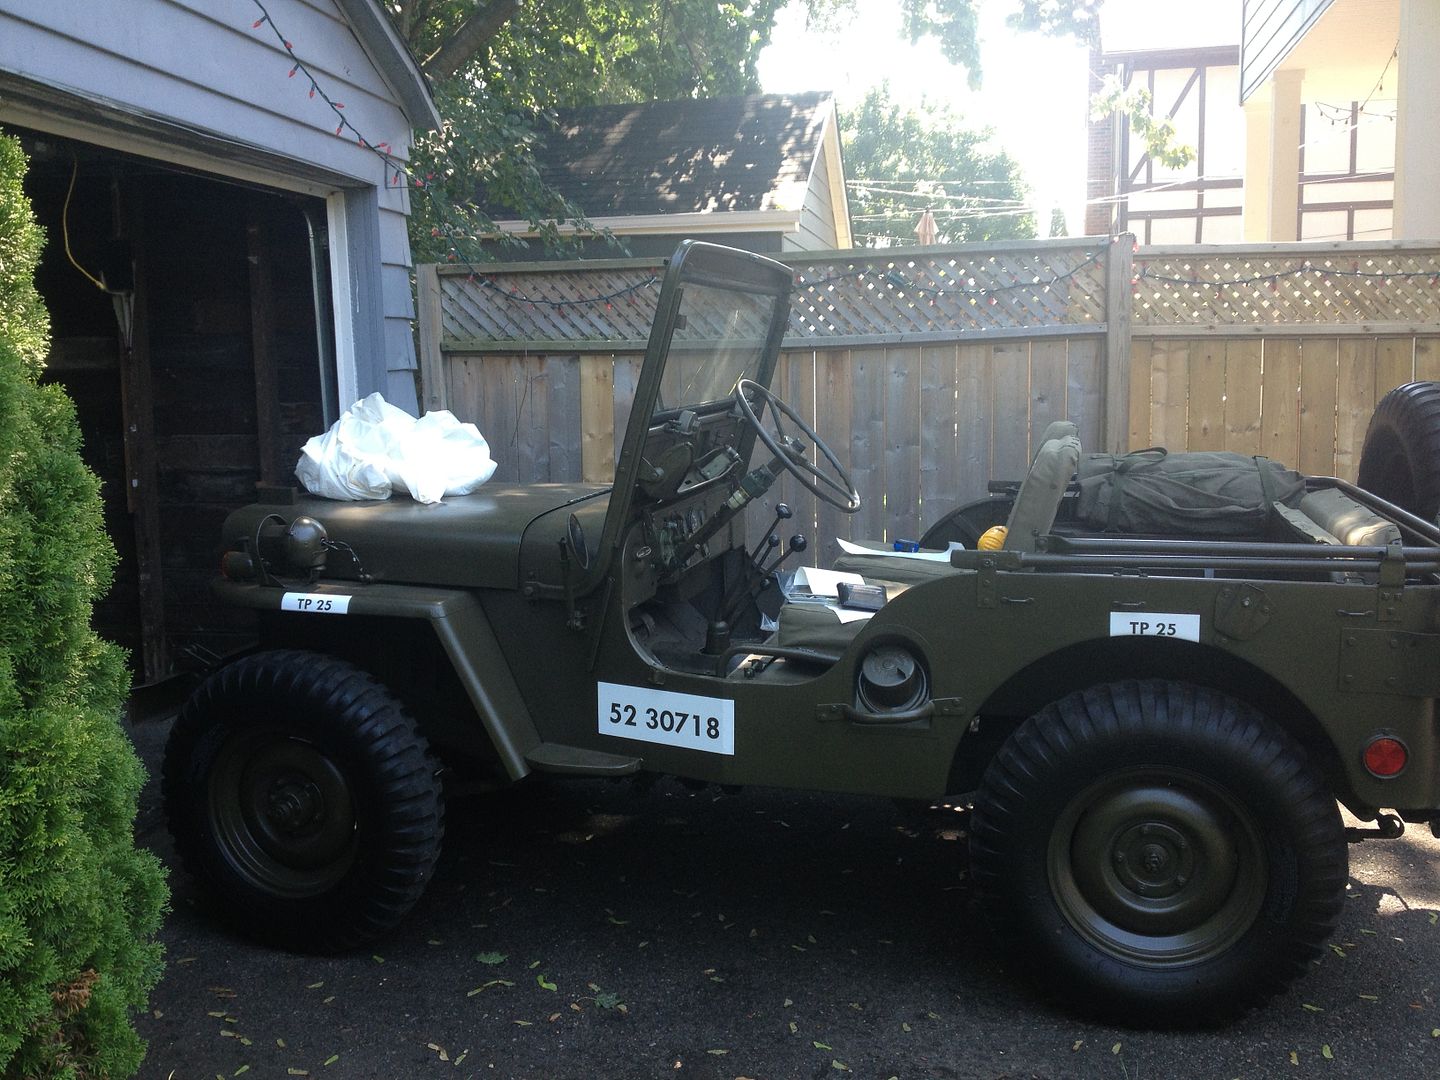
Time for a fresh coat of paint to bring it all together.

Out it came. Touch-ups are a future worry, it's ready for a drive!

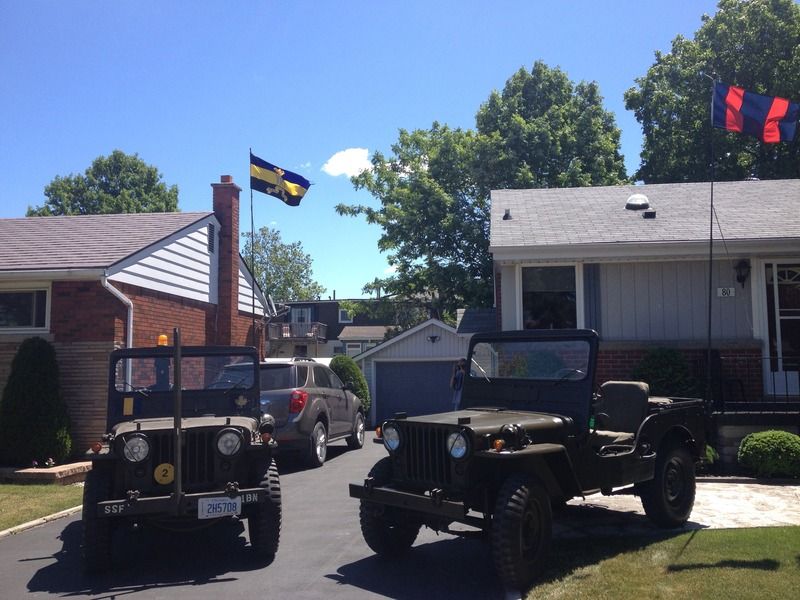
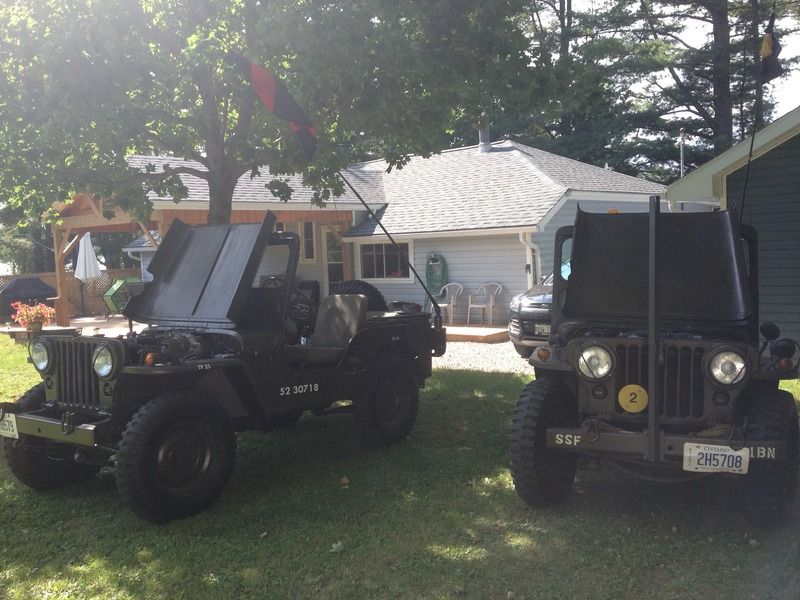
Dressed up and showing off beside its RCR (Royal Canadian Regiment) cousin.
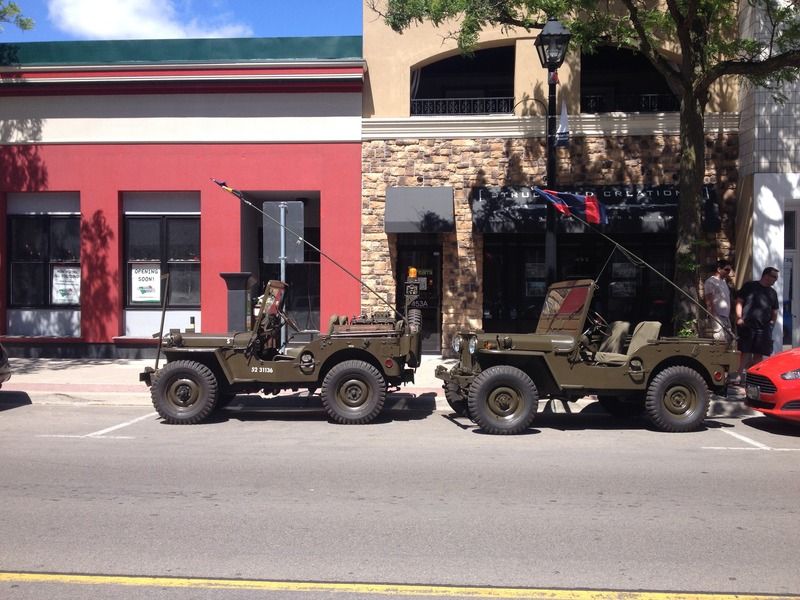
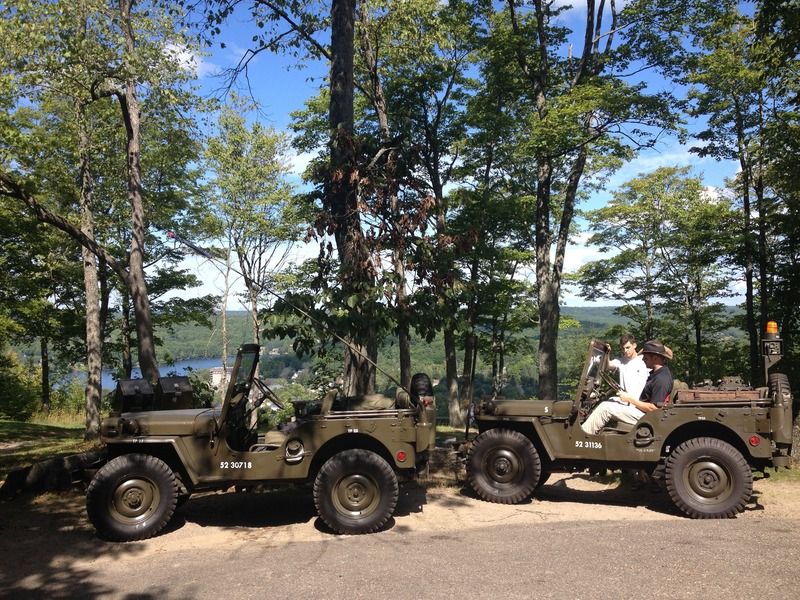
Time to get out for a first convoy drive! The feeling of 4 years of work is something inexplicable...
Here's the stop for lunch, don't tell parking enforcement.
Out it came. Touch-ups are a future worry, it's ready for a drive!
Dressed up and showing off beside its RCR (Royal Canadian Regiment) cousin.
Time to get out for a first convoy drive! The feeling of 4 years of work is something inexplicable...
Here's the stop for lunch, don't tell parking enforcement.
Jordan
M38 CDN
52-30718
M38 CDN
52-30718
-
Saberr
- Contributor
- Posts: 124
- Joined: Thu Aug 20, 2015 6:00 pm
-
coolpool

- Contributor
- Posts: 65
- Joined: Tue Dec 01, 2015 6:00 pm
- Location: Cold Lake, Alberta, Canada
Very nice hawkshadow! Can't wait to see this in person when in TO in early September if you're around. Was it as easy as it appears to paint in your driveway? That's amazing! As for your oil question, I bought regular Castrol SAE 30 oil and added a zinc additive from Lucas to address the flat tappet lube issue.
Pete Phillips
1952 M38 Cdn W/Winch 52-31658
1953 M100 Cdn 53-71069
MVPA #36514
1952 M38 Cdn W/Winch 52-31658
1953 M100 Cdn 53-71069
MVPA #36514
-
Hawkshadow
- Jeep Enthusiast
- Posts: 310
- Joined: Tue Oct 09, 2012 6:00 pm
- Location: Toronto, Ontario, Canada
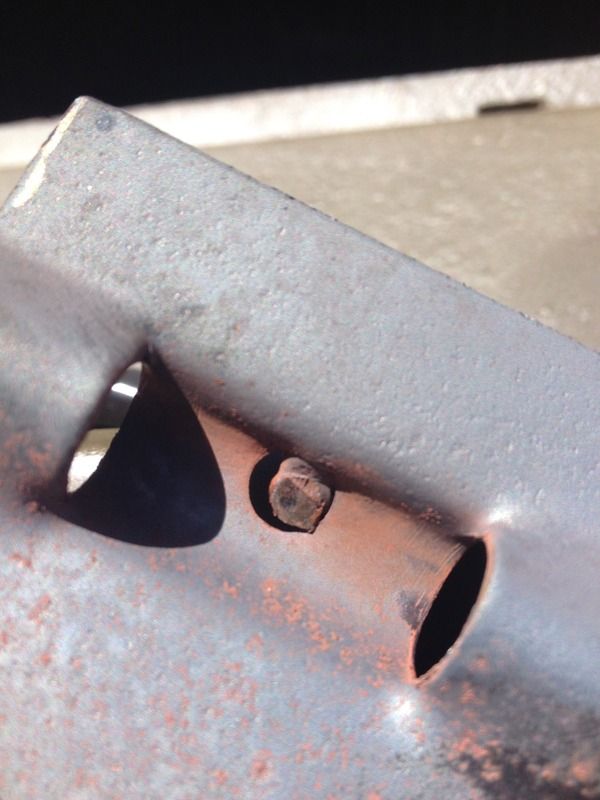
As I'm sure has been seen using a repro tub produces many frustrating head-scratching moments. Mounting the spare tire bracket was no exception. The outside of the tailgate is un-drilled while the inside has the square stamped for the bolt. Going straight through didn't line up with the hole. If I drilled through the carrier bracket I bottomed out on the wall of the carrier itself. The solution was the angle seen below.
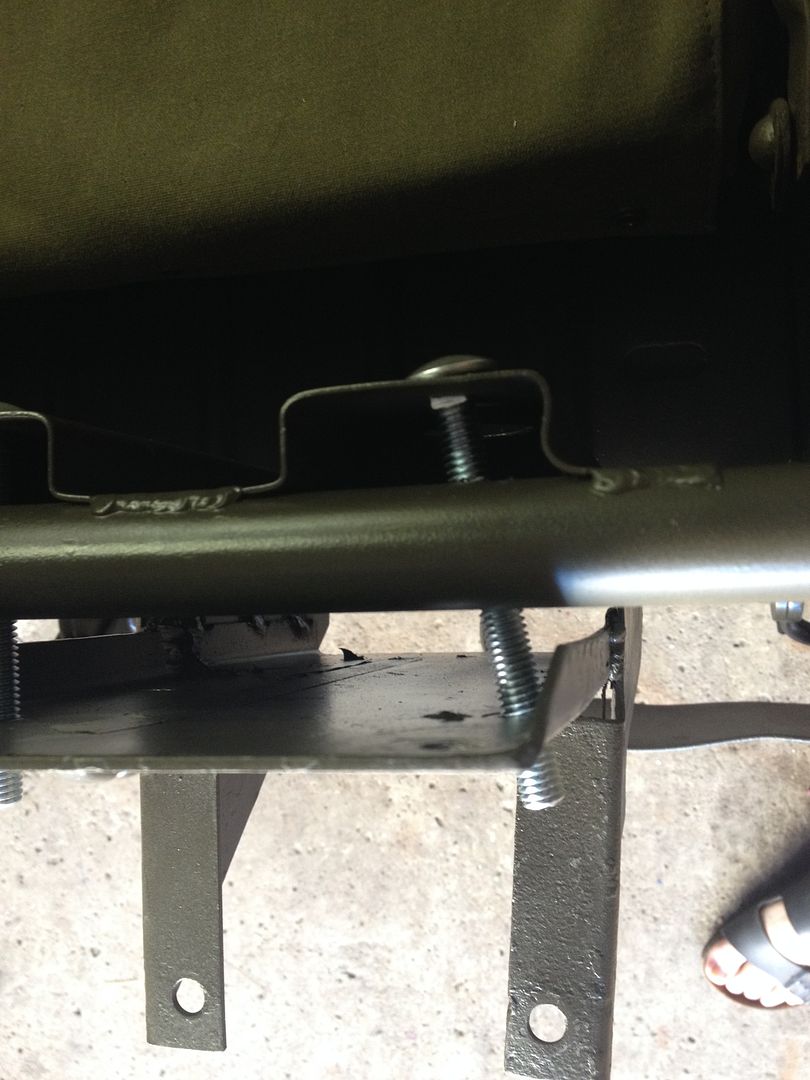
To make the spacers for mounting the spare tire bracket I had to notch the end to allow it to fit under the lip of the tailgate.
Stencils
I ordered up masking stencils from Delta Team Decals. Positive ordering experience, highly recommended. The snag in my process was poor paint adhesion between my stencil paint and my body paint. I prepped with wax and grease remover and used automotive paint but while it really wanted to stick to the masking and peel off with it, it didn't like sticking to the paint. That lead to hours of gently removing the masking with a razor and tweezers and some rough edges. However, it hasn't come off yet after some long drives at highway speed so maybe it adhered better after curing completely.
BUT here are a few pictures that make the whole thing look like a piece of cake!
Clean and apply masking
Peel off top transfer tape:
Mask everything else:
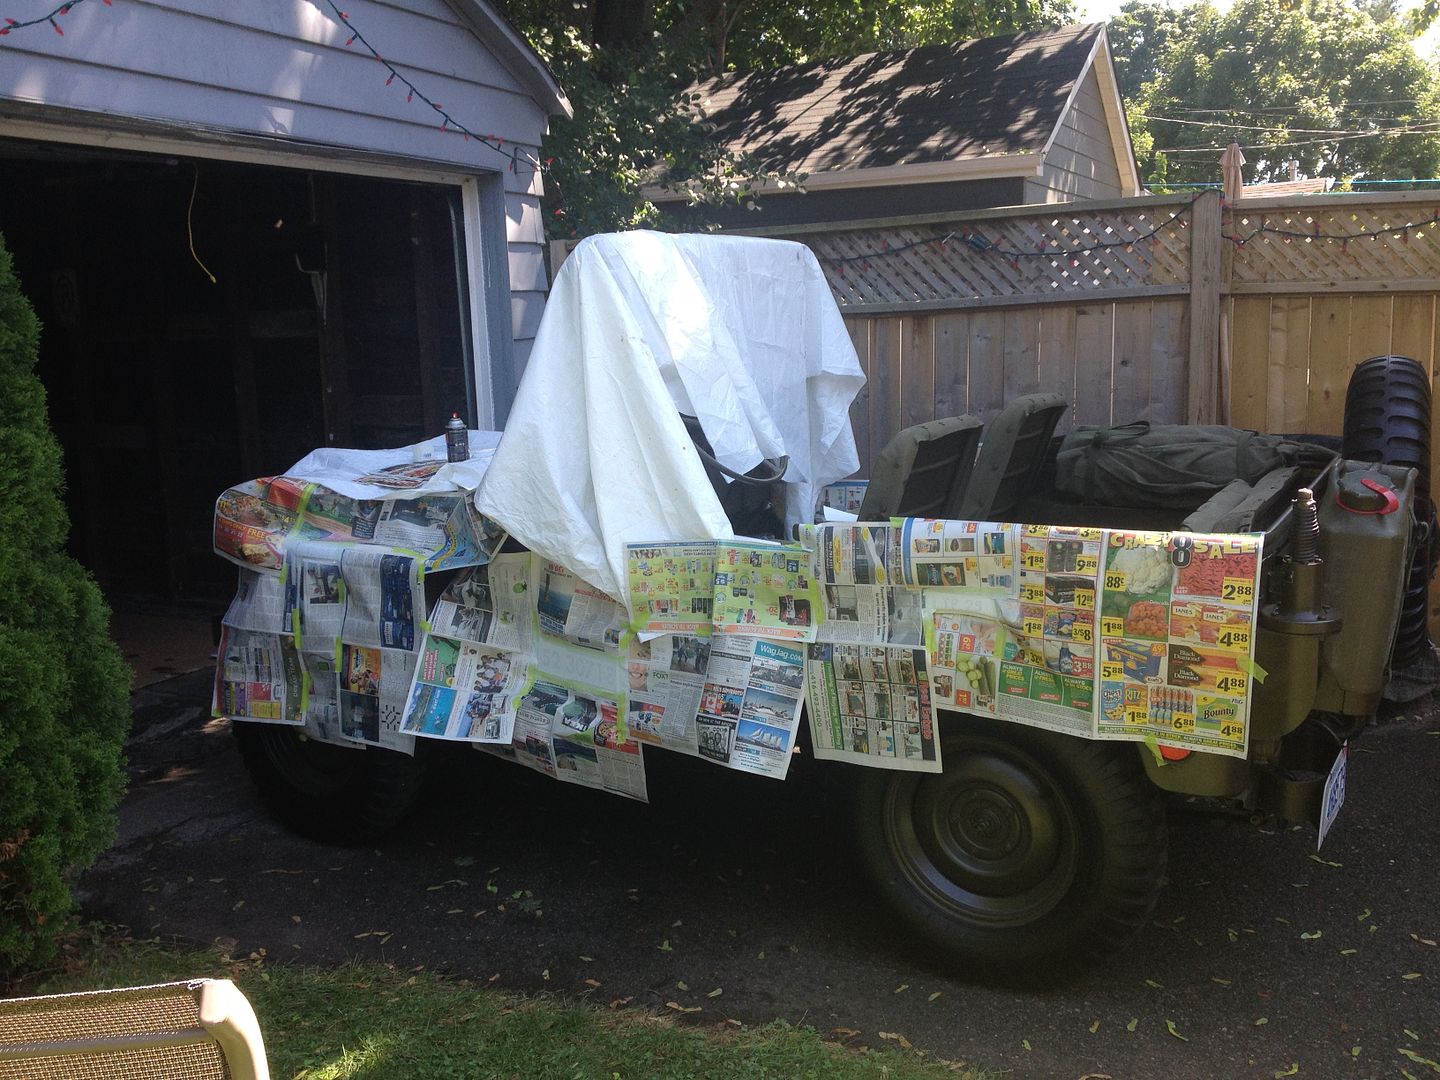
Paint, spend the hours gently removing the masking and forget to take any pictures, and when you're done.....
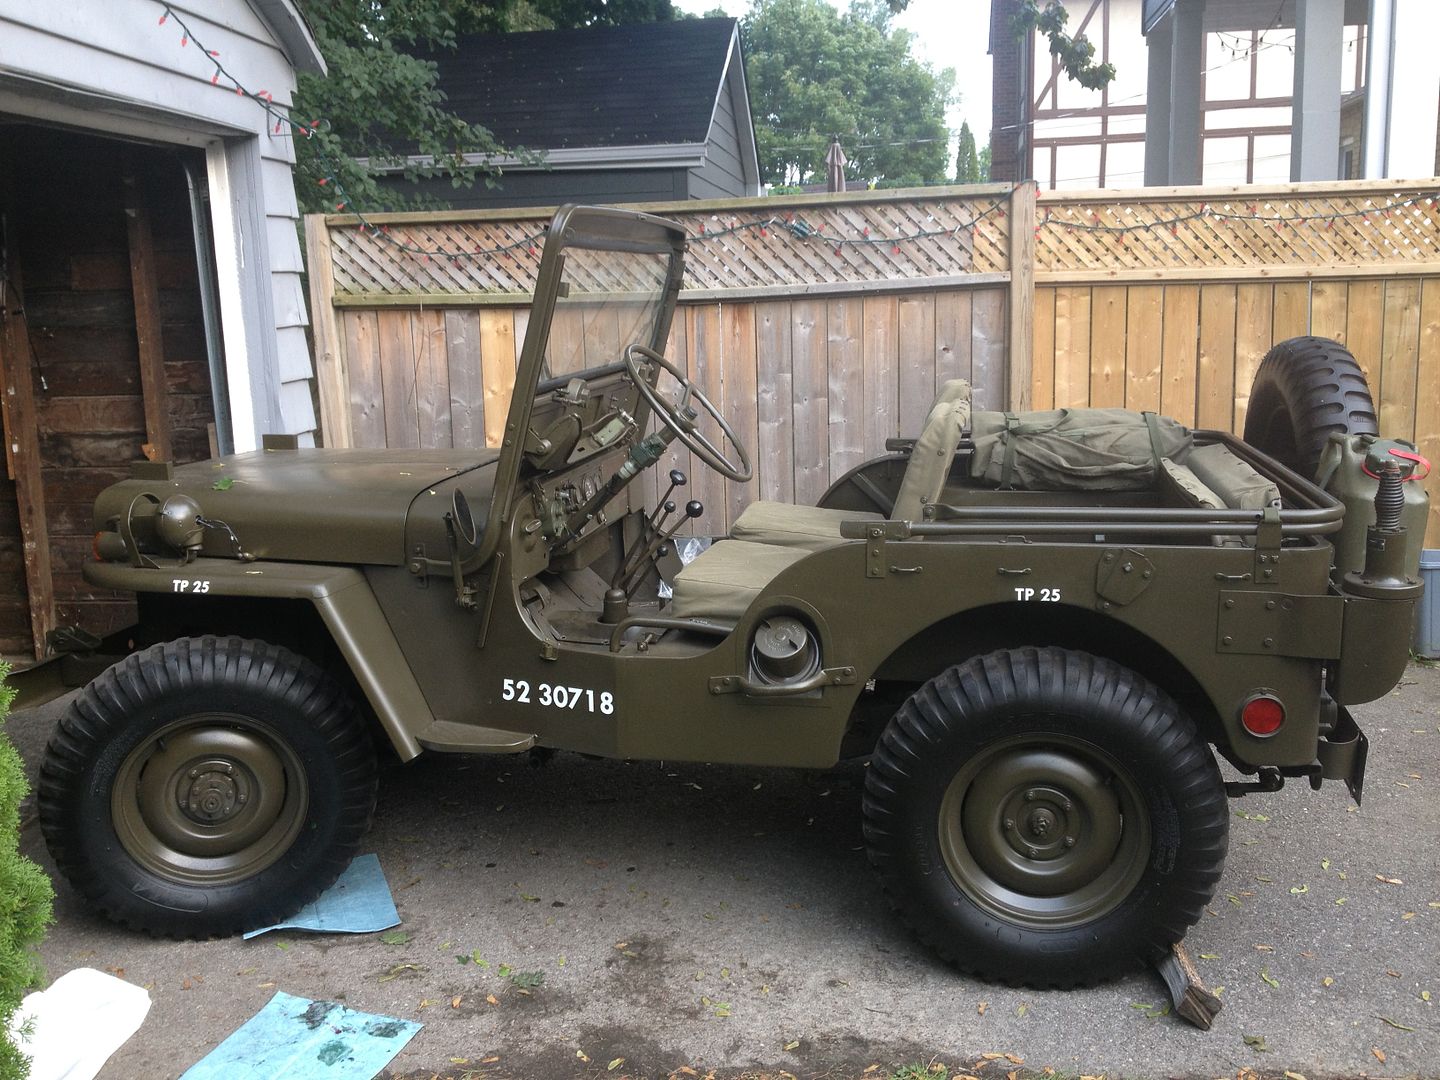
Finally, here is a picture of the quick rough wheel alignment method that I used. Rough, yes, but it got it within 1/8".
To make the spacers for mounting the spare tire bracket I had to notch the end to allow it to fit under the lip of the tailgate.
Stencils
I ordered up masking stencils from Delta Team Decals. Positive ordering experience, highly recommended. The snag in my process was poor paint adhesion between my stencil paint and my body paint. I prepped with wax and grease remover and used automotive paint but while it really wanted to stick to the masking and peel off with it, it didn't like sticking to the paint. That lead to hours of gently removing the masking with a razor and tweezers and some rough edges. However, it hasn't come off yet after some long drives at highway speed so maybe it adhered better after curing completely.
BUT here are a few pictures that make the whole thing look like a piece of cake!
Clean and apply masking
Peel off top transfer tape:
Mask everything else:
Paint, spend the hours gently removing the masking and forget to take any pictures, and when you're done.....
Finally, here is a picture of the quick rough wheel alignment method that I used. Rough, yes, but it got it within 1/8".
Jordan
M38 CDN
52-30718
M38 CDN
52-30718
-
4x4M38
- Jeep Legend

- Posts: 3487
- Joined: Thu May 29, 2014 6:00 pm
- Location: Texas Hill Country
-
Hawkshadow
- Jeep Enthusiast
- Posts: 310
- Joined: Tue Oct 09, 2012 6:00 pm
- Location: Toronto, Ontario, Canada
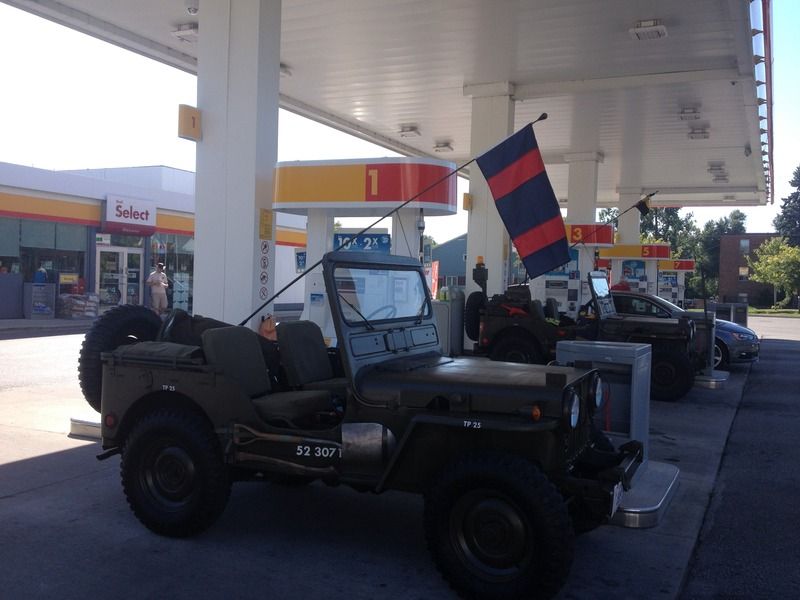
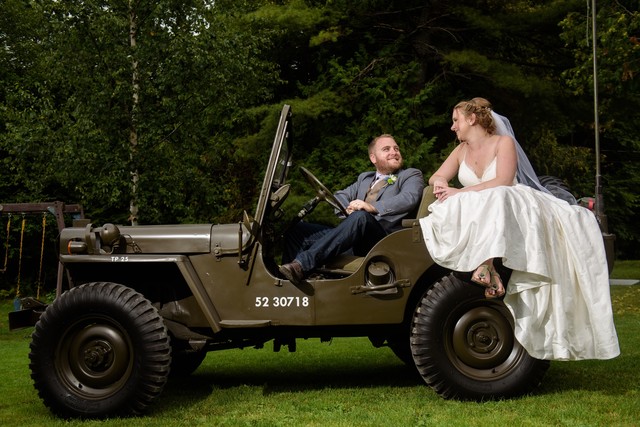
All of the years of hard work came together in the convoy jeep run. Two M38s, the groom and his best man on the road.
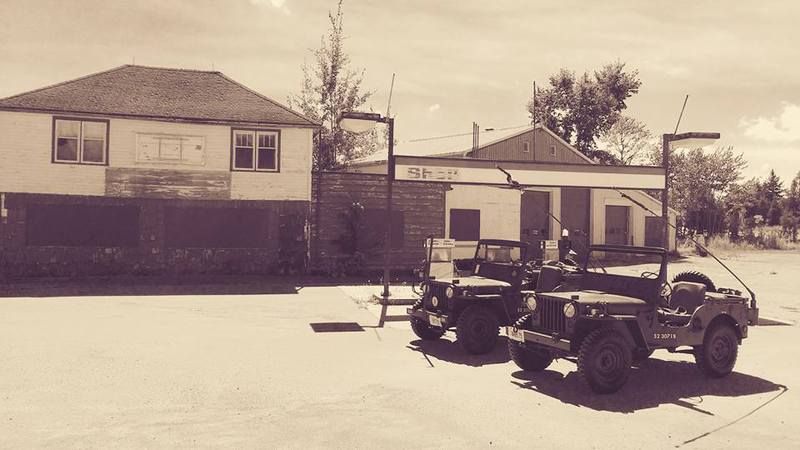
Gassing up before hitting the road
Break stop
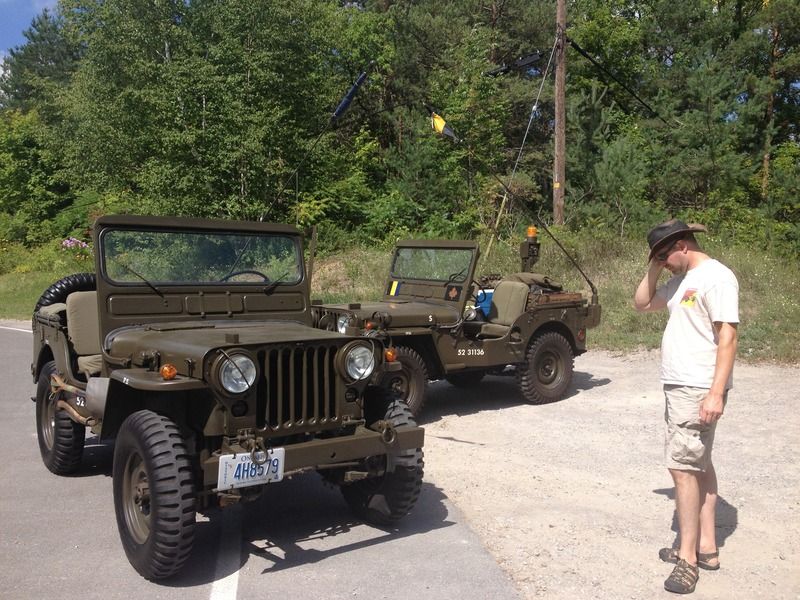
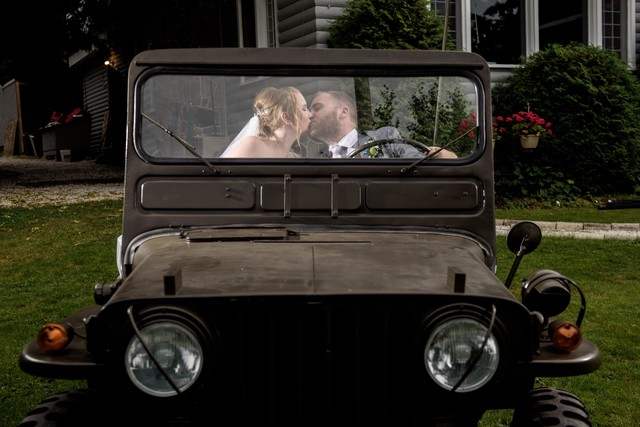
Impromptu break stop that gave a pretty cool photo op.
Arrived and cooling off in the shade.
The morning of the wedding is a great time to take a run with the guys to the local lookout!
And of course a stop at the local Legion.

And after the ceremony is said and done... Man, Wife, and Jeep.
 [/img]
Gassing up before hitting the road
Break stop
Impromptu break stop that gave a pretty cool photo op.
Arrived and cooling off in the shade.
The morning of the wedding is a great time to take a run with the guys to the local lookout!
And of course a stop at the local Legion.
And after the ceremony is said and done... Man, Wife, and Jeep.
[/img]Jordan
M38 CDN
52-30718
M38 CDN
52-30718
-
Hawkshadow
- Jeep Enthusiast
- Posts: 310
- Joined: Tue Oct 09, 2012 6:00 pm
- Location: Toronto, Ontario, Canada
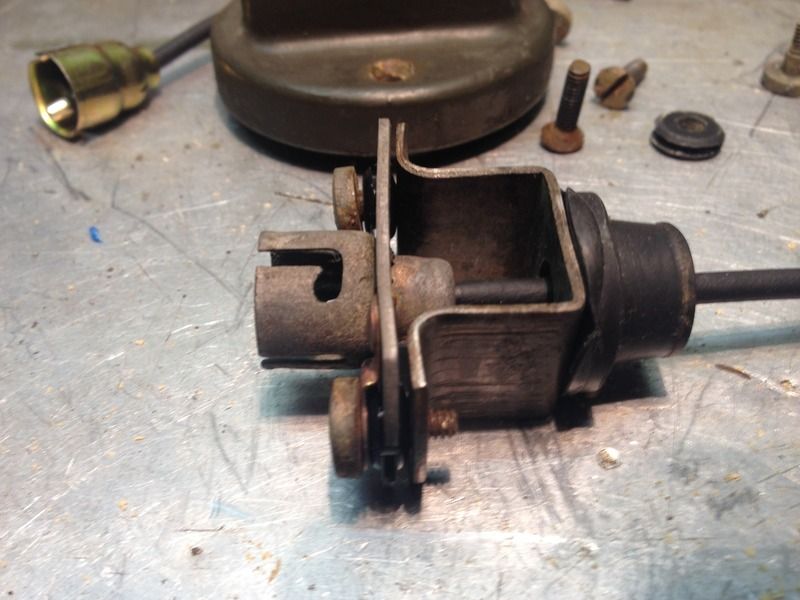
I figured that it was time to rebuild the steering bellcrank to reduce some of the slack.
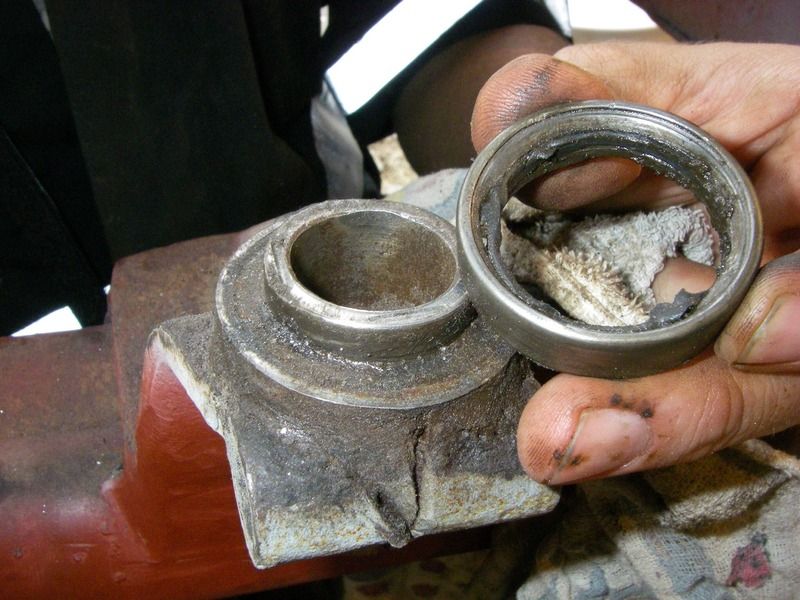
Remove old bellcrank form the jeep. I found that the old needle bearings had completely degraded and were floating around the bellcrank.
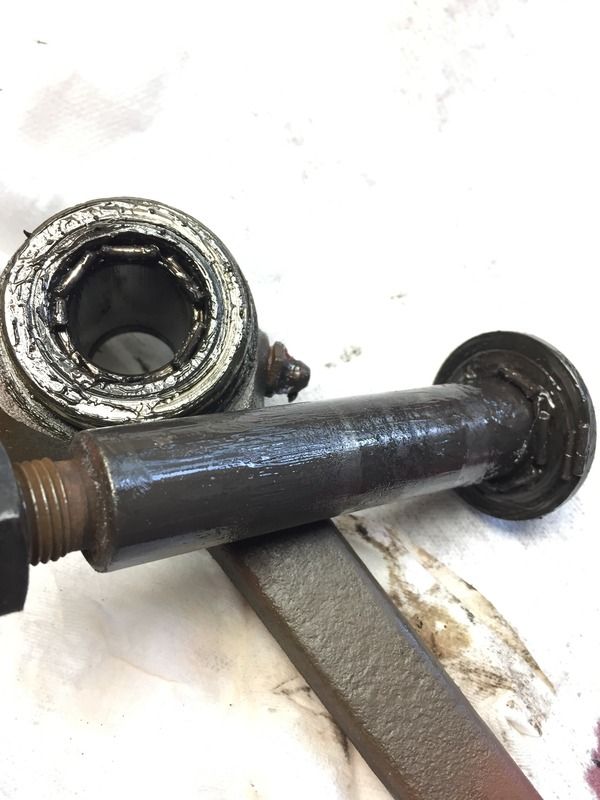
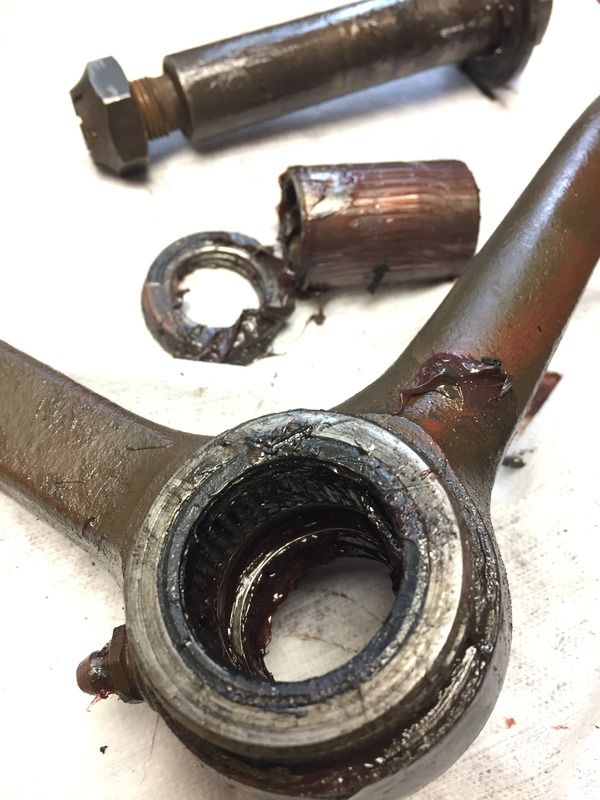
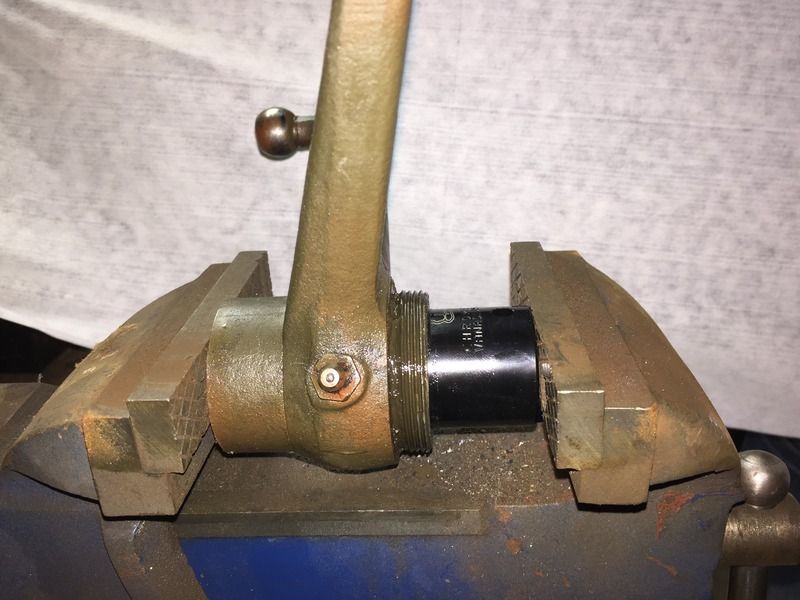
Use a socket of the exact size and press out the bearings and seals
Here is the bellcrank with all of the bearings and seals removed
Here is the new kit, available from several dealers.
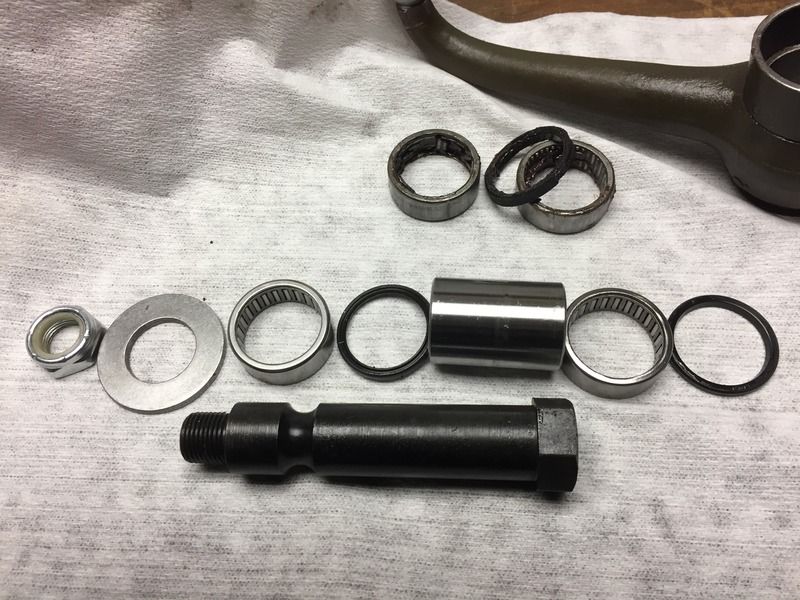
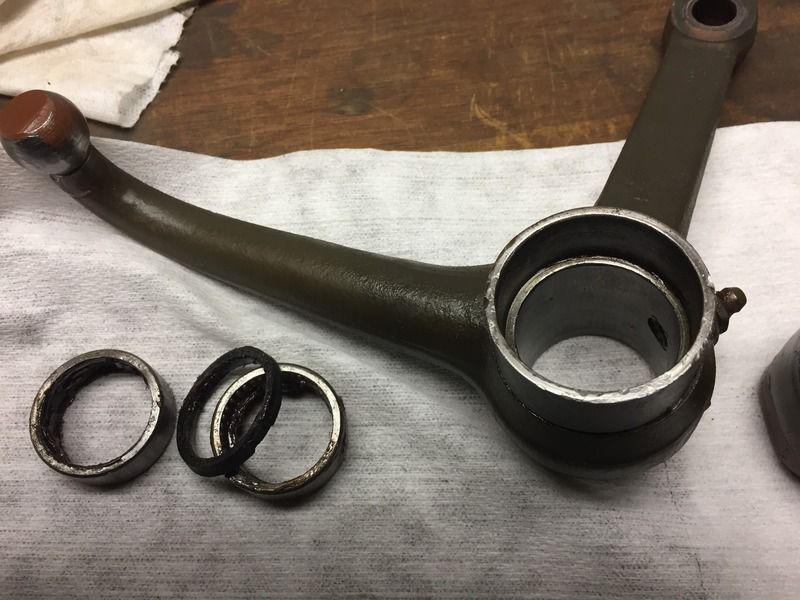
Pack the bearings with fresh grease and reassemble in reverse.
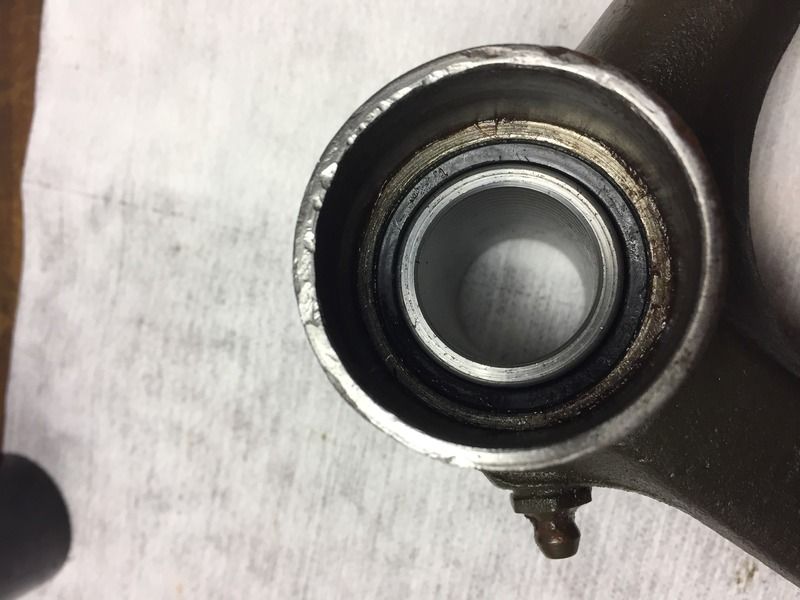
Now this is exactly the same as it was when I removed for rebuild. My question is how do the seals stay in place? With the gap on the top between the top seal and the frame, it seems to me like the seals would just get blown out if you pump in grease. It was set up with a couple of washers inside initially.
Additionally, the centre pivot shaft of the rebuild kit is notably shorter than the original and as such would be too short to fit all the way through the bracket.
Remove old bellcrank form the jeep. I found that the old needle bearings had completely degraded and were floating around the bellcrank.
Use a socket of the exact size and press out the bearings and seals
Here is the bellcrank with all of the bearings and seals removed
Here is the new kit, available from several dealers.
Pack the bearings with fresh grease and reassemble in reverse.
Now this is exactly the same as it was when I removed for rebuild. My question is how do the seals stay in place? With the gap on the top between the top seal and the frame, it seems to me like the seals would just get blown out if you pump in grease. It was set up with a couple of washers inside initially.
Additionally, the centre pivot shaft of the rebuild kit is notably shorter than the original and as such would be too short to fit all the way through the bracket.
Jordan
M38 CDN
52-30718
M38 CDN
52-30718
-
4x4M38
- Jeep Legend
- Posts: 3487
- Joined: Thu May 29, 2014 6:00 pm
- Location: Texas Hill Country
-
4x4M38
- Jeep Legend
- Posts: 3487
- Joined: Thu May 29, 2014 6:00 pm
- Location: Texas Hill Country
-
4x4M38
- Jeep Legend
- Posts: 3487
- Joined: Thu May 29, 2014 6:00 pm
- Location: Texas Hill Country
-
4x4M38
- Jeep Legend
- Posts: 3487
- Joined: Thu May 29, 2014 6:00 pm
- Location: Texas Hill Country
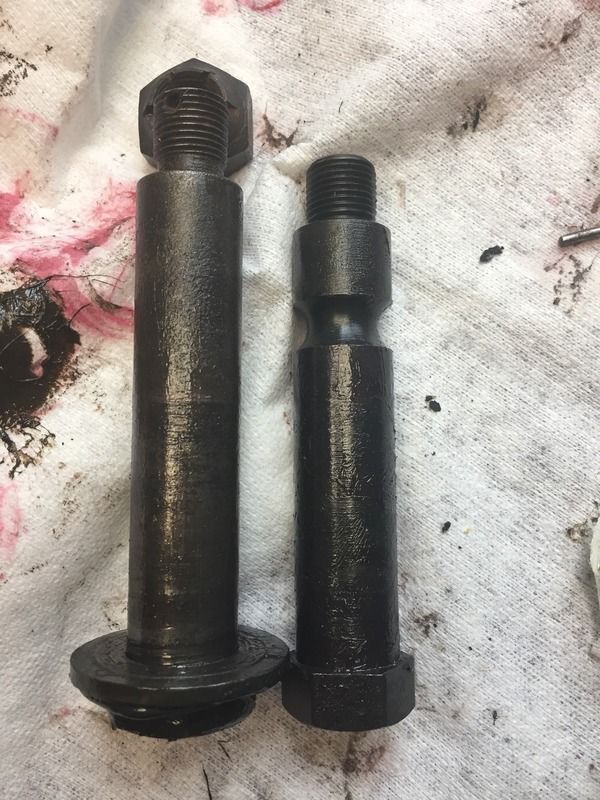
Here is Chris' photos of different bolts.
http://www.willysmjeeps.com/v2/modules. ... _photo.php
However, looking at the previous info it would
seem you have a longer bolt per CDN practice
as your jeep had a winch installed at some point
http://www.willysmjeeps.com/v2/modules. ... _photo.php
However, looking at the previous info it would
seem you have a longer bolt per CDN practice
as your jeep had a winch installed at some point
-
Hawkshadow
- Jeep Enthusiast
- Posts: 310
- Joined: Tue Oct 09, 2012 6:00 pm
- Location: Toronto, Ontario, Canada
Wow, Brian thanks for all of that information! I'm thinking that my next course is to compare the two sleeves to see if the old one is longer as well.
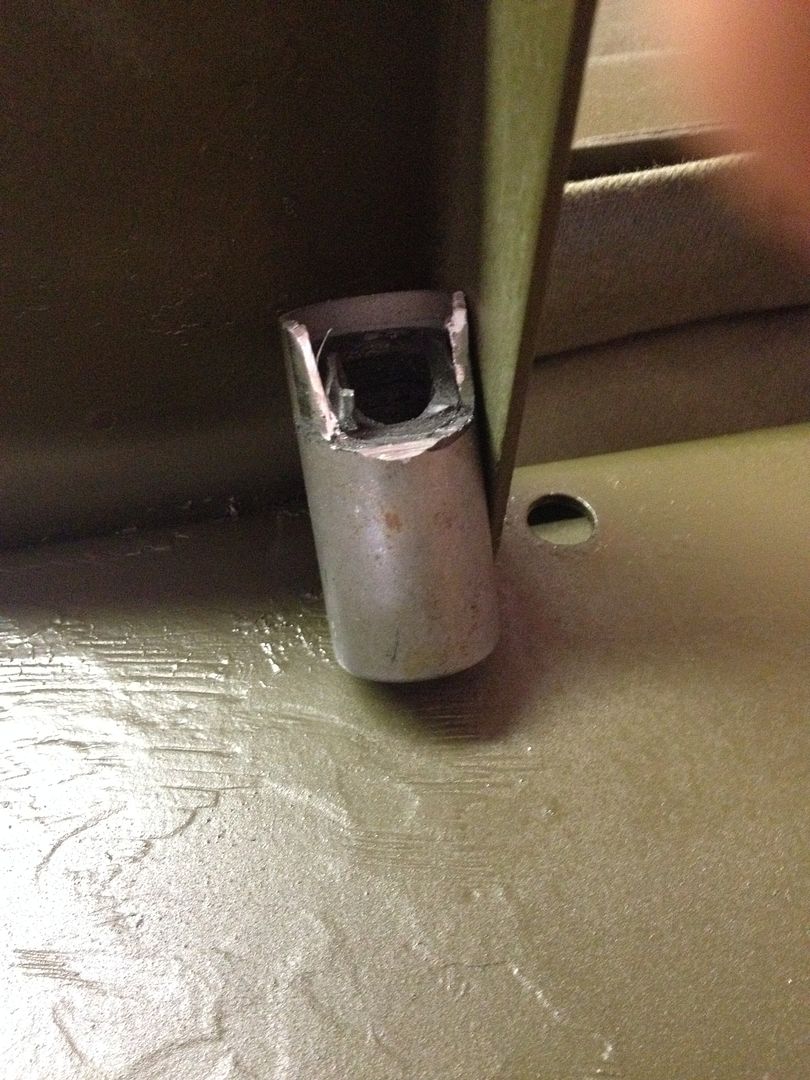
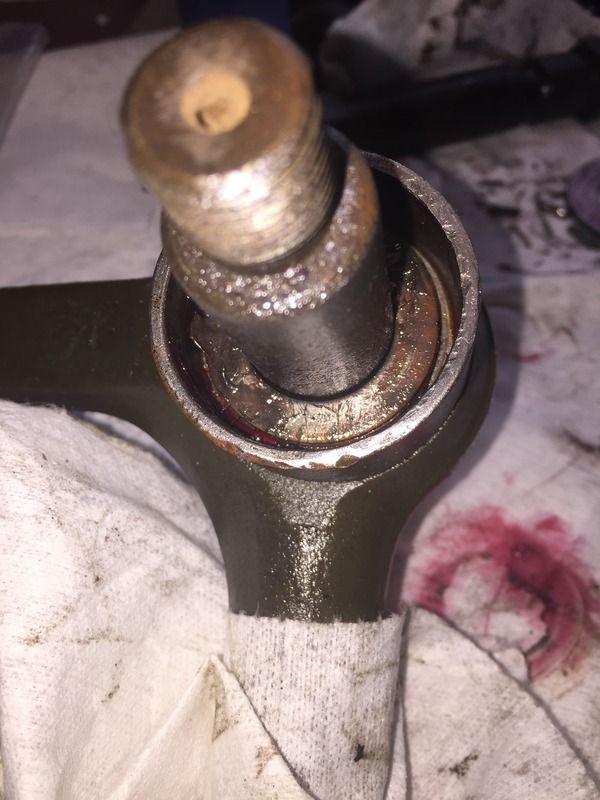
This is also probably a good spot to link back to an older thread that I posted about an unlisted part that I found at the bellcrank bracket. Perhaps this part assists in holding the seals in place? I wish that I had the part to take a look at and it wasn't missing.
http://www.willysmjeeps.com/v2/modules. ... ic&t=10678
Jordan
M38 CDN
52-30718
M38 CDN
52-30718