Page 2 of 21
Re: Sandblasting
Posted: Thu Jan 28, 2021 1:14 pm
by Naugha
[/quote]
Did you bring your tub to the blaster or was he on-site? ......My biggest dilemma is that I'm worried if I have to pay someone 10 hours to blast everything, I could buy a compressor, pot blaster and media cheaper and do it myself, and then still have a good air compressor for the next couple decades![/quote]
My guy had a local shop so he got to keep all that lead paint. He was able to accurately judge the time/cost for the job which is best with any work.
Yeah. So much to decide ..... but there is something very pleasant about dropping off that nasty old bucket and getting back bare metal .... ready for weeks of body work and painting.

Re: Sandblasting
Posted: Sun Jan 31, 2021 10:59 am
by jake138
4x4M38 wrote:Jake,
A couple of points. You need a good compressor with lots of tank space. Even the Horror Freight pot blasters will pull an inexpensive compressor and tank down in no time. Same with the die grinders. They work great using sanding discs but they eat a lot of air.
The blasters themselves...the cheapie models only come with one round hole nozzle. That’s fine, but in blasting a lot of flat areas a slot nozzle would be much more efficient, plus that big hole again eats a lot of air..
One other thing to think about. It is very easy for an inexperienced sand blaster to heat up thin sheet like our 18 gauge and warp the heck out of it.
After all, guys that do it for a living manage it depending on who you find.
Not saying you shouldn’t try it, just know it isn’t as easy as picking up a sand blast nozzle and merrily wiping paint and crap off.
Take care,
Brian
Brian,
Thanks for all the advice! In the garage at my previous house, I had built an air compressor setup onto the wall with two 20 gallon tanks fed by a 7scfm 220volt compressor. I used it with my blasting cabinet and it was enough that I could keep the regulator around 60-70 psi and blast non-stop without needing to wait for the compressor to build, but the compressor definitely did run non-stop. I selected a compressor that was rated for 100% duty cycle and never had any issues. I actually plumbed the an air conditioning condenser from a Dodge Grand Caravan in between the second tank and the air/water seperator and it worked great for helping to pull heat and moisture out of the air. I'll post a picture later, it was a great setup that I sold with the house last summer.
I've never seen a flat nozzle so I will definitely look around for some! I had two size round nozzles with my cabinet but I never even tried using the smaller one because I was worried, as you mentioned, about melting holes in my projects. There definitely is a fine line between helping and hurting!
Naugha wrote:
My guy had a local shop so he got to keep all that lead paint. He was able to accurately judge the time/cost for the job which is best with any work.
Yeah. So much to decide ..... but there is something very pleasant about dropping off that nasty old bucket and getting back bare metal .... ready for weeks of body work and painting.
I know, dropping off the fender was nice just to see some results. I still have a few months of research before I'm ready to pull the trigger either way.
Thanks again for the advice gentlemen.
~Jake
Update
Posted: Tue Mar 23, 2021 10:31 am
by Naugha
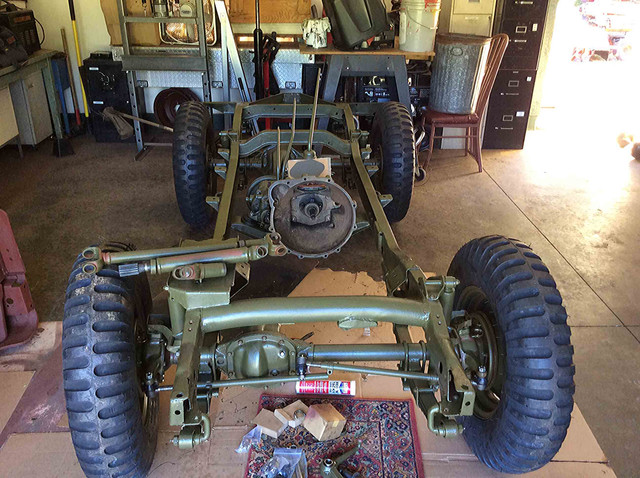
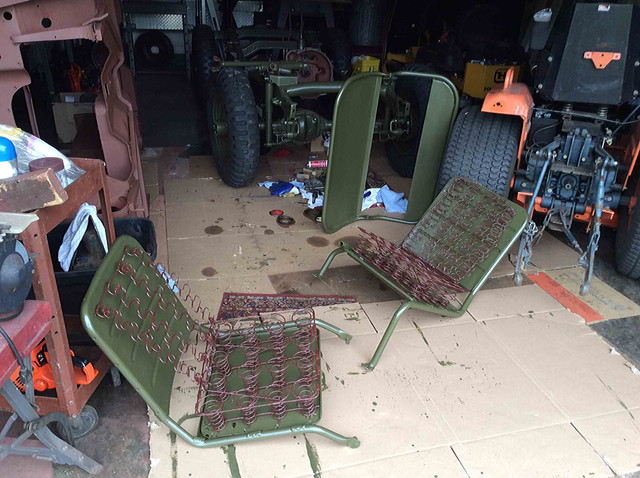
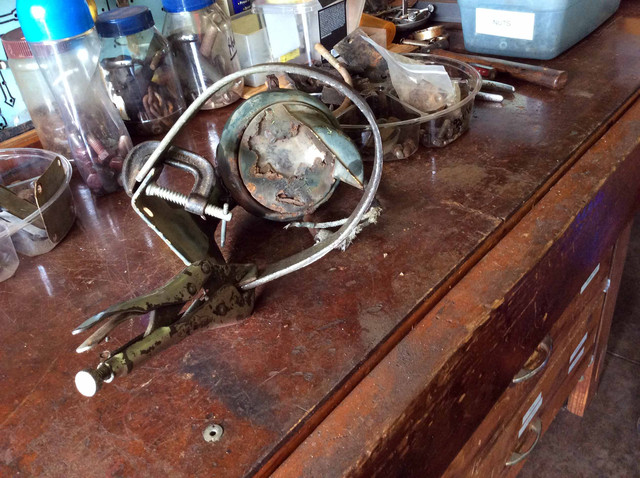
To improve my attitude I decided to reattach some parts .....
Hmmm, leg bone connected to thigh bone, right?
Better check the manuals & albums.
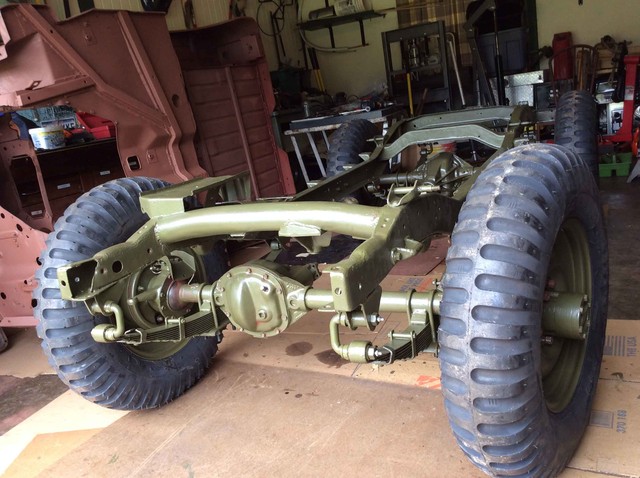
Yeah, the locking hubs are not 'motorpool' but they look kinda cool.
Posted: Wed Mar 24, 2021 7:14 am
by 4x4M38
And they are handy.
Posted: Wed Mar 24, 2021 7:19 am
by Ryan_Miller
Running gear is looking good. I remember when mine was at that stage where it could be rolled around and if was a big milestone.
Waiting for the Machine Shop
Posted: Thu Apr 15, 2021 4:38 pm
by Naugha
Still waiting for my GoDevil
Posted: Tue Jun 15, 2021 5:54 am
by Naugha
The engine may be finished any day now, yeah, right.
We must be patient. Bugging the best machine shop in town is unwise.
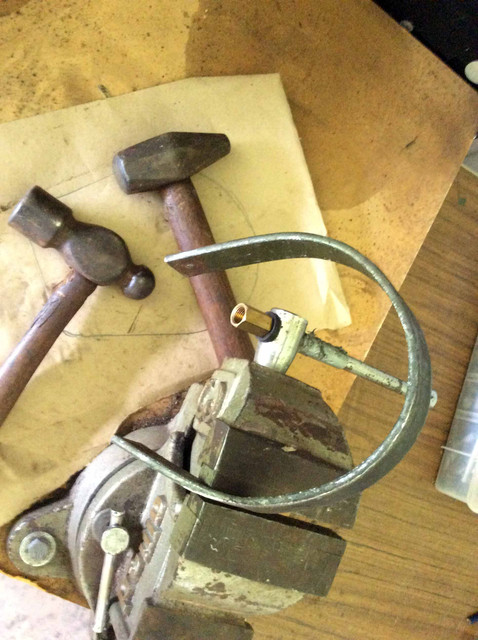
I have been busy with small stuff that for me is often difficult. Early on I decided to refurbish as many original parts found on the jeep as possible.. Several hard to find take off parts I purchased are also getting a face lift. Soon I will add some pics of these sub-projects.
As to refurbishing/ building/ buying/ repo or NOS or take off, it’s mixed bag. When you finish successfully making or rebuilding a part, life is good. Nothing is better than proper original stuff. My M38 came with an above average body & parts but far from everything. Some original stuff is soooo hard for me to find, and yes I have sinned in a few areas that could be revisited.
Is making or refurbishing a part ‘worth it’? Why not just buy NOS or repo?
Those are what my HS English teacher called esoteric questions.
For now I have sworn off major sub-projects, maybe.... but I do have the jeep’s original light switch (all the levers work) and last year I bought a couple of those NOS wiring harness components that you see on ebay. I even found a good deal on a mil spec crimping tool. The original harness is in a box in the barn ... roasted & toasted but the jeep was on the road in Texas for decades using those wires with a 24v system.
What harm could come from laying out a large cardboard template on the barn floor using the proper wiring diagram for a late 1952 M38, play connect the dots and then test the circuits with my HF multimeter?
That sub-project would force me to open my wallet and buy a new harness. They say $800 but we know it’s closer to 1k after you get all the goodies.
There is just something unsettling about a 1k rewiring expense. It’s not the money, it’s the principle of the thing .....
uh, well, no.... scratch that..... yeah, it’s the money.

Posted: Tue Jun 15, 2021 6:09 am
by jake138
I personally am a huge proponent to 'build before I buy'. I enjoy making my little brackets, clips, hangers and whatelse. Sometimes I spend way more time than it was probably worth, but there's always the satisfaction at the end of knowing it was hand-crafted. However, my M38 is also a resto-mod and much further from a true restoration than what most people on this forum have built.
Posted: Tue Jun 15, 2021 6:10 am
by 4x4M38
Don,
You don’t have to spend that kind of money.
There are replacement harnesses for other vehicles that only require eliminating or swapping a couple of wires, and the cost is or was closer to 250-300. The diagrams and instructions are here on Wes’ pages.
Posted: Tue Jun 15, 2021 6:47 am
by 4x4M38
Here’s an M35 front harness:
https://www.ebay.com/itm/161786339781
Maybe Wes can pinpoint the photos he marked up on how to adapt to the M38. I can’t seem to find them.
Posted: Tue Jun 15, 2021 12:17 pm
by Naugha
jake138 wrote: Sometimes I spend way more time than it was probably worth, but there's always the satisfaction at the end of knowing it was hand-crafted. However, my M38 is also a resto-mod and much further from a true restoration than what most people on this forum have built.
I am usually happy with the outcome of a build/refurbish/DIY effort but during the process my attitude can sometimes tank. Hard work and being clever only gets me so far. Some things demand a real mechanic and end up at the shop.
‘Resto-mod’ sounds cool.
I hope my project will finish close to a ‘motor pool / daily driver’..... with a few things you can’t see left over from the PO’s decades of running dusty Texas roads. After all, most of these survivors had a Bubba.
Posted: Tue Jun 15, 2021 12:58 pm
by Naugha
4x4M38 wrote:Don,
You don’t have to spend that kind of money. There are replacement harnesses for other vehicles that only require eliminating or swapping a couple of wires, and the cost is or was closer to 250-300. The diagrams and instructions are here on Wes’ pages.
I bought some harness material off ebay last year and the original harness has douglas connectors and other components that maybe could be used.
Several threads caution that the task can be daunting to neophytes but I do plan on a dry run with the materials I have on hand.
Maybe reproduce the M38 wiring harness on a ‘cardboard jeep’ mock up with the runs being the proper length etc. Something to do. Could be fun.
Posted: Tue Jun 15, 2021 1:41 pm
by 4x4M38
Somewhere hereabouts one of our Brethren made a drawing with the lengths of the various cables marked out.
BO Bracket Refurb
Posted: Tue Jun 15, 2021 2:11 pm
by Naugha
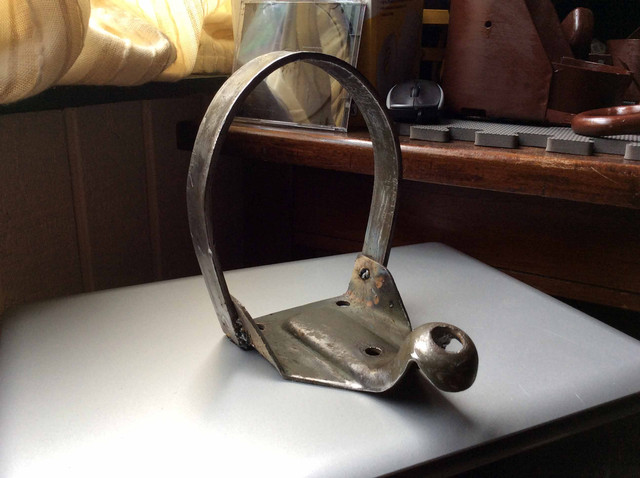
I wanted original M38 gingerbread but some stuff is hard to find and pricey.
Found what I think is a M38 BO Light. The light was toasty. The bracket was off and twisted. The price was low. It came with that thick cone shaped washer that is under the light. Plan to add the rubber pad that one thread says went between bracket and fender. I have a NOS BO lamp that will go with the unit.
You can buy a repo bracket that is ready to go for what the take off /as is unit cost me ($35) .... only saw one original ($130).
I imagine folks here know a guy that has a shelf of NOS M38 carbs for $45 each and throws away damaged parts .... but I dont know that guy.

Will add more refurb stories/ pics later.
Steering Wheel Refurb
Posted: Tue Jun 15, 2021 2:49 pm
by Naugha
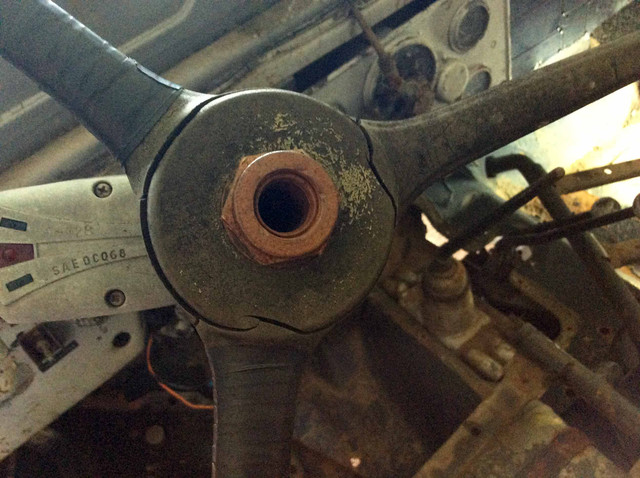
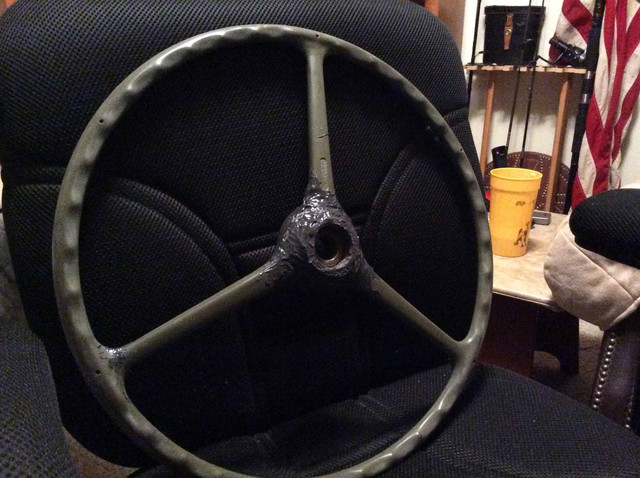
Here is what I did with the original steering wheel.
Scrape lightly with sharp knife, Scrub with dish soap & steel wool
Dremel Tool with ball head/ clean & widen the cracks
Fill with JB / add some of the green plastic shavings to the JB
Dry over night/ Shape with Dremel/ Fine sandpaper/ steel wool
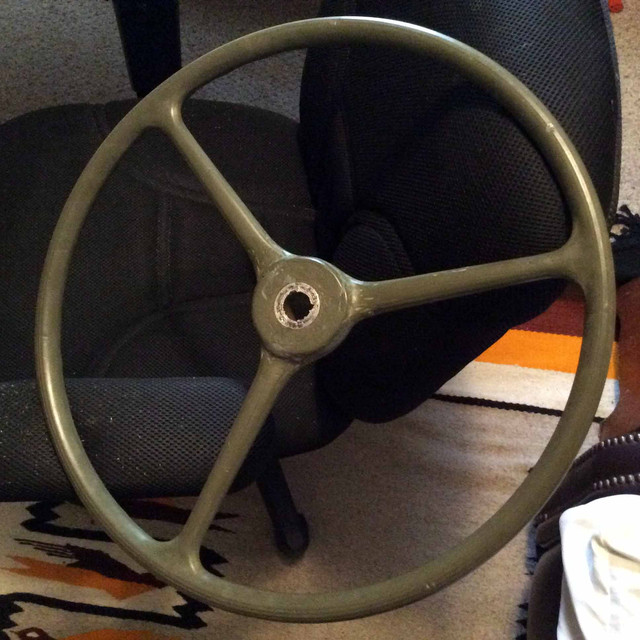
I am trying to keep almost everything original to the jeep.
Yes, that last pic is the same wheel. No paint.