Blown Head Gasket - M38

Discussion topics on Willys Overland M series vehicles
User avatar
wesk
Site Administrator
Site Administrator
Posts: 16460
Joined: Sun Apr 03, 2005 6:00 pm
Location: Wisconsin
Contact:

Post by wesk »

I noticed the rear of the oil pan gasket at the rear main seal has been cut out by hand over where the ends of the seal protrude. Doesn't seem normal to me, and nothing in the manuals or forums about it. What are these "buttons" on the end of the seal? I'm guessing I don't have a rope seal but rather the neoprene rubber seal.
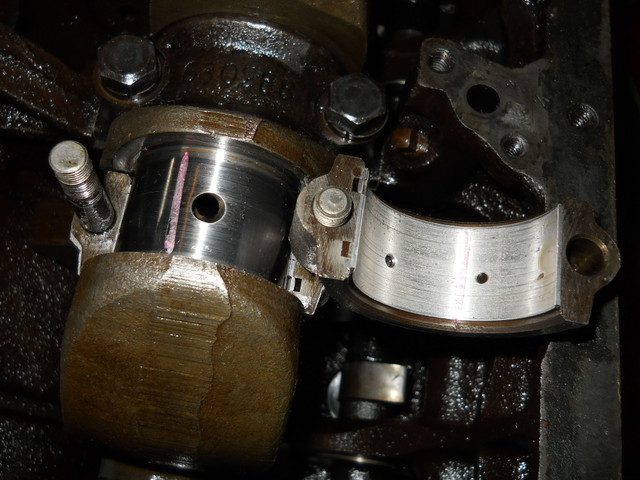
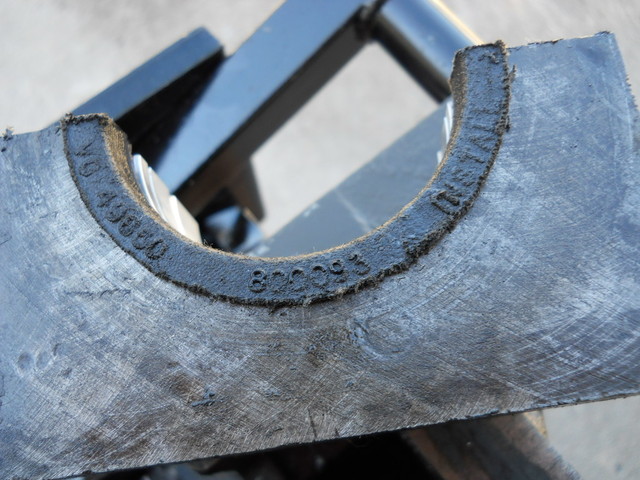
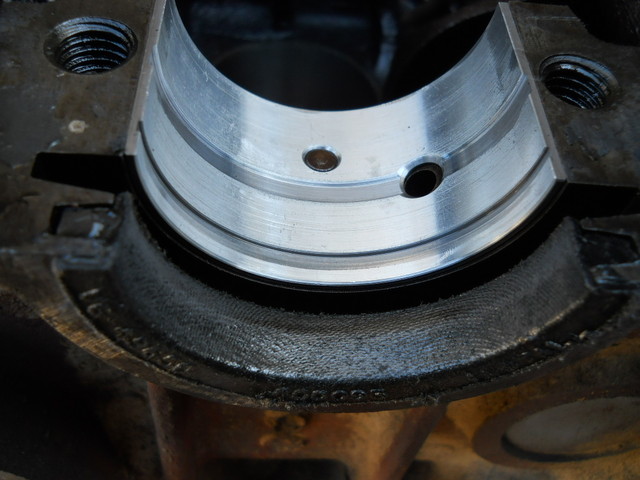
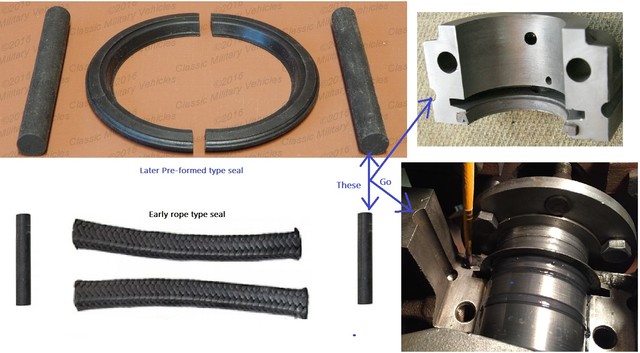
Those vertical rubber seals are for sealing the outer gap between the cap & the block. You won't know weather you have a rope seal or preformed neoprene seal until you remove the cap. Both type seals use the same pair of cap tubular seals. The installation of those cap tubular packings is shown in the TM< 9-1804A page 86 & 87. Looks like someone forgot to trim the excess seal off before installing the pan.

Image
The removable "cup" on the bottom of the exhaust valve has me confused.....not in the TM that I found. What is it called?
It's called a rotator cup. It rotates the valve stem to keep the valve face reseating constantly. A later innovation found on the F134. This is why it helps to have more than just the M38 TM's. These rotators are covered in the civvy manuals and the M38A1 manuals. The M38A1 TM 9-8015-1 pages 120 & 121 are a good place to start.
I noticed no lock washers on the bolts to the oil pick-up tube inside the pan.
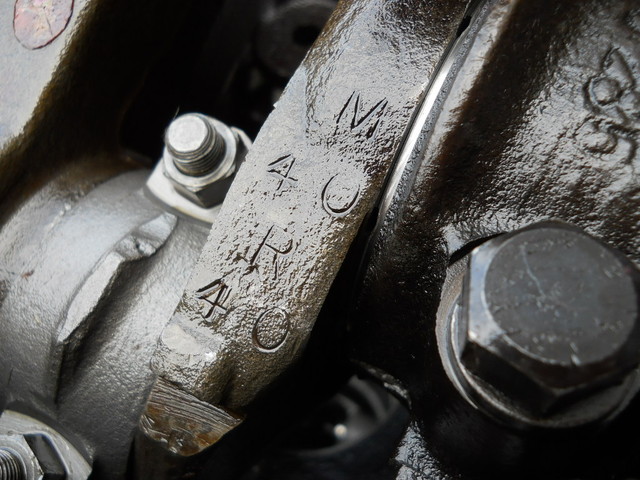
Obviously the original or proper new bolts with captive lockwashers as listed in the ORD 9 were not used!
there are no jam nuts ("PAL nuts") on the connecting rod bolts.
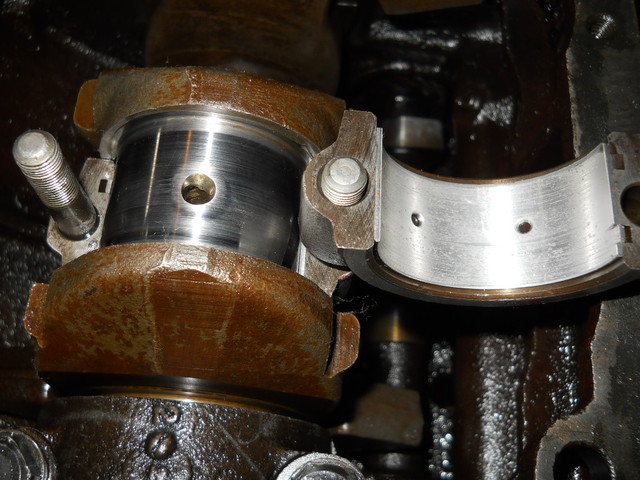
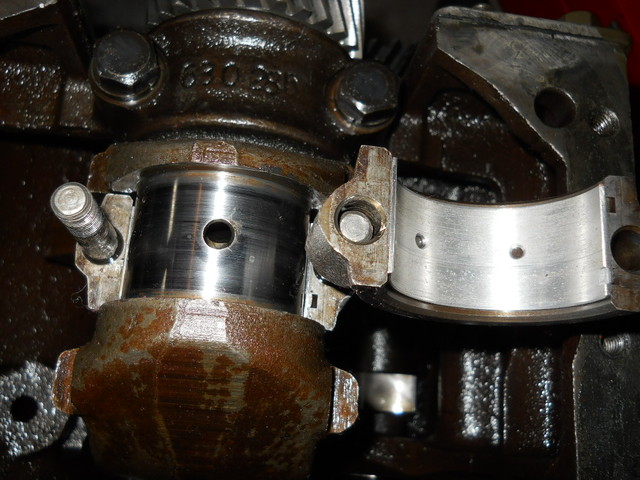
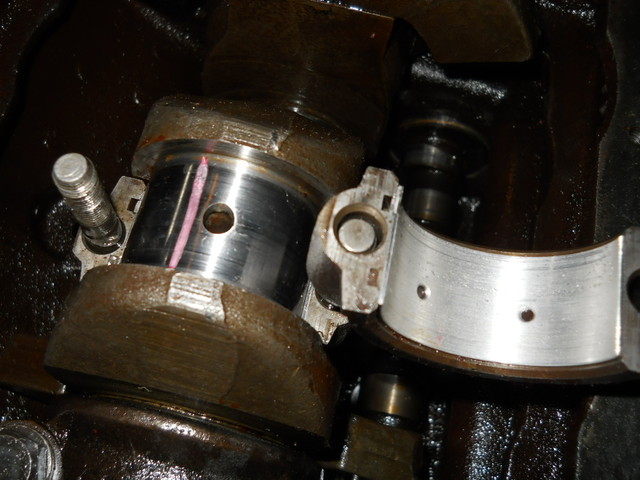
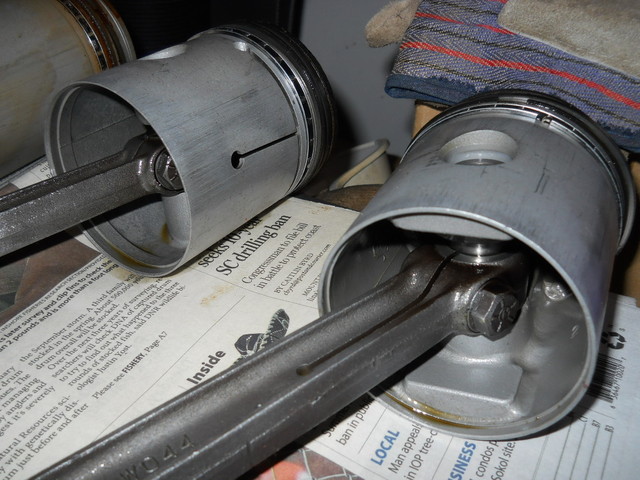
These are covered right in the M38 ORD 9 and the M38 TM 9-1804A manual.
Again the last idiot that had the engine apart either didn't care or couldn't/wouldn't read the book!
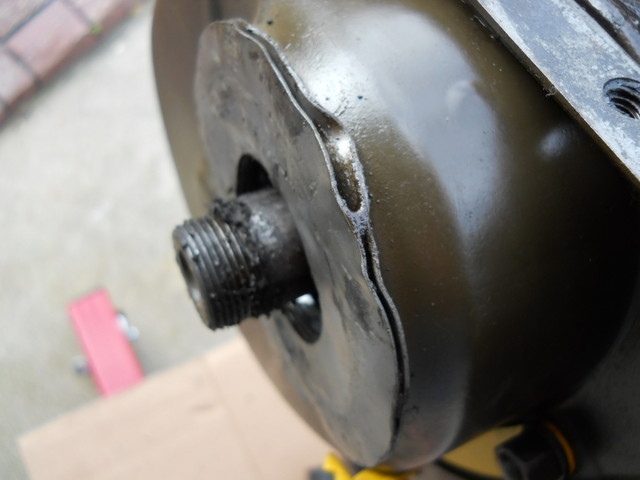
How is the skid plate attached to the oil pan?

As I recall they were spot welded.
Once I get the crankshaft out, should it be handled, transported, and stored vertically? I've see posts that say vertical, horizontal braced, and don't matter.
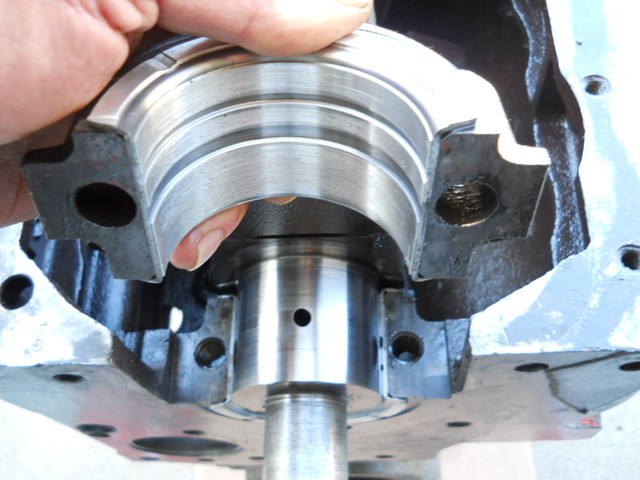
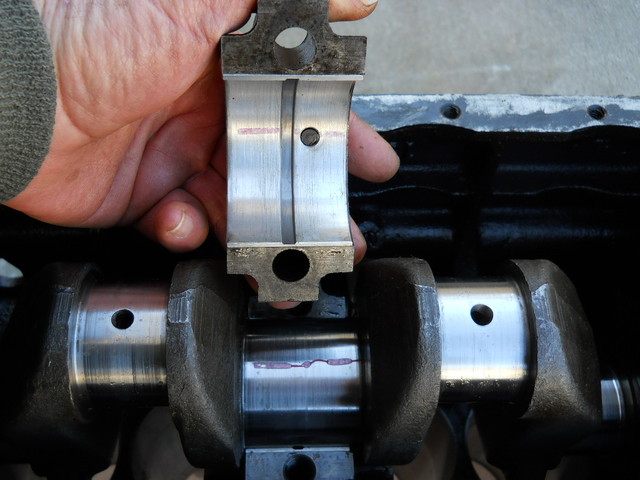
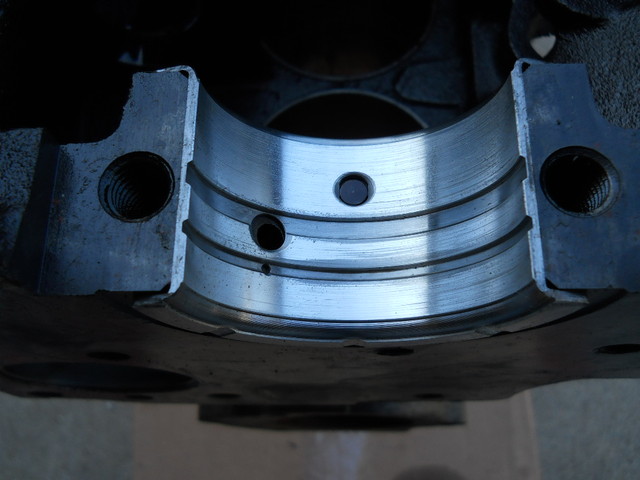
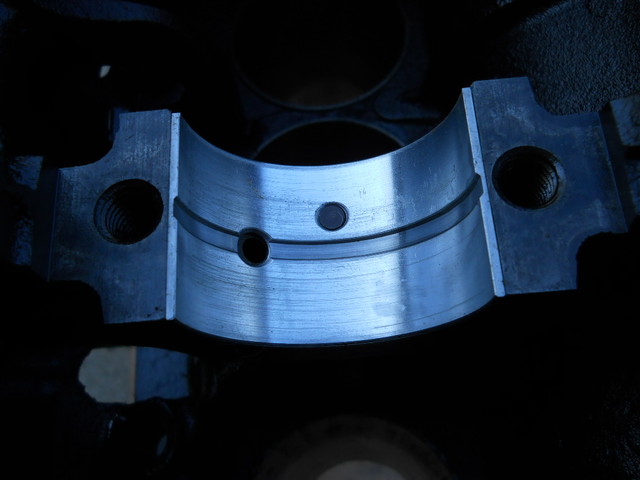
Yes they must be handled with care. The safest way to transport or ship is horizontally with supports at the crank's main bearing journals.
Wes K
45 MB, 51 M38, 54 M37, 66 M101A1, 60 CJ5, 76 DJ5D, 47Bantam T3-C & 5? M100

Mjeeps photo album: http://www.willysmjeeps.com/v2/modules. ... _album.php
RonD2
Jeep Legend
Jeep Legend
Posts: 2071
Joined: Wed Oct 01, 2014 6:00 pm
Location: South Carolina, Dorchester County

Post by RonD2 »

Thanks Wes!

I do have the civvy manual, and have read it, but the rotator cups didn't register when I pulled them. As soon as you mentioned it --- it clicked. :oops:

Yup, I've found more than a few "short-cuts" all over this jeep since I bought it. Some not so serious, others make me cringe --- that somebody would put so much effort into something and then do @%$&*% stuff. What doesn't kill me, makes me stronger. I'll get it fixed right.

So far, except for the cracks in the block, I think the motor looks pretty good as far as I have it apart. Only the machine shop will tell....
Ron D.
1951 M38 Unknown Serial Number
1951 M100 Dunbar Kapple 01169903 dod 5-51

“The only good sports car that America ever made was the Jeep."
--- Enzo Ferrari

RonD2
Jeep Legend
Jeep Legend
Posts: 2071
Joined: Wed Oct 01, 2014 6:00 pm
Location: South Carolina, Dorchester County

Post by RonD2 »

"the last idiot that had the engine apart either didn't care or couldn't/wouldn't read the book!"

......shot beverage out my nose with that one Wes......thinking...

I think he just called me an idiot!

Too funny!
Ron D.
1951 M38 Unknown Serial Number
1951 M100 Dunbar Kapple 01169903 dod 5-51

“The only good sports car that America ever made was the Jeep."
--- Enzo Ferrari

RonD2
Jeep Legend
Jeep Legend
Posts: 2071
Joined: Wed Oct 01, 2014 6:00 pm
Location: South Carolina, Dorchester County

Post by RonD2 »

I'm up to the point of using my vintage Hastings Feed-up Ridge Reamer. After reading up on doing this, I'm concerned about accidentally cutting too much to get the pistons out of the block (remember, be gentle, I'm a virgin). Just enough, but not so much to cause me to have to buy the next size up pistons and rings......

Any advice?
Ron D.
1951 M38 Unknown Serial Number
1951 M100 Dunbar Kapple 01169903 dod 5-51

“The only good sports car that America ever made was the Jeep."
--- Enzo Ferrari

User avatar
wesk
Site Administrator
Site Administrator
Posts: 16460
Joined: Sun Apr 03, 2005 6:00 pm
Location: Wisconsin
Contact:

Post by wesk »

I think he just called me an idiot!
In this discussion the last guy to take the engine apart was the guy before you!
but not so much to cause me to have to buy the next size up pistons and rings......
You go a wee bit at a time and rub your fingernail across the ridge area. When there's no more bump remove the piston. a 0.001 or 0.002 over the rest of the bore won't harm anything. Try to remember the rings normally do not travel in the area of the ridge and therefore have no need to be able to seal well there. The ridge reamers I have used only cut about a 1/4" down from the top of the bore.
Wes K
45 MB, 51 M38, 54 M37, 66 M101A1, 60 CJ5, 76 DJ5D, 47Bantam T3-C & 5? M100

Mjeeps photo album: http://www.willysmjeeps.com/v2/modules. ... _album.php
User avatar
wesk
Site Administrator
Site Administrator
Posts: 16460
Joined: Sun Apr 03, 2005 6:00 pm
Location: Wisconsin
Contact:

Post by wesk »

Another caution on the crank rear seal. Review my photo album's sub-album on this topic. For either the rope seal or the preformed seal to seal well the finish on the crack journal must be very smooth & clean. Also to be able to use a preformed seal the crank dimension (diameter) where the seal lip rides is critical and was not originally cut to the needed dimension on the early rope seal cranks.
Wes K
45 MB, 51 M38, 54 M37, 66 M101A1, 60 CJ5, 76 DJ5D, 47Bantam T3-C & 5? M100

Mjeeps photo album: http://www.willysmjeeps.com/v2/modules. ... _album.php
RonD2
Jeep Legend
Jeep Legend
Posts: 2071
Joined: Wed Oct 01, 2014 6:00 pm
Location: South Carolina, Dorchester County

Post by RonD2 »

Thanks Wes. The seal in my motor now isn't leaking, so until I get it apart and to the machine shop, I'll assume it's the correct type and was correctly installed. Unless something unusual reveals itself, I'll install a new one of the same type that's in it now. I'm guessing the hard part will be finding a quality manufacturer.

Your sub-album sheds light, but the dimensions and the drawings are very difficult to make out.
Ron D.
1951 M38 Unknown Serial Number
1951 M100 Dunbar Kapple 01169903 dod 5-51

“The only good sports car that America ever made was the Jeep."
--- Enzo Ferrari

User avatar
wesk
Site Administrator
Site Administrator
Posts: 16460
Joined: Sun Apr 03, 2005 6:00 pm
Location: Wisconsin
Contact:

Post by wesk »

I'll assume it's the correct type and was correctly installed. Unless something unusual reveals itself, I'll install a new one of the same type that's in it now.
The key to success in this business of rebuilding something other people have boogered up is to NEVER ASSUME ANYTHING! Don't rely on your machinist to be well versed in the intricacies and oddities of the L134 Willys engines. If you want it done right then make sure the machinist knows about all of these little quirks and differences. Our forums are full of posts/reports on things that went wrong right from the machine shop because the machinist was unfamiliar with this 70 year old engine.

Image

From reading this you should now clearly understand the importance of at least the critical dimension required for the preformed seal of 2.302" - 2.312" diameter of the seal's lip riding surface on the crank.

Image
Make sure your crankshaft's sealing surface does not look like this!

Image
But looks like this!

Image

The 3rd dimension from the bottom of the center of this drawing is the one we are concerned with. 2.312/2.308 You can ignore the .006 difference in the smaller dimension from the bulletin.
Wes K
45 MB, 51 M38, 54 M37, 66 M101A1, 60 CJ5, 76 DJ5D, 47Bantam T3-C & 5? M100

Mjeeps photo album: http://www.willysmjeeps.com/v2/modules. ... _album.php
RonD2
Jeep Legend
Jeep Legend
Posts: 2071
Joined: Wed Oct 01, 2014 6:00 pm
Location: South Carolina, Dorchester County

Post by RonD2 »

Couldn't borrow one, so had to order a Puller Kit (OTC 4534) for the timing gears that won't be here until next Saturday, so all I got done was to remove pistons this weekend.

Discovered crankshaft marked .040" under on the Mains and Rods:

Image

Rod bearings look ok to me (what the heck do I know?). They all plastigaged right at .004". First time I ever used plastigage, thought I'd learn taking the motor apart so I'm familiar when I re-assemble it. We'll see what the machine shop says. These photos show #4-#1-#2-#3 left to right top to bottom:

ImageImage
ImageImage

What happens to the timing cover when somebody puts too long a bolt into the front of the oil pan, and the front flange on the timing cover is a little mangled:
ImageImage

Number 4 piston is different than the other three pistons. No "T-slot" and it has an extra boss in the lower skirt under the pin. If nothing else, it's heavier?

Image

I also noted all four connecting rods have the same part number in the casting: 641770. According to the ORD9, rods 1 and 3 are 641770 and rods 2 and 4 are supposed to be 641771. The funny thing is that they all appear to me otherwise correct --- the caps orient correctly (narrow side to the nearest main) and the oil squirt holes are in the proper locations. I'm guessing they're off-shore cr*p? Will see what the machine shop says about them.

Other notes: my timing gear oil squirt fitting (ORD9 page 46, 7372557, WO-641050) appears to have the wrong (old, superceded) .070 orifice in it. The largest wire gage I have is .040 and it's swimming in the hole. I believe a MWO changed the orifice to .040 to solve an insufficient oil problem with the front main bearing? I believe the solution is to weld the .070" hole closed and drill it back to .040"? I'm guessing because nobody has correct fittings in stock? Another chore for the machine shop.

I also noted all my valve guides appear to be improperly installed. TM9-1804A paragraph 43.f. on page 55 gives height from the top of intake and exhaust guides to the top of the block deck. No two of mine are the same. Another job for the machine shop.

I'm going to plastigage the mains next weekend after I pull the timing gears. For grins, I measured the crankshaft end play at .015" (yikes! the spec is .004"-.006"), so I'm getting more nervous all the time....... :D
Ron D.
1951 M38 Unknown Serial Number
1951 M100 Dunbar Kapple 01169903 dod 5-51

“The only good sports car that America ever made was the Jeep."
--- Enzo Ferrari

User avatar
wesk
Site Administrator
Site Administrator
Posts: 16460
Joined: Sun Apr 03, 2005 6:00 pm
Location: Wisconsin
Contact:

Post by wesk »

I also noted all four connecting rods have the same part number in the casting: 641770. According to the ORD9, rods 1 and 3 are 641770 and rods 2 and 4 are supposed to be 641771. The funny thing is that they all appear to me otherwise correct
The ORD 9 is correct, you need two PN 641770 & 2 pn 641771. Not only does the narrow side of the rod bearing end flange go towards the main bearing, the oil squirt holes have to point to the oil filler pipe side of the engine. If you use 4 641770 rods then two of the oil squirt holes will face the wrong side of the engine. Also take note that the "T" slot in the piston must face the cam.
appears to have the wrong (old, superceded) .070 orifice in it.
Just ask your machinist for a .040 dia. drill bit (a #60 bit) and measure the squirter yourself using the Bit. If it is truly a .070 then weld or solder it shut and redrill it with a .040 dia bit (a #60 Bit). Better yet every restorer should own a Numbered drill bit set. The really well equipped guys have fractional, numbered, lettered and metric bit sets on their shelf.

Note, the largest undersize for rods & mains listed in the ord 9 are .030. Have you shopped for .040 bearings yet? I see some vendors have .040, .050, .060. .070 & .080. But the military and civilian service manuals only allow .030 max.

In some of your photos I see the rod caps still in place without the required jam nuts.

One thing you are quickly learning with this teardown is just how much the last guy in there actually knew about Willys L134's!
Last edited by wesk on Sat Jan 26, 2019 4:31 pm, edited 1 time in total.
Wes K
45 MB, 51 M38, 54 M37, 66 M101A1, 60 CJ5, 76 DJ5D, 47Bantam T3-C & 5? M100

Mjeeps photo album: http://www.willysmjeeps.com/v2/modules. ... _album.php
User avatar
Jeff_Lee
Active Member
Active Member
Posts: 151
Joined: Sun Jan 26, 2014 6:00 pm
Location: West Palm Beach FL area

Post by Jeff_Lee »

I am a bit confused on this exchange on the orifice size. I don't understand why you would weld a .070 hole shut, just to redrill it .070"?
RON:
appears to have the wrong (old, superceded) .070 orifice in it.
WES:
Just ask your machinist for a .040 dia. drill bit (a #60 bit) and measure the squirter yourself using the Bit. If it is truly a .070 then weld or solder it shut and redrill it with a .070 dia bit (a #50 Bit). Better yet every restorer should own a Numbered drill bit set. The really well equipped guys have fractional, numbered, lettered and metric bit sets on their shelf.
Wes, did you mean to say: weld the .070 hole shut and redrill with .040"??

Thanks for clarifying,
Jeff
1951 M38 restoration project - Flightline Jeep MC 23923 DoD 6-51
1954 M-100 Trailer USMC Dunbar Kapple s/n M-750759 DoD 1-54
1947 Willys CJ2A - Harvest Green
1954 Ford F-100 Parts chaser - blueprinted Y-Block
Southeast Florida
User avatar
wesk
Site Administrator
Site Administrator
Posts: 16460
Joined: Sun Apr 03, 2005 6:00 pm
Location: Wisconsin
Contact:

Post by wesk »

Jeff,
Good catch. Yes. I'll edit my post.
Wes K
45 MB, 51 M38, 54 M37, 66 M101A1, 60 CJ5, 76 DJ5D, 47Bantam T3-C & 5? M100

Mjeeps photo album: http://www.willysmjeeps.com/v2/modules. ... _album.php
RonD2
Jeep Legend
Jeep Legend
Posts: 2071
Joined: Wed Oct 01, 2014 6:00 pm
Location: South Carolina, Dorchester County

Post by RonD2 »

Finished the tear-down today (nobody can call me "Speedy" :lol: ). First time ever tearing down any motor, I'm blessed it had to be a Willys Go-Devil! Am now ready to take the block to the machine shop, along with all the pieces. From studying the manuals, everything was there, and in the right places and orientations. I'll see what the shop says about tolerances --- and repairing the cracks in the block deck. 8O

The nearly new looking fiber camshaft gear popped off with just a tap (no puller). Ever so slight backlash felt between it and the crankshaft gear --- maybe 1/64th or less. Is any amount of backlash ok? I noted the flat-washer holding it on is somewhat de-formed into a cup but was tight. The TM says "flat washer" (nothing special) so I'll be looking for a replacement anyway.

The crankshaft main bearings looked good to me and plastigaged out to .004" on the front, .004" on the middle, and .003" on the rear. Within spec if I read them correctly. Some photos:

ImageImage
ImageImage

The rear main seal is marked VG 49650 and 800093, with orientation arrows. Photos below. I haven't done any research yet --- but it doesn't look like a rope seal to me (like I'd recognize the difference? ;)). As previously mentioned, not many miles on it, but it wasn't leaking (not enough for me to notice anyway).

ImageImage

As always, your observations and comments are appreciated! I don't know what I don't know so keep me straight. Wish me luck at the machine shop!
Ron D.
1951 M38 Unknown Serial Number
1951 M100 Dunbar Kapple 01169903 dod 5-51

“The only good sports car that America ever made was the Jeep."
--- Enzo Ferrari

RonD2
Jeep Legend
Jeep Legend
Posts: 2071
Joined: Wed Oct 01, 2014 6:00 pm
Location: South Carolina, Dorchester County

Post by RonD2 »

Left out a photo.........here's a shot of the rear main crankshaft:


Image


And a question: those two special tapered flywheel bolts......does it take a press to get the old out and the new in?
Thought I'd ask --- or leave it to the machine shop --- before I got out the B.F.H. :lol:
Ron D.
1951 M38 Unknown Serial Number
1951 M100 Dunbar Kapple 01169903 dod 5-51

“The only good sports car that America ever made was the Jeep."
--- Enzo Ferrari

User avatar
wesk
Site Administrator
Site Administrator
Posts: 16460
Joined: Sun Apr 03, 2005 6:00 pm
Location: Wisconsin
Contact:

Post by wesk »

Looking at that seal seating area I doubt that your rear main was not leaking! You'll have to get those pits machined out and have the machinist Mic it for tolerance.

It needs to look like this:
Image

Image
those two special tapered flywheel bolts......does it take a press to get the old out and the new in? Thought I'd ask --- or leave it to the machine shop
All 4 bolts & 2 studs should tap out easily with a brass hammer. In your case you should leave it for the machine shop. Also that pair of tapered dowel bolts is seldom replaced unless they are damaged or excessively worn. Also a heads up here! Go to your TM 9-1804A page 86, Para. 81 and underline with red ink the 5th sentence.
Wes K
45 MB, 51 M38, 54 M37, 66 M101A1, 60 CJ5, 76 DJ5D, 47Bantam T3-C & 5? M100

Mjeeps photo album: http://www.willysmjeeps.com/v2/modules. ... _album.php
Post Reply