Page 5 of 21
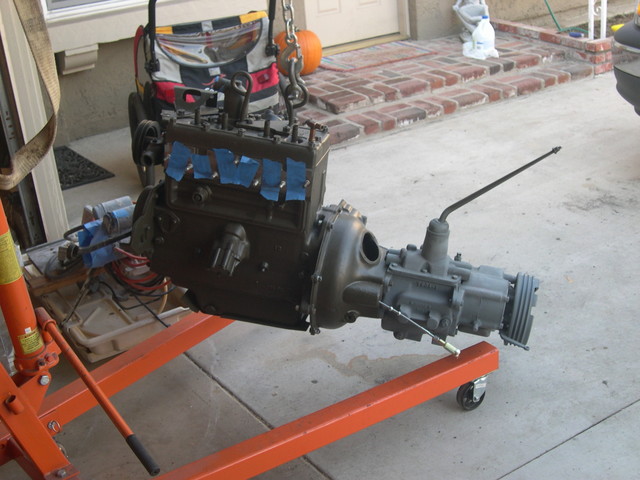
Engine
Posted: Sat Oct 17, 2009 7:28 am
by ocwd
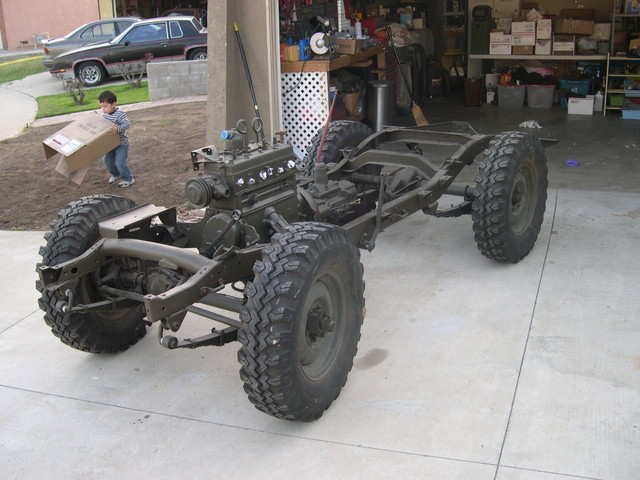
More progress. I have to make some repairs to the frame motor mounts before I can drop this in.
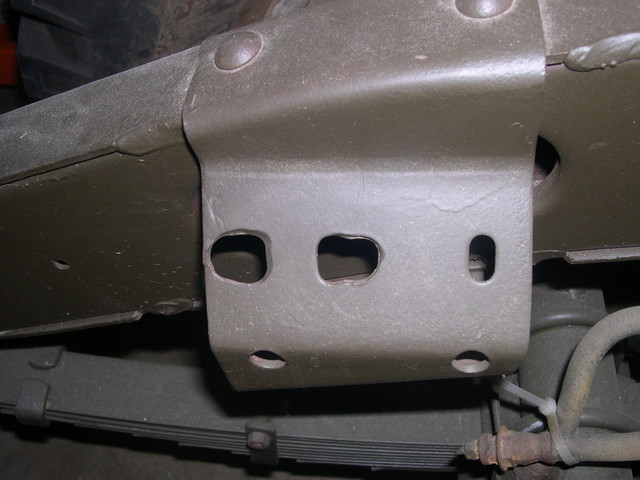
Frame Motor Mounts
Posted: Fri Oct 23, 2009 8:03 am
by ocwd
By the way, those oversized holes are not wollowed out. That is a bubba mod. There was a strange looking motor mount used to get the GPW engine that was in my Jeep to fit.
Posted: Fri Oct 23, 2009 5:11 pm
by 53a1
I have the same type of thing going on. I'll post a picture of it to the bubba mods sticky.
Bubba Mod
Posted: Fri Oct 23, 2009 6:33 pm
by ocwd
I'll post a picture of the strange motor mount and the frame when that sticky gets going. The mod to my frame is not as extreme as others that I have herd of.
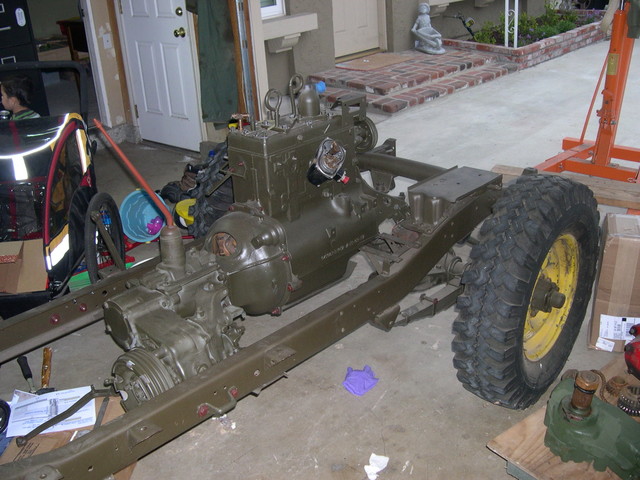
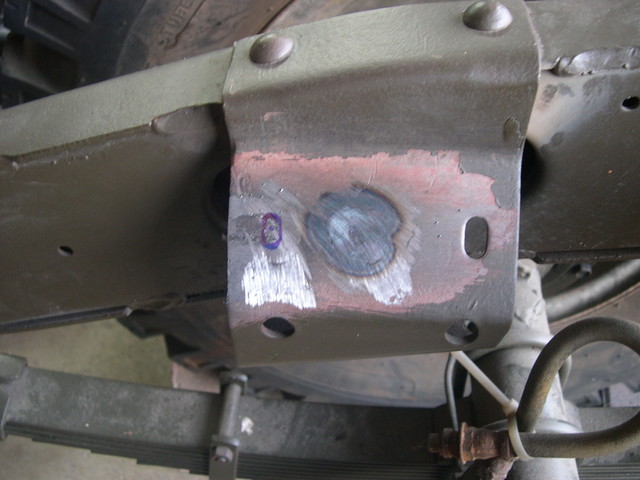
Motor Mount
Posted: Fri Nov 06, 2009 6:42 pm
by ocwd
Now I just have to fix the mounting holes so I can put the motor mounts on.
Progress
Posted: Sat Feb 27, 2010 2:47 pm
by ocwd
Posted: Sat Feb 27, 2010 11:02 pm
by 53a1
Good job Dave! Keep at it!
Paint
Posted: Sun Feb 28, 2010 9:02 am
by ocwd
Thanks Dave, the pictures don't do justice to the paint. It's very dusty but looks nice.
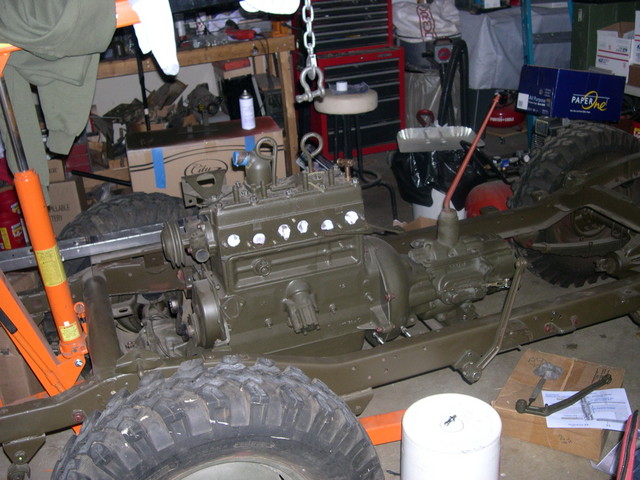
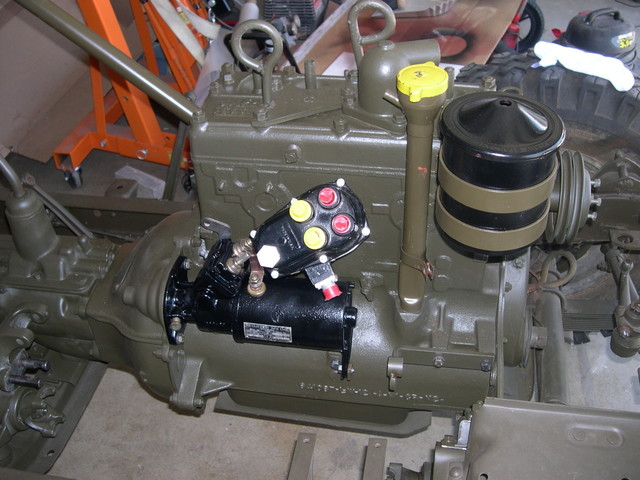
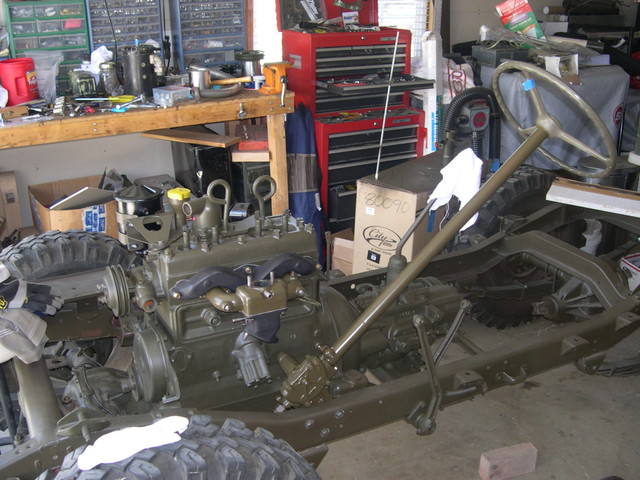
More Progress
Posted: Wed May 26, 2010 3:01 pm
by ocwd
Here is some more progress. Now I have 3 shades of OD. Oh well.
Posted: Wed May 26, 2010 4:10 pm
by 53a1
Nice. Keep up the quality work Dave!
One note, you should install your pulley before you tighten down the timing cover. You may have done this already and just removed the pulley. If you didn't and you sealed the cover already just make sure you keep an eye out for leaks.
Another source of initial leaks is the pulley guard. I have leaks on mine because I didn't use the brass washer seals on the bushings that sit between the guard and the pan. I thought thead sealant would work but the bolt goes through some thick gaskets in that area so the thread sealant is ineffective and I don't want to use too much of the other stuff because it can get into the oil.
Re: More Progress
Posted: Thu May 27, 2010 12:03 pm
by Deino
ocwd wrote:Here is some more progress. Now I have 3 shades of OD. Oh well.
Heh...seems like that would make it more original looking.

Keep up the good work!
Posted: Thu May 27, 2010 5:15 pm
by MODIFIED
53a1 wrote:......because I didn't use the brass washer seals on the bushings that sit between the guard and the pan.
Assuming your not talking about the pulley guard "stand-offs" you mentioned as "bushing'. I'm not familiar with a "brass Washer seals ?" for the Pulley Guard via Oil pan. Got a pic you can share? could not find in the TM's
Posted: Thu May 27, 2010 8:37 pm
by 53a1
I think I messed up. I was describing the bushings that go on both sides of the 'stand off'. Maybe I'm wrong about this but I could have sworn I read that it calls for these bushings to seal the bolt that goes through the pulley guard, 'stand off' and pan into the block.
Posted: Thu May 27, 2010 9:35 pm
by wesk
The pulley guard/shield PN WO A1124 gets 6 spacers PN WO 649849. This is on page 28 of the ORD 9 SNL G-740 Sep 55. It also refers you to Pg 46 for the 6 bolts PN H101-0423562 which were superseded by PN H001-0423563. No sealing washers or bushings are listed.
Posted: Fri May 28, 2010 4:19 am
by tkjeeper
wow, awesome job! you give me inspiration. I'm so pumped to pick up my M38A1 in a week! I'll be needing lots of help. Great work, impressive so far, I'll be following this thread.