Finally started working on my M38
Posted: Sat Oct 04, 2008 9:08 am
Here is a picture of my Jeep as I dragged it home from Reading on March 12, 2005. It was about a 12 hour trip an I had to drive over the grapevine. When I got home, I discovered that the large nut on my tow ball had loosened and fallen off. Who knows how long it had been like that. Since then, I have added a new hitch that attaches to my frame. My F150 is perfect for towing this little Jeep around.
On April 4th of this year, I finally started tearing into my Jeep. Disassembly was fun and easy. All the small parts were bagged and labeled.
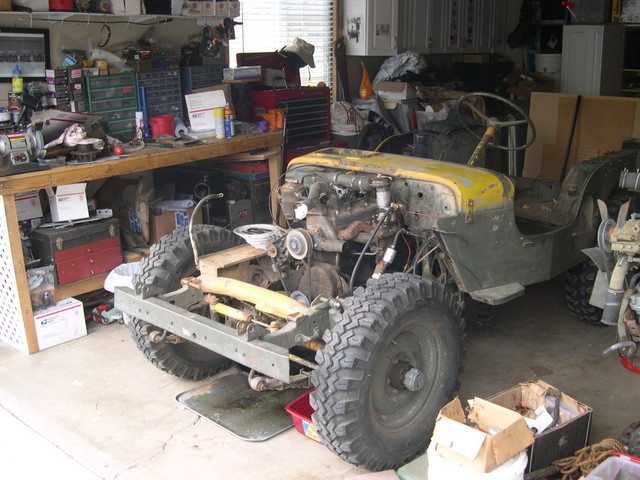
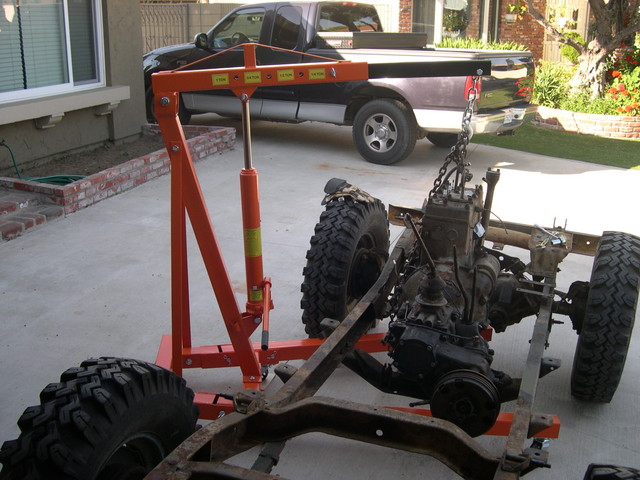
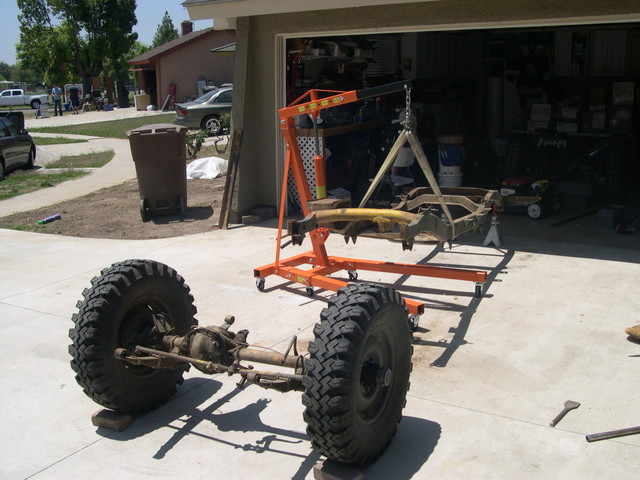
I pulled the GPW engine out to make room for an RMC engine. I love this shop lift. I use all the time. I pulled the body before I had this lift so I had to ask a buddy for help.
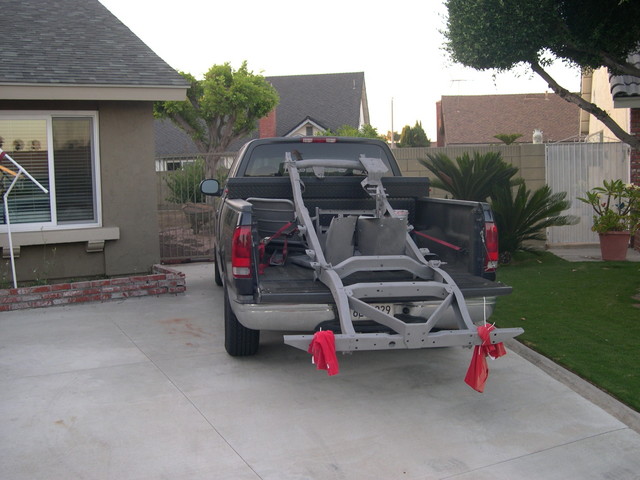
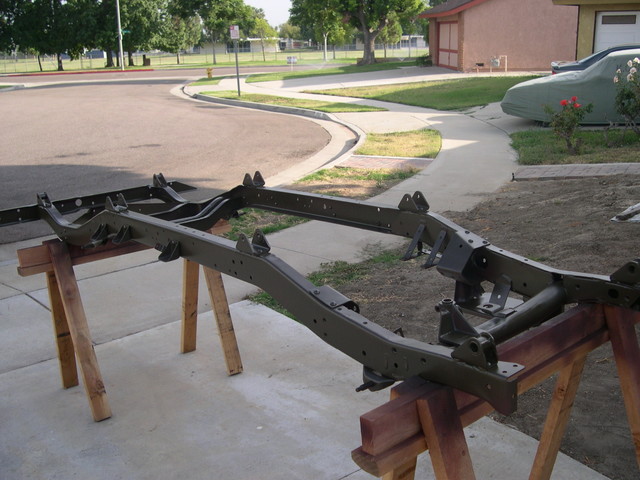
Here is a load of parts back from the sand blaster. I started stripping the frame by hand at first. That was going painfully slow so I decided to have it sand blasted. I am glad that I did. It was only about $200 for the frame, front seats, grill, fenders, cross member, and bumper.
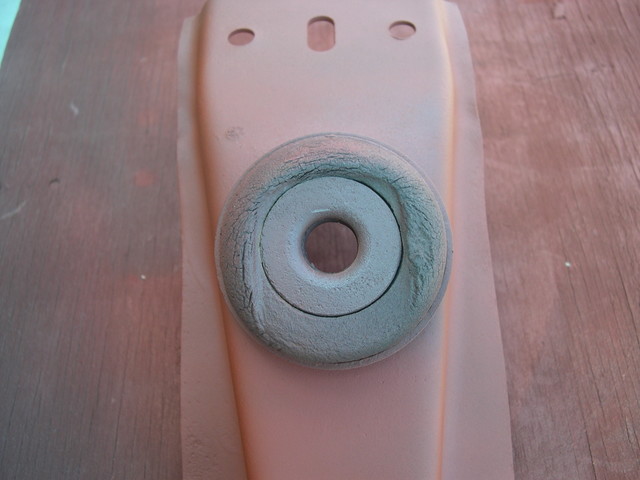
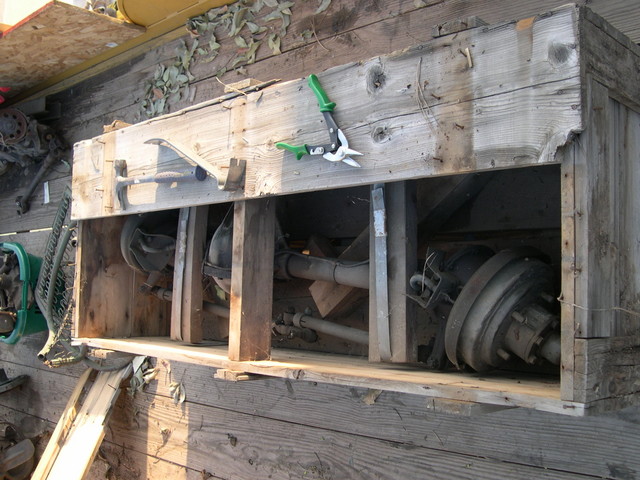
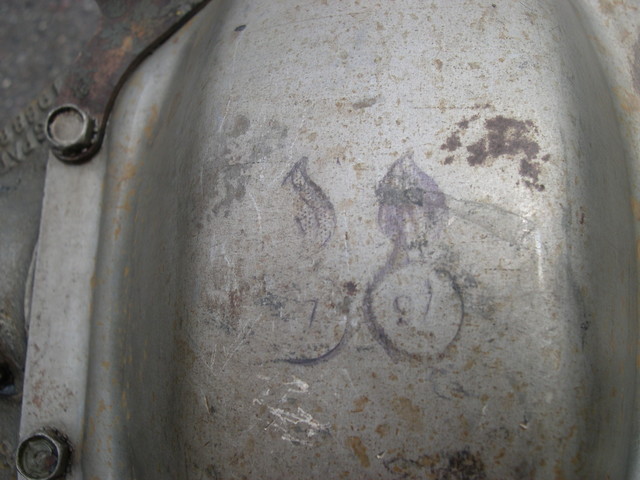
Here are a couple of pictures of the replacement axles that I bought for my Jeep. There wasn't anything wrong with the old axles but these were part of a large parts buy so I decided to use them. The front was still in the crate. I washed it and gave it a quick rub-down with acetone and one coat of paint over the OD paint. I thought that the back was painted black. I started cleaning it with acetone so I could paint it and discovered that it was actually bare metal coated with cosmolene. I included a picture of the bare metal dif cover with some sort of unit marking on it. I am not sure what the markings mean but they are now covered by two caots of primer and soon will be covered by two coats of OD.
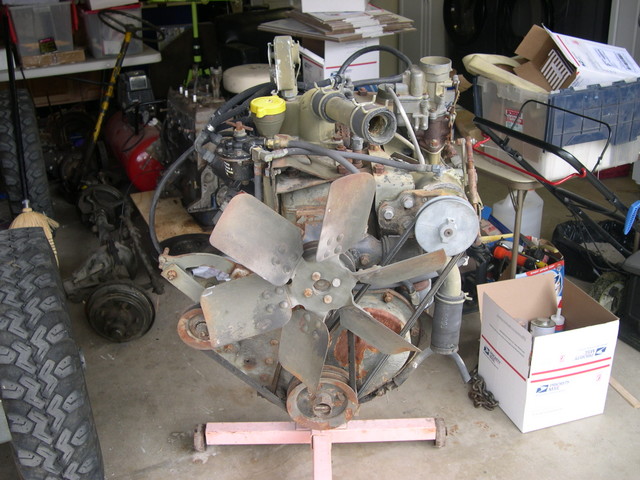
Here is my new engine. RMC59781 was part of a gen set. It's an early RMC and my Jeep is a late M38. I looked around for a late engine but this is what I came up with locally. Just in case anyone is interested, I paid $600 for this engine and it came with a 24 volt distributor, WO carb, oil bath air cleaner (WWI style), exhaust manifolds, and some other junk. I sold the GPW engine for $600 which included the block, head, and internals.
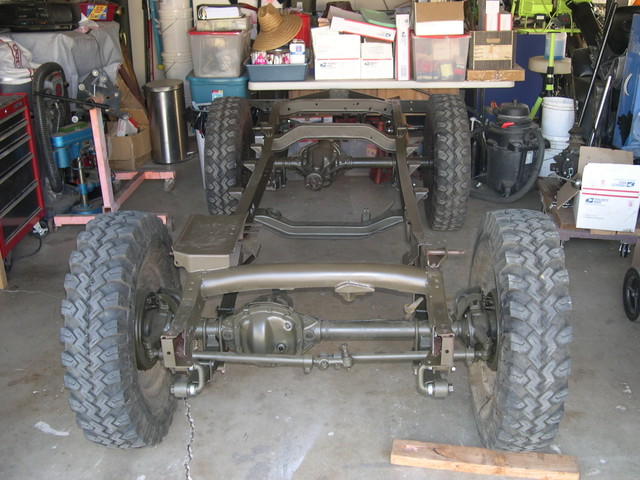
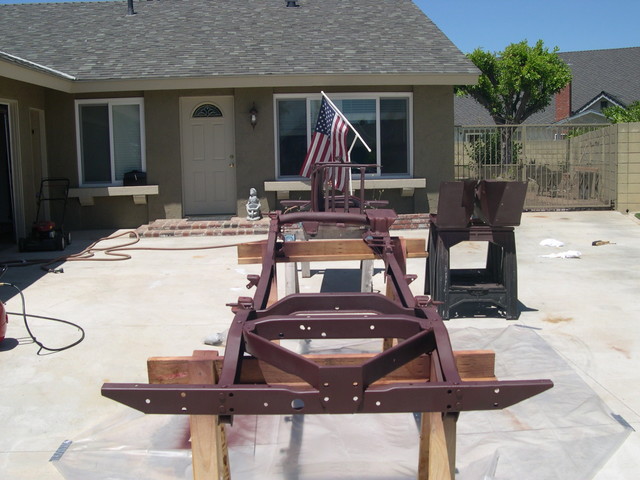
I sprayed the bare frame with metal prep then gave it two coats of red primer. I use 000 steel wool between coats of primer and paint. Then I gave the frame it's first coat of paint. I figured that I would give the frame two coats of paint.
So that's as far as I have gotten. It is now 6 months to the day since I started working on my Jeep. I had planned on getting my frame and rear axle painted this week end but it's suppose to rain today. What a bummer. Oh well, I have lots of small parts that I can work on in the garage. My engine is back from the shop and my buddy in AZ has it. Right now I am just cleaning and priming some of the engine components like the oil pan, valve cover, etc. I have been using high temp engine primer.
I love looking at posts like this so I figured that I would start my own.
On April 4th of this year, I finally started tearing into my Jeep. Disassembly was fun and easy. All the small parts were bagged and labeled.
I pulled the GPW engine out to make room for an RMC engine. I love this shop lift. I use all the time. I pulled the body before I had this lift so I had to ask a buddy for help.
Here is a load of parts back from the sand blaster. I started stripping the frame by hand at first. That was going painfully slow so I decided to have it sand blasted. I am glad that I did. It was only about $200 for the frame, front seats, grill, fenders, cross member, and bumper.
Here are a couple of pictures of the replacement axles that I bought for my Jeep. There wasn't anything wrong with the old axles but these were part of a large parts buy so I decided to use them. The front was still in the crate. I washed it and gave it a quick rub-down with acetone and one coat of paint over the OD paint. I thought that the back was painted black. I started cleaning it with acetone so I could paint it and discovered that it was actually bare metal coated with cosmolene. I included a picture of the bare metal dif cover with some sort of unit marking on it. I am not sure what the markings mean but they are now covered by two caots of primer and soon will be covered by two coats of OD.
Here is my new engine. RMC59781 was part of a gen set. It's an early RMC and my Jeep is a late M38. I looked around for a late engine but this is what I came up with locally. Just in case anyone is interested, I paid $600 for this engine and it came with a 24 volt distributor, WO carb, oil bath air cleaner (WWI style), exhaust manifolds, and some other junk. I sold the GPW engine for $600 which included the block, head, and internals.
I sprayed the bare frame with metal prep then gave it two coats of red primer. I use 000 steel wool between coats of primer and paint. Then I gave the frame it's first coat of paint. I figured that I would give the frame two coats of paint.
So that's as far as I have gotten. It is now 6 months to the day since I started working on my Jeep. I had planned on getting my frame and rear axle painted this week end but it's suppose to rain today. What a bummer. Oh well, I have lots of small parts that I can work on in the garage. My engine is back from the shop and my buddy in AZ has it. Right now I am just cleaning and priming some of the engine components like the oil pan, valve cover, etc. I have been using high temp engine primer.
I love looking at posts like this so I figured that I would start my own.