Joined: Mar 13, 2006 Posts: 1079 Location: Richburg, SC
Posted: Tue Sep 16, 2014 8:39 pm Post subject: M100 reto - Day 2
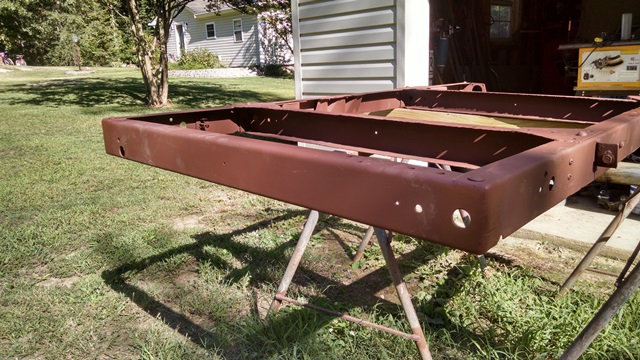
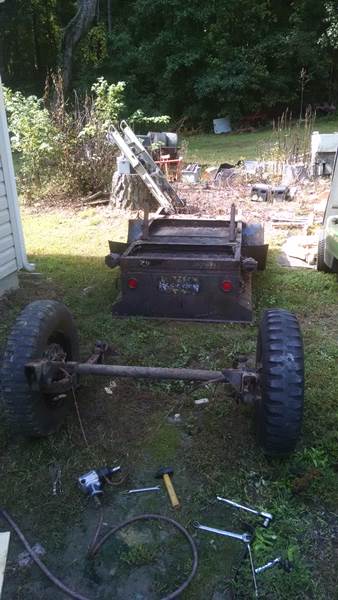
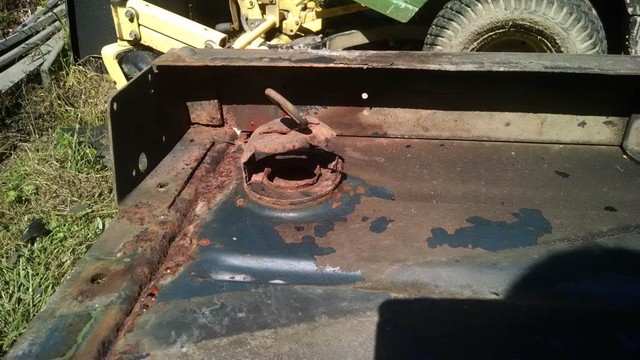
Got started back on my M100 today. I disassembled it completely and separated the tub/frame from the running gear to assess the rust problem.
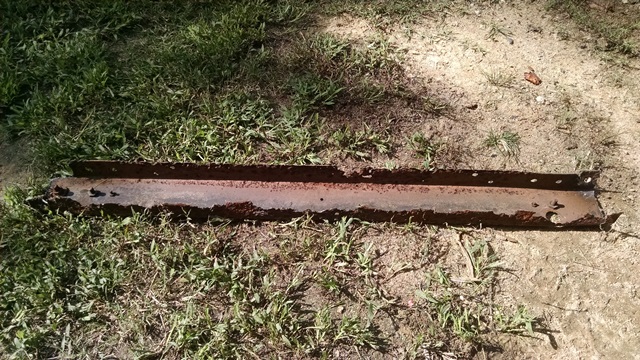
Turned out to be more than I thought, of course! The cross members are all pretty rusty on the bottom.
The whole underside of the tub and fenders were covered with spray on undercoating which was peeling off. After about 10 minutes with the blower, about half of it was gone - revealing you favorite color Wes! Now, back to my last discussion. This thing was more than likely a USAF trailer - unless it was dipped during a previous resto. There was strata blue everywhere I looked, and it looked original. BUT, I am restoring this trailer to go with my 'a1, so it is going back OD24087. I will document everything that I found as far as the paint and tub markings for a future owner - if they decide to go back original with it.
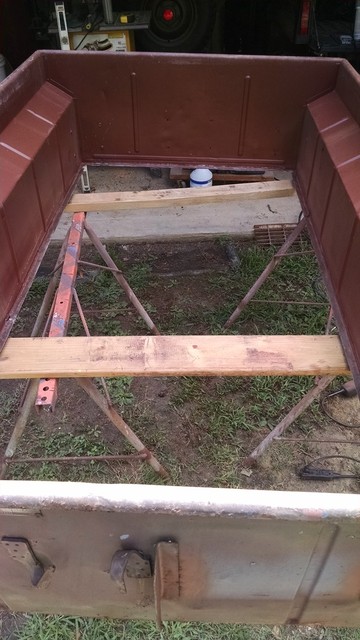
I decided to go ahead and separate the tub from the frame. I underestimated the amount of tack welds holding the tub on - man, why did they have to tack weld under the gussets on the cross members where you can't get a side grinder? I guess they weren't thinking that some day someone would want to separate the tub and frame again, huh? I cut tack welds until I ran out of Dremel cutoff disks (had to use them to cut the welds under the gussets. I also found the tack welds along the frame rail every foot or so - MAN!
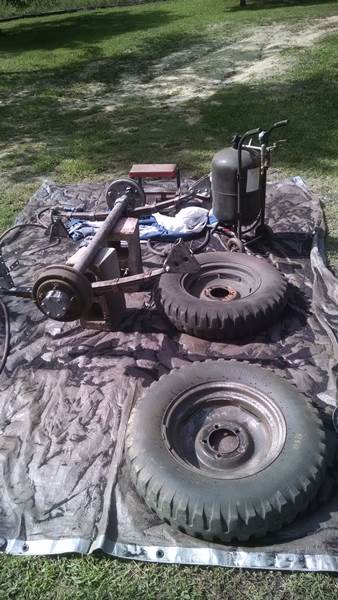
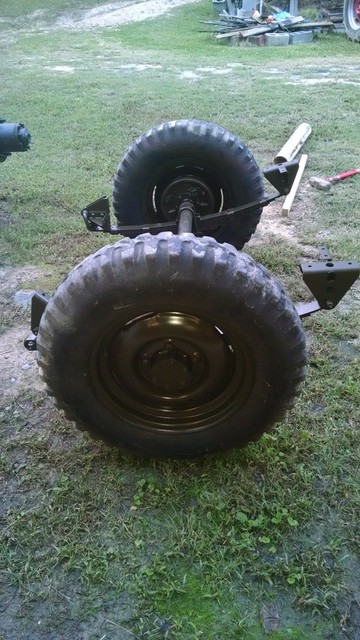
Then I started sandblasting the running gear. This went pretty quick - about an hour and a half. I went ahead and blasted the wheels inside and out at the same time.
I mixed up some red oxide primer and sprayed 2 coats on the running gear, but ran out before I got to the wheels. I guess I will have to pick up some red oxide spray bomb and masking tape tomorrow and get them sprayed before I go to work so that they don't rust up before I get off next week!
Next week, I will finish separating the tub and frame and make a decision (with the help of my bodyman - brother) on whether to replace the whole floor or just repair what I have. Man, I didn't plan on spending $400 more on replacing the floor of this thing. But I guess that will bring it 1 step higher than a "motor pool" resto! Maybe I should go ahead and replace the cross members too? Is the c channel something that can be sourced locally? It looks like an off the shelf type of channel to me. On the other hand, my other frame might be in better condition - I will have to check it out! _________________ Matt
1953 M38a1
1964 USMC M38a1
'51 USMC M100 trailer, '54 M100 trailer, '90 M101a1 trailer
Http://wilfreeman.wordpress.com (M38a1 build blog)
http://m38a1usmc.wordpress.com (USMC M38a1 rebuild blog)
Joined: Mar 13, 2006 Posts: 1079 Location: Richburg, SC
Posted: Sun Mar 01, 2015 8:29 pm Post subject:
Wow, I didn't realize it had been so long since I posted last. The trailer was put on the back burner for the winter and now because I am trying to get my Deuce and Jeep ready for a rally.
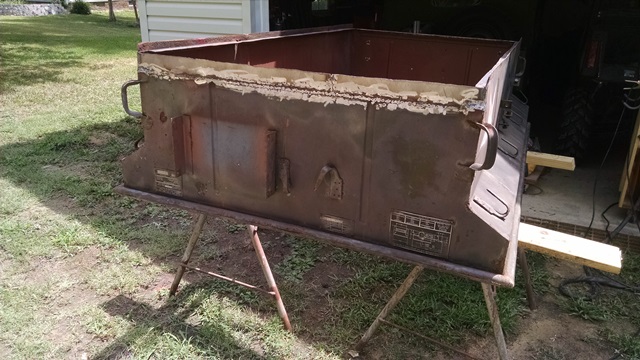
I finished painting the running gear and got the tub cut off of the frame - hard to believe there were so many spot welds on that thing! I guess my next step will be to get my cross members fabbed and replaced, then I can order the replacement floor and figure out how to replace that. I am thinking about cutting the old one out, leaving a "shelf" for the new floor to sit on with a tight fit around the tub walls. Epoxy panel adhesive can be used to bond old and new. Then I can spot weld the floor to the cross members as original.
I'll post some pics of the running gear and tub/frame tomorrow. _________________ Matt
1953 M38a1
1964 USMC M38a1
'51 USMC M100 trailer, '54 M100 trailer, '90 M101a1 trailer
Http://wilfreeman.wordpress.com (M38a1 build blog)
http://m38a1usmc.wordpress.com (USMC M38a1 rebuild blog)
Joined: Mar 13, 2006 Posts: 1079 Location: Richburg, SC
Posted: Fri Apr 03, 2015 6:55 am Post subject:
Thanks Brian!
I have not done anything else to it yet. I lost the link (and don't remember the name) to the cheap floor panel, so I am going to have to pay twice as much for the same part from one of the main Jeep parts places! It shouldn't take TOO much work to replace the floor and install the new one, replace the frame cross members and patch a couple of places on the front of the tub.
I am planning on cutting the floor out and leave a 1/2" ledge of the old one. I am going to cut off the lip of the new floor so that I have a very tight fit to the tub sides. Instead of welding the new floor in, I will be using 3M panel adhesive on the ledge. This should make a nice smooth and solid repair. I will also be using adhesive on the braces under the floor instead of tack welds.
I have a small chinese pressure pot that I bought about 15 yrs ago. It works ok, but is slow going. _________________ Matt
1953 M38a1
1964 USMC M38a1
'51 USMC M100 trailer, '54 M100 trailer, '90 M101a1 trailer
Http://wilfreeman.wordpress.com (M38a1 build blog)
http://m38a1usmc.wordpress.com (USMC M38a1 rebuild blog)
I would be reluctant to use a sealant/adhesive in place of the original welding process on a trailer that takes a heck of a pounding even when used empty on the road. It might handle a show unit that doesn't travel the everyday road system. The only change to the original system I am considering is bolting the floor to the frame instead of welding. Once I have selected the bolting points I will reinforce the floor with small doublers at those points. _________________ Wes K
45 MB, 51 M38, 54 M37, 66 M101A1, 60 CJ5, 76 DJ5D, 47Bantam T3-C & 5? M100
Joined: Mar 13, 2006 Posts: 1079 Location: Richburg, SC
Posted: Fri Apr 03, 2015 2:30 pm Post subject:
Normally, I would agree, but today's panel adhesives are often used in place of the welding process. If the underlying and replacement metals are prepared correctly, the bond is as strong as a weld. My brother has been in the auto body repair business for 30 yrs and has owned his shop for about 10. I will consult with him before making the final decision.
The doublers you are talking about on the floor to cross braces - are they shims to take up the space between the floor panel and cross brace? I noticed that there is a slight gap between the two - it will be even wider gap if installing the floor panel on top of the old floor panel lip (ledge) like I am planning. I also plan on adding metal to eliminate this gap and prevent bowing of the new floor.
I am just in the planning stages right now, as it is now once again rally/show season. I will get back on the M100 in the coming months. I am getting my M35a2 ready for towing my Jeep/car hauler to a show in a couple of weeks. I need to do some work on the parking brake on the Jeep, and WANTED to finish rebuilding my spare engine, but I guess that won't happen in time. _________________ Matt
1953 M38a1
1964 USMC M38a1
'51 USMC M100 trailer, '54 M100 trailer, '90 M101a1 trailer
Http://wilfreeman.wordpress.com (M38a1 build blog)
http://m38a1usmc.wordpress.com (USMC M38a1 rebuild blog)
I am aware of the modern alternative adhesives to welding but I still do not trust them with old base materials and the actual welding of the tub to original specs is rather simple to do and held up quite well for over half a century. The doublers are to reinforce the floor where only 4 to 6 bolts will replace dozens of welds holding the tub to the frame. Plus the bolt system allows easy removal of the tub when repairs are needed. I'll use whatever thickness fills the existing gap. _________________ Wes K
45 MB, 51 M38, 54 M37, 66 M101A1, 60 CJ5, 76 DJ5D, 47Bantam T3-C & 5? M100
Joined: Mar 13, 2006 Posts: 1079 Location: Richburg, SC
Posted: Sat Apr 04, 2015 6:46 am Post subject:
I might end up welding the floor in when it comes down to it - like you said, it's not that much work. I might as well go back as close to original as possible if I am going to restore it.
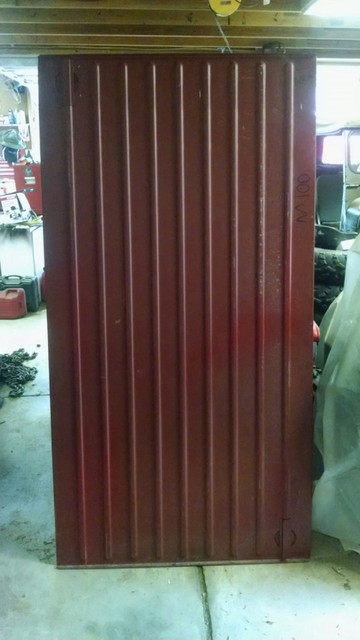
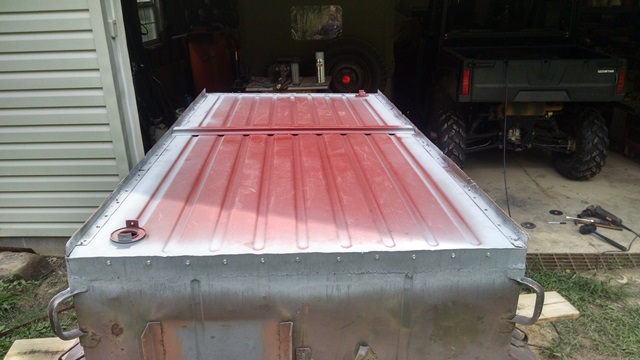
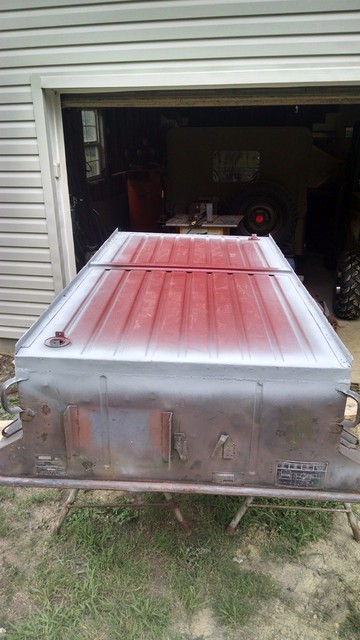
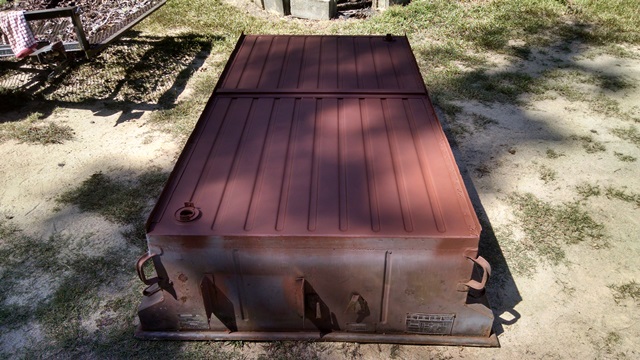
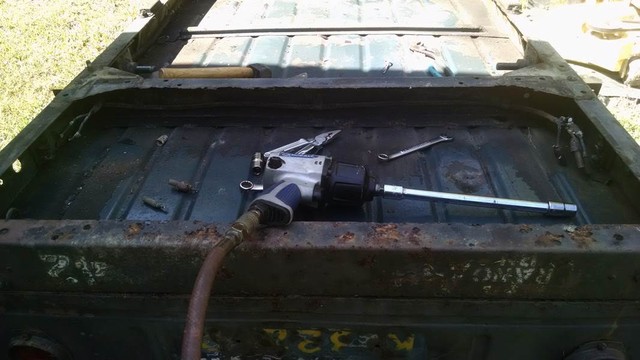
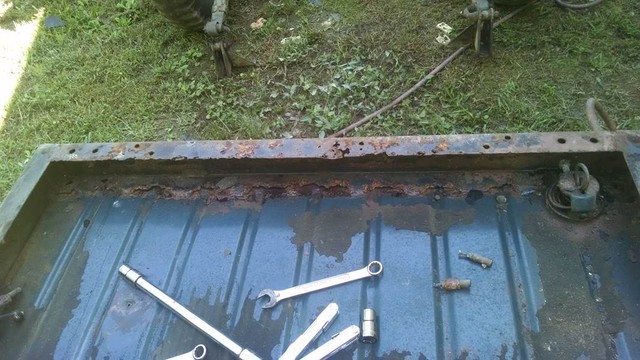
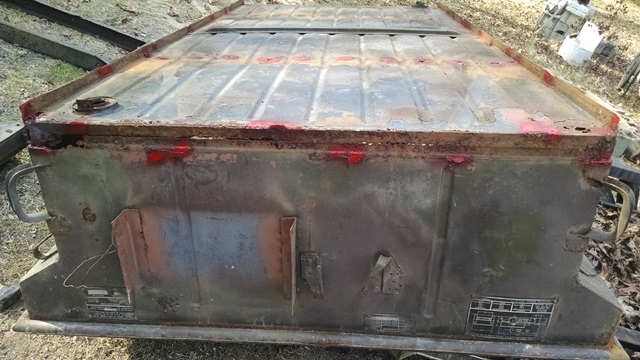
I see what you are talking about now - the M416 tub is very simple to remove (4 bolts/nuts) compared to having the edges of the tub and the floor welded to the outer frame and cross members. There are a LOT of welds holding the tub to the frame, as you can see in my pic (the red paint is where welds were located). _________________ Matt
1953 M38a1
1964 USMC M38a1
'51 USMC M100 trailer, '54 M100 trailer, '90 M101a1 trailer
Http://wilfreeman.wordpress.com (M38a1 build blog)
http://m38a1usmc.wordpress.com (USMC M38a1 rebuild blog)
Joined: Mar 13, 2006 Posts: 1079 Location: Richburg, SC
Posted: Thu Jun 11, 2015 2:57 pm Post subject:
I bought a trailer floor from Bensinger for $300. My father in law was in the area last week on business, so he picked it up for me to save $100 shipping. I was finally able to get out to the shop today to look at it a little closer today.
- the metal thickness (without having a metal thickness gauge) is .062", which equals about 16ga? Seems to be plenty heavy enough. I forget what the factory floor measured.
- The end and side edges are turned up and down 1" like the original.
- It didn't include the floor drain plug retainers, although MD Juan says they are included.
- It includes the spot welded on center cross member on the back.
- The drain covers are square instead of rounded like original.
- The edges of the panel where the ribs and drains are located are cut and re welded - I am guessing that when stamping or rolling the ribs deformed the panel and it had to be cut and re welded to to straighten it out.
I won't know how it fits until I start fitting it on my trailer tub. I will update then. _________________ Matt
1953 M38a1
1964 USMC M38a1
'51 USMC M100 trailer, '54 M100 trailer, '90 M101a1 trailer
Http://wilfreeman.wordpress.com (M38a1 build blog)
http://m38a1usmc.wordpress.com (USMC M38a1 rebuild blog)
Joined: Mar 13, 2006 Posts: 1079 Location: Richburg, SC
Posted: Thu Aug 27, 2015 1:29 pm Post subject:
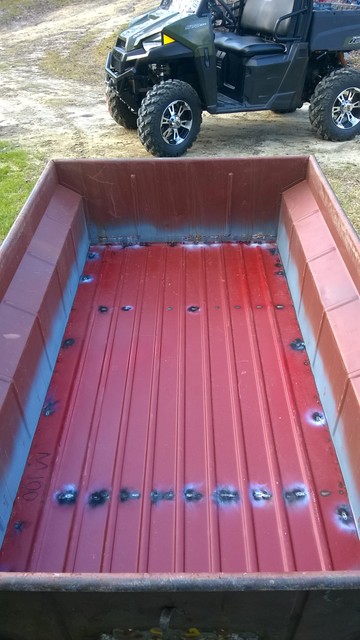
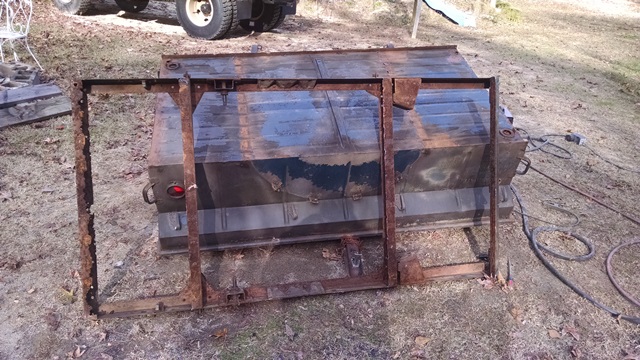
I got a little done on my M100 last week - I got the old floor cut out and the ledge prepped to install the new floor.
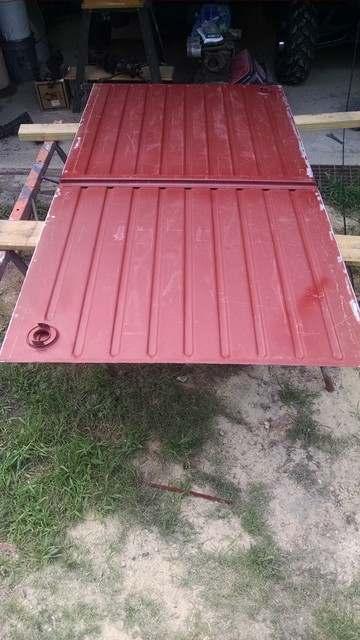
I also got the rotted metal cut out of the front panel and replaced with new. I still have some work to do on the seams though.
This morning when I got off work I got back on it. I cut the turned down edges off of the new floor so that it would sit flat on the old floor ledge. I left the turned up edge on the front to secure to the new front panel metal.
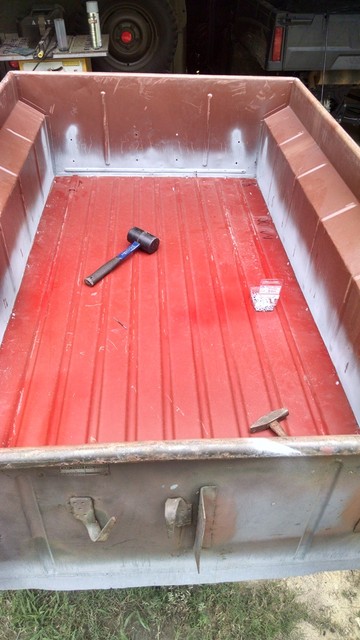
After a little trimming I had it fitting so that I wouldn't need to use seam sealer to make it look good. I drilled holes about every 8-12" around the edge and front panel and pulled the new floor down tight with sheet metal screws.
I flipped the tub over and plug welded the holes I previously drilled in the ledge to secure the new floor.
Lastly, I plug welded the front panel holes where the screws were and ground down the welds. I sprayed everything with primer.
If it doesn't rain tomorrow, the plan is to flip the tub and weld up the screw holes. i am planning on using my spare M100 chassis frame instead of repairing this one - it is too far gone. I should be able to get it sanded down and painted and maybe paint the underside of the tub. If I can get that done, maybe I can get the frame welded back to the tub also. _________________ Matt
1953 M38a1
1964 USMC M38a1
'51 USMC M100 trailer, '54 M100 trailer, '90 M101a1 trailer
Http://wilfreeman.wordpress.com (M38a1 build blog)
http://m38a1usmc.wordpress.com (USMC M38a1 rebuild blog)
That is looking GREAT !!! _________________ Don Norris
Southeast, NC
53 CJ3B F134
59 Willys Pick-up truck
54 CJ3B is my M606 wanta-be in progress (rough)
M100 trailer
Joined: Mar 13, 2006 Posts: 1079 Location: Richburg, SC
Posted: Fri Aug 28, 2015 7:28 am Post subject:
Thanks Don! It has been a long work in progress, but hopefully I can get it done over the next couple of times off - or at least back on the road, if not done. _________________ Matt
1953 M38a1
1964 USMC M38a1
'51 USMC M100 trailer, '54 M100 trailer, '90 M101a1 trailer
Http://wilfreeman.wordpress.com (M38a1 build blog)
http://m38a1usmc.wordpress.com (USMC M38a1 rebuild blog)
Joined: Mar 13, 2006 Posts: 1079 Location: Richburg, SC
Posted: Tue Sep 15, 2015 6:05 pm Post subject:
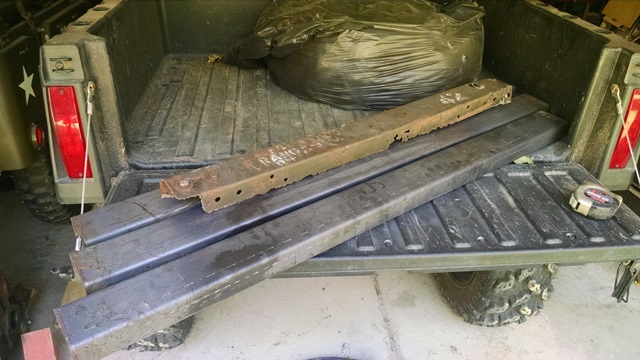
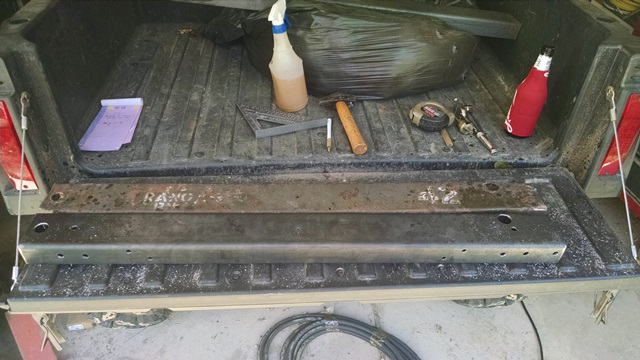
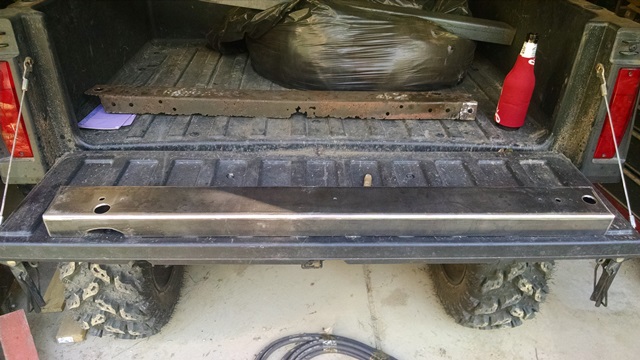
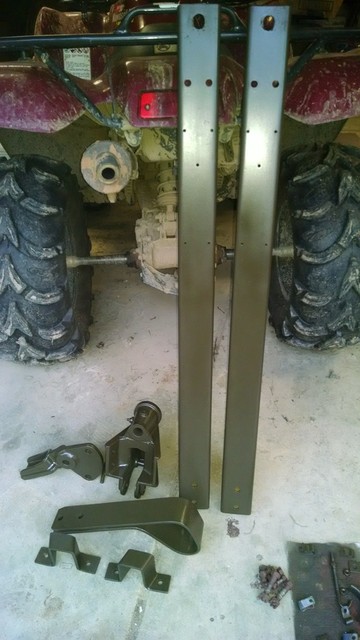
I've gotten a little bit done this week. First, I got the rear crossmember cut off of the frame and had some new channel bent to make a crossmember from.
I cut the new channel to make a tab on each end and bent the tab down. Then I drilled the holes in the exact locations of the originals.
Next, I sanded and primed the bottom of the tub, frame and new crossmember.
Lastly, I bolted (using carriage bolts instead of rivets) and welded the rear crossmember onto the frame and touched up the primer.
The plan for tomorrow is to spray some OD on the frame and tub bottom and to stitch weld them together. The whole writeup and more pics can be seen on my blog https://wilfreeman.wordpress.com/ _________________ Matt
1953 M38a1
1964 USMC M38a1
'51 USMC M100 trailer, '54 M100 trailer, '90 M101a1 trailer
Http://wilfreeman.wordpress.com (M38a1 build blog)
http://m38a1usmc.wordpress.com (USMC M38a1 rebuild blog)
Joined: Mar 13, 2006 Posts: 1079 Location: Richburg, SC
Posted: Mon Feb 01, 2016 8:23 pm Post subject:
Finally got around to working on the trailer again today - nice day at 70deg and sunny!
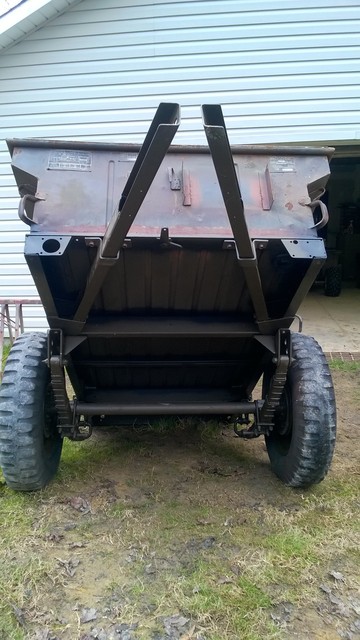
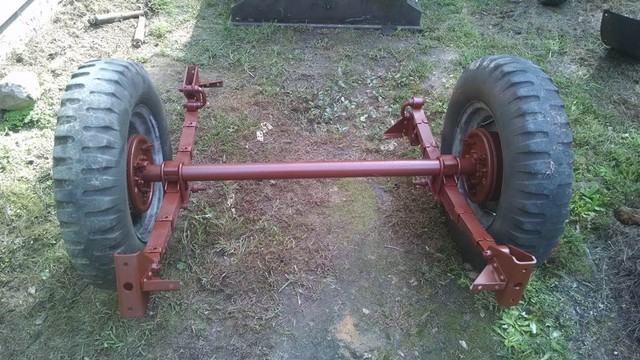
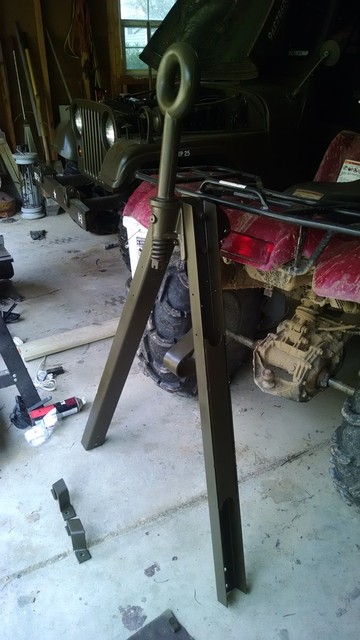
So, I finished the welding on the underside and primed the bare spots. Then I installed the drawbars:
I installed the running gear - hard to do by one person! With the help of a slight hill to hold the tub upright, I bolted up the back spring hangers, lifted the axle/tires into position and used a floor jack to push the forward hangers into position.
Lastly, I installed the casting and landing leg. I still have to do a few spot welds on the inside as well as pretty up the front panel weld. Then I can sand her down, throw a coat of OD on her and put on new tires/tubes.
All times are GMT - 6 Hours Goto page Previous1, 2, 3Next
Page 2 of 3
You cannot post new topics in this forum You cannot reply to topics in this forum You cannot edit your posts in this forum You cannot delete your posts in this forum You cannot vote in polls in this forum


 [/img]