Hey RG,
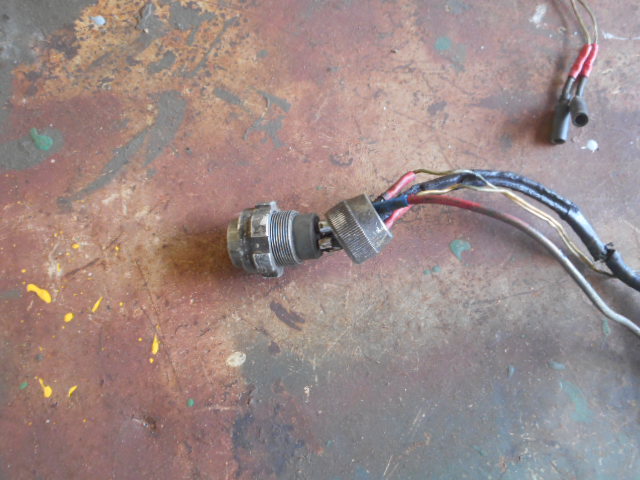
I'm sure you'll find the manual on Bendix and Canon plug connectors. If like most, once you get the compression lock-nut off the back, the only thing holding the pins in place inside that rubber block-grommet is a ring around each pin that's buried in the center of that (molded for that ring) rubber block -- the rubber block grips each pin individually by that ring around the pin inside the molded part of the rubber block. It's a friction fit. As already mentioned, the nut on the back compresses the rubber to seal it all up.
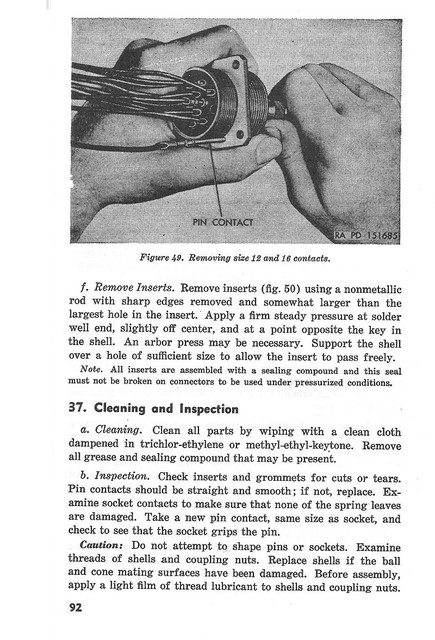
I've seen plenty of connectors destroyed by trying to pry the rubber from around the pins. The only way to get them out is to push (with some wiggle) that ring around the pin through the rubber block-grommet. The design is made to extract pins through the rear of the connector, but in theory they can come out the front just as well (problem is the special tools aren't made to do it that way). Not recommended, forget I said it. Once you get one out (or see an illustration in the TM) you'll see what's hard to describe here in words.
As already mentioned, once the rubber block gets hard and brittle it gets tough to take apart. If the rubber disintegrates at all you might as well just look for a new connector unless you can find a replacement rubber grommet. A disintegrating rubber block-grommet is a fire waiting to happen.
I suggest soak the entire connector in some penetrating lubricant for a while, sometimes simple liquid dish soap works good. Then find a dowel (if the pins are female kind) to insert into the face of the pin and gently as possible wiggle and push the pin out the rear of the rubber block-grommet. If there's still a wire attached you can sometimes gain more leverage by pushing the pin and pulling the wire at the same time (this usually takes 3 hands). Be careful not to break the "ears" off female pins when wiggling -- just pressure them to the rear as easy as possible. If the pins are male on the mating side then you probably don't have much choice but to fashion a hollow-dowel tool to push them out the back of the connector (there is a special tool set made for various pin sizes on these connectors). Trying to push a male pin with needle-nose pliers or something of the like usually won't end well.
Once you get one pin out, the rest each get easier (more room for the rest --- the rubber block relaxes a bit). Conversely, when assembling--- the last one in is usually the hardest. I cannot emphasize lubricant enough.
Submerge the whole thing real good and gently try to wiggle the pins around inside the rubber block-grommet to work the lubricant in as much as possible and loosen things up.
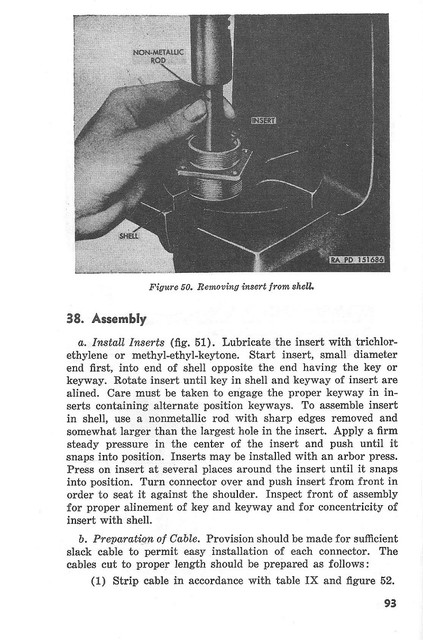
Once you get the pins dis-mounted from the rubber block-grommet, if they're still serviceable, it's fairly easy to un-solder the wire from each cup on the pin, solder in new wire, and gently push each one back into the (lubricated) rubber block. Sometimes it might be easier to feed the new wire through the front of the block and pull the pin into the rubber grommet until you feel it's ring lock into the block. The rubber block should have letters that identify each pin location relative to the key on the connector.
Lastly (and I'm not familiar with this exact connector) the rubber block-grommet is usually held in place inside the metal connector shell by it's own molded "lip". Once all the pins are removed it should come out of the shell much easier (with lube and finesse). It may come out with pins still in if not totally hard-brittle (with lube and finesse).
Good luck! Just my 2 rookie cents (but repaired many a connector during my active duty avionics maintenance days) It can be done without the special tools but calls for plenty of finesse...

Standing by for Wes to shoot me in the you-know-what......

Ron D.
1951 M38 Unknown Serial Number
1951 M100 Dunbar Kapple 01169903 dod 5-51
“The only good sports car that America ever made was the Jeep."
--- Enzo Ferrari